If you follow us on
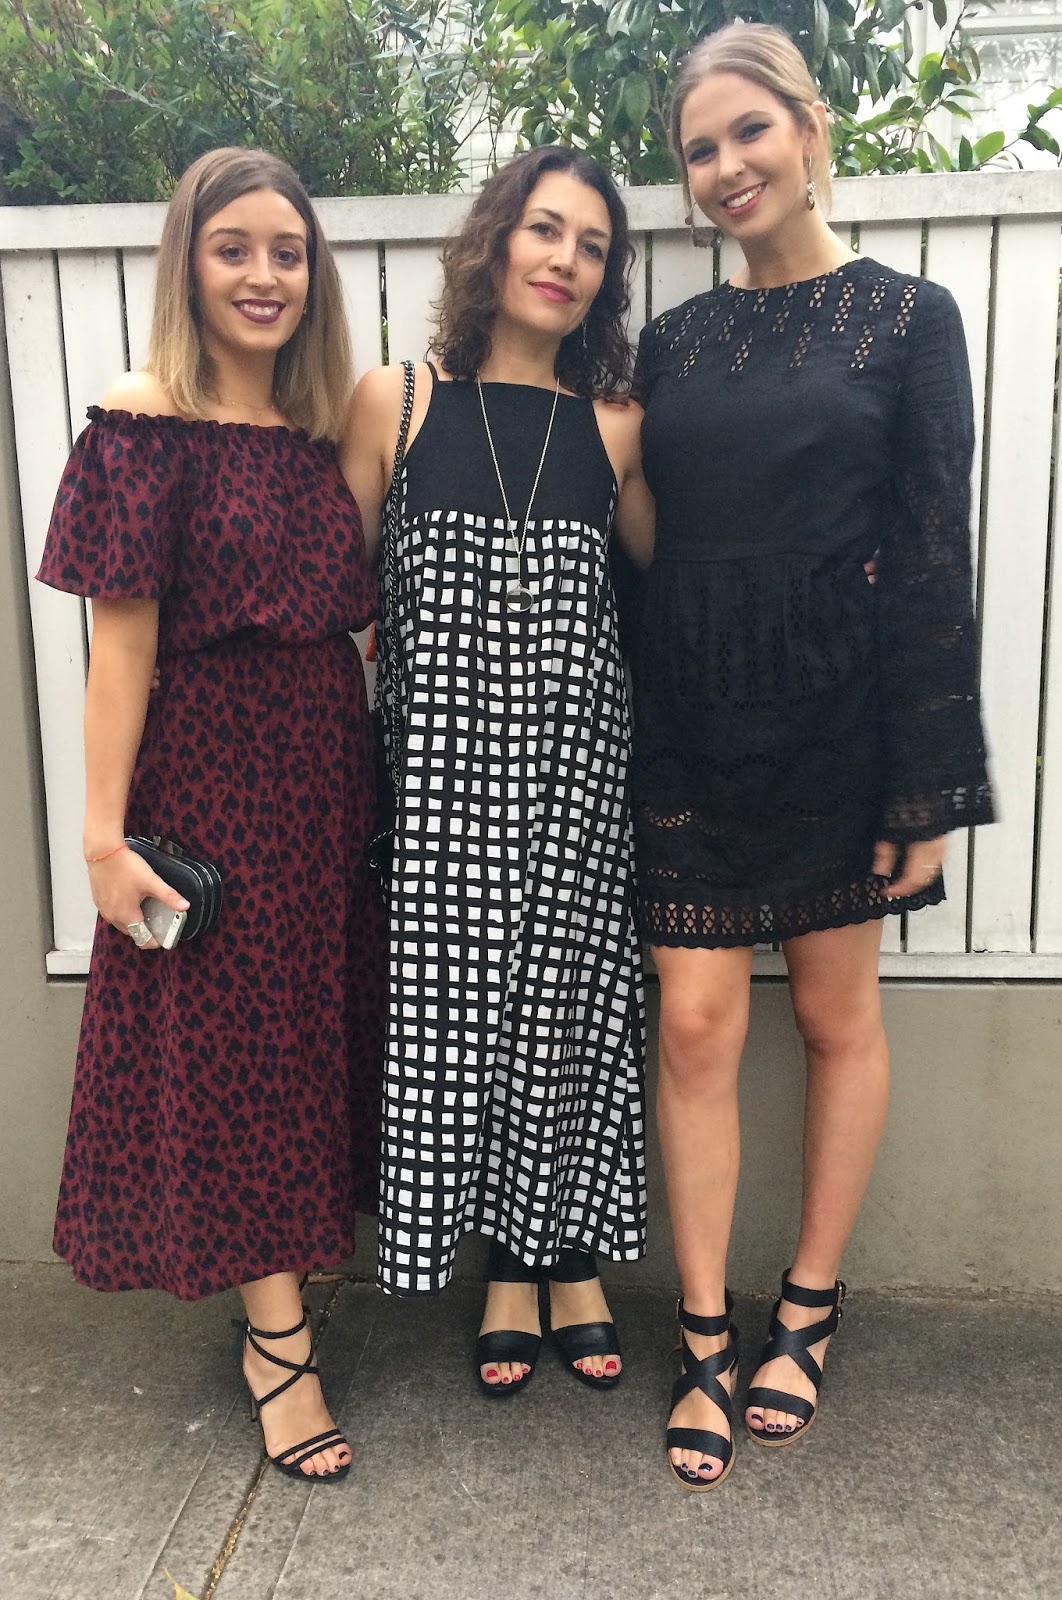
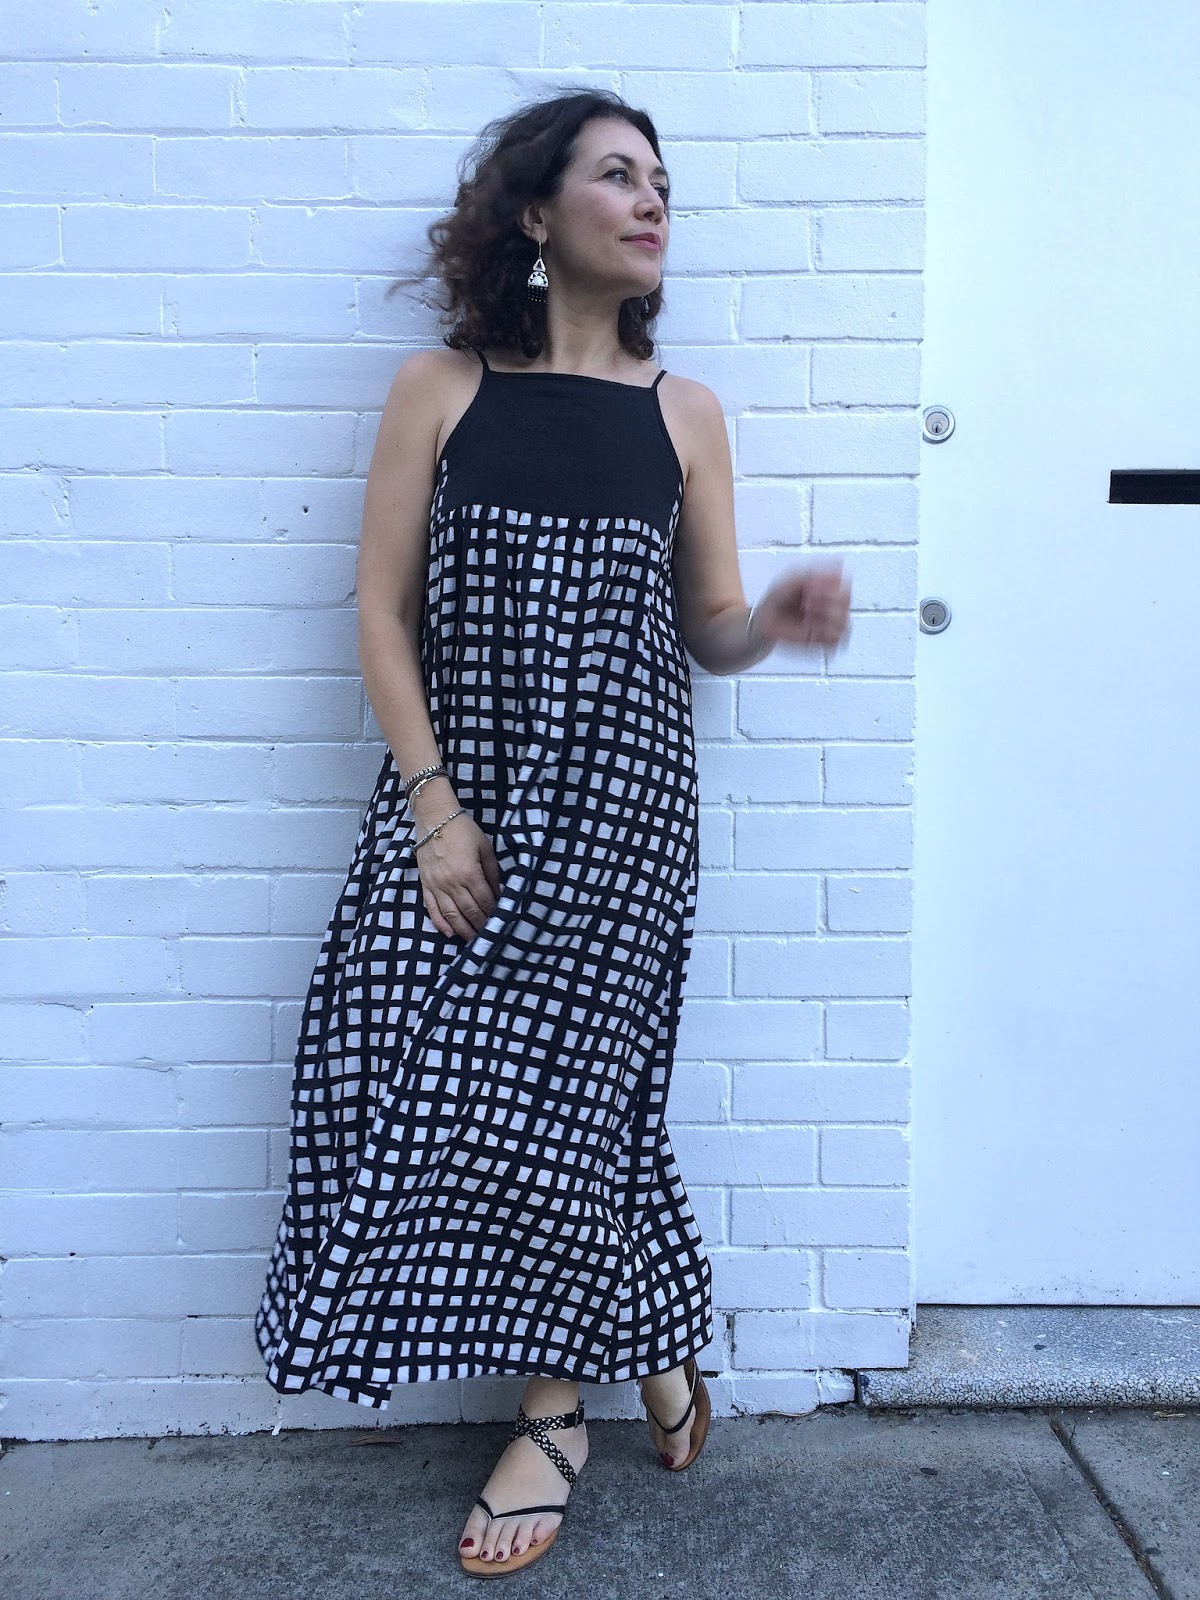
Instagram you may have seen the image of my Tessuti Sydney Christmas party frock. My obvious pattern choice for the party was our recently released
Annie Dress and this comfortable dress has been worn
plenty this summer.
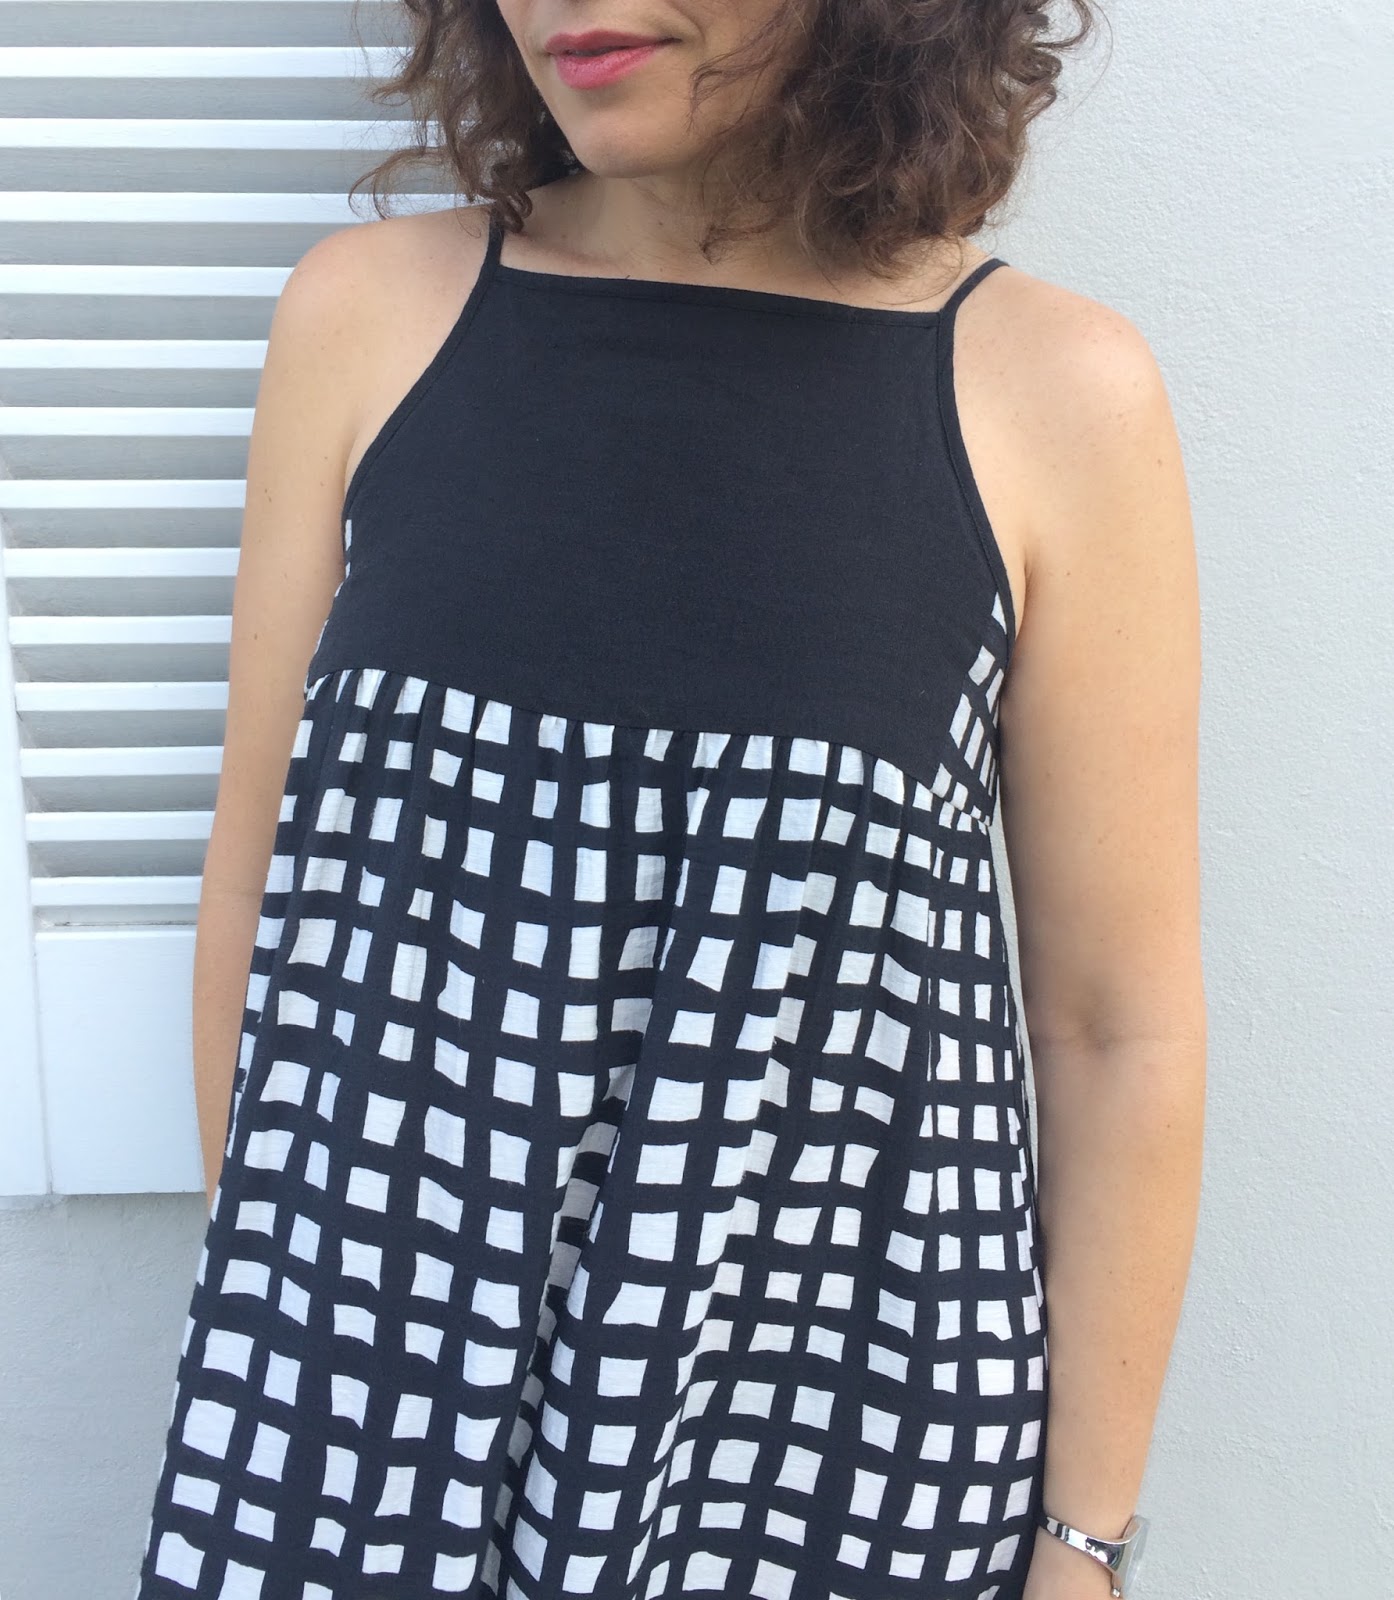
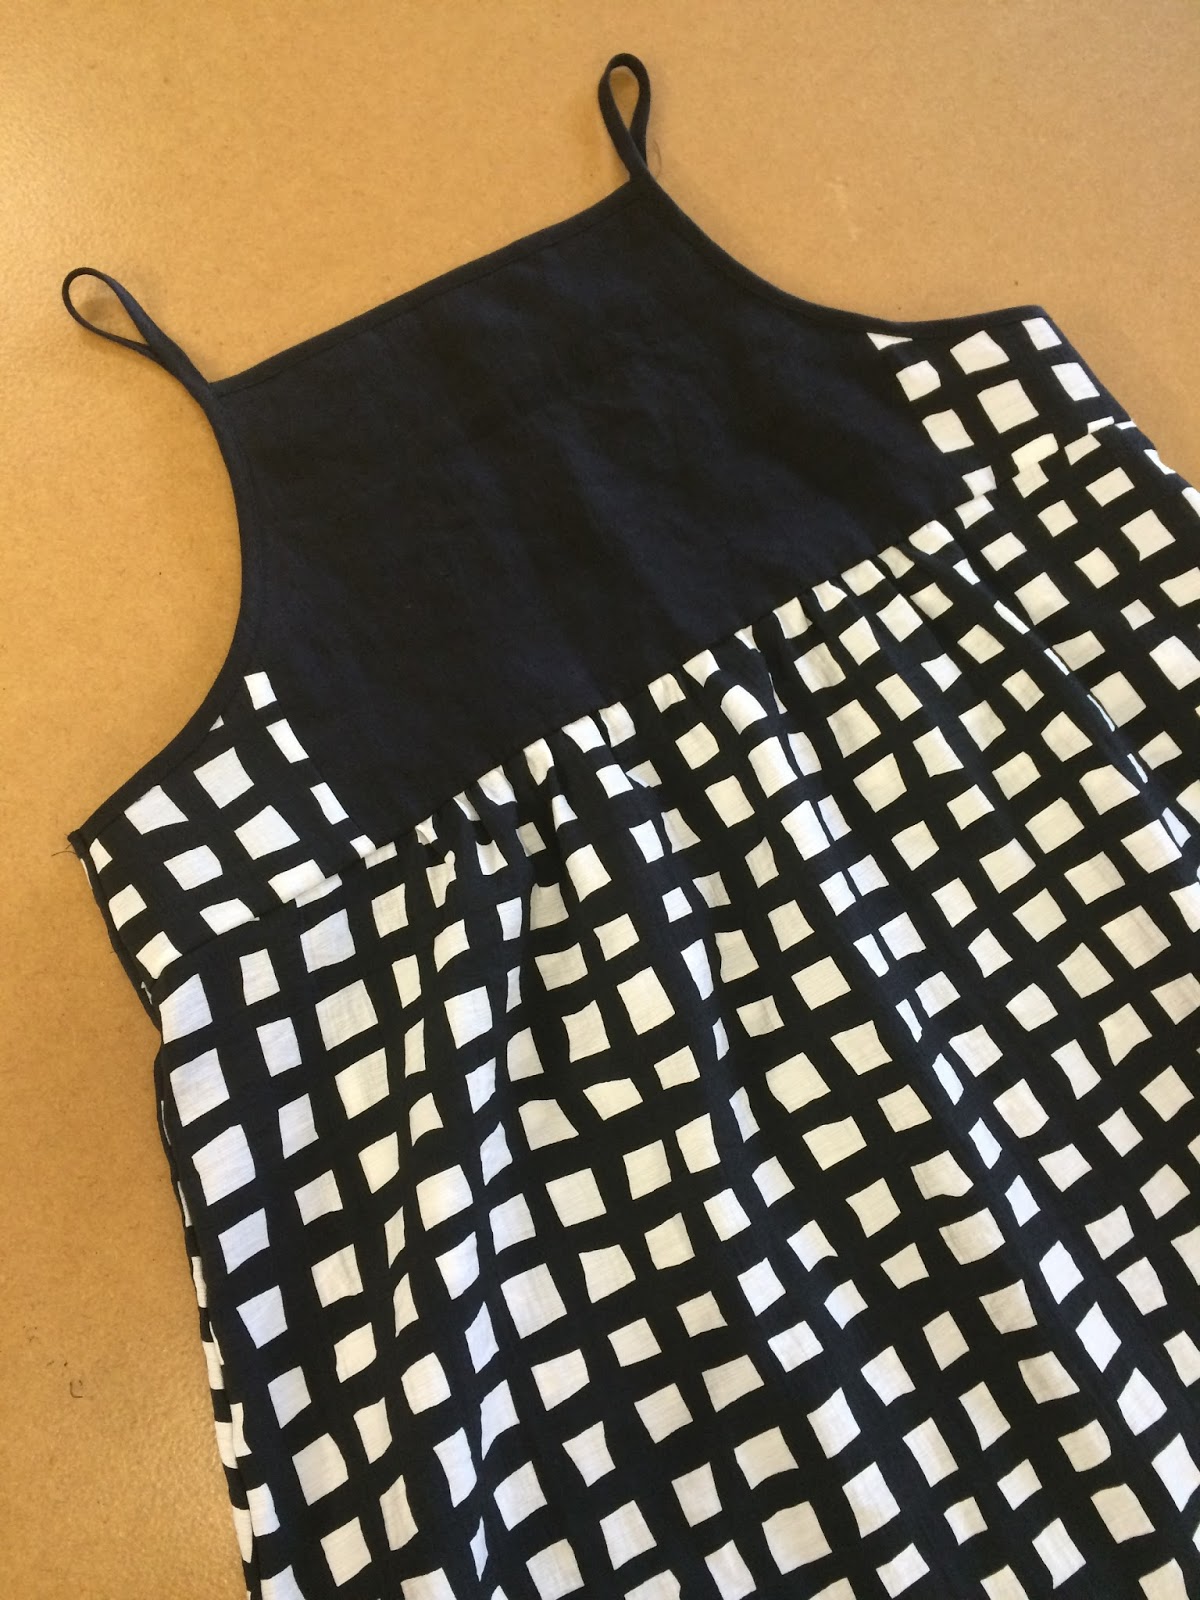
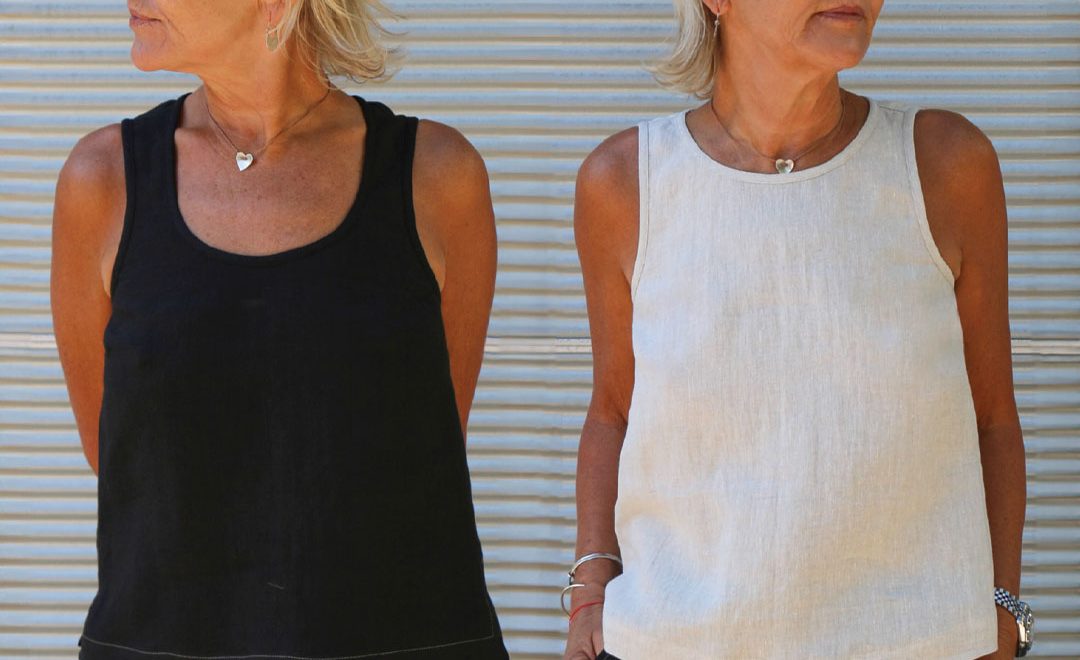
I made some slight changes to the original pattern to create another variation. Eliminating the wider straps in the original design, I instead incorporated bias binding edging around the yoke. The binding around the armhole edges then extends into narrow spaghetti shoulder straps.
I used rayon/nylon
Blackwell Check (sold out) for the main part of the dress and side yokes. For the solid yoke on back and front, I went with
Black Hartford linen as well using the linen for the yoke facings (for more stability) and bias binding edges. I love this modification and hope you do too. For anyone wanting to try this version, here’s a tutorial just for you!
What you need to do to prepare
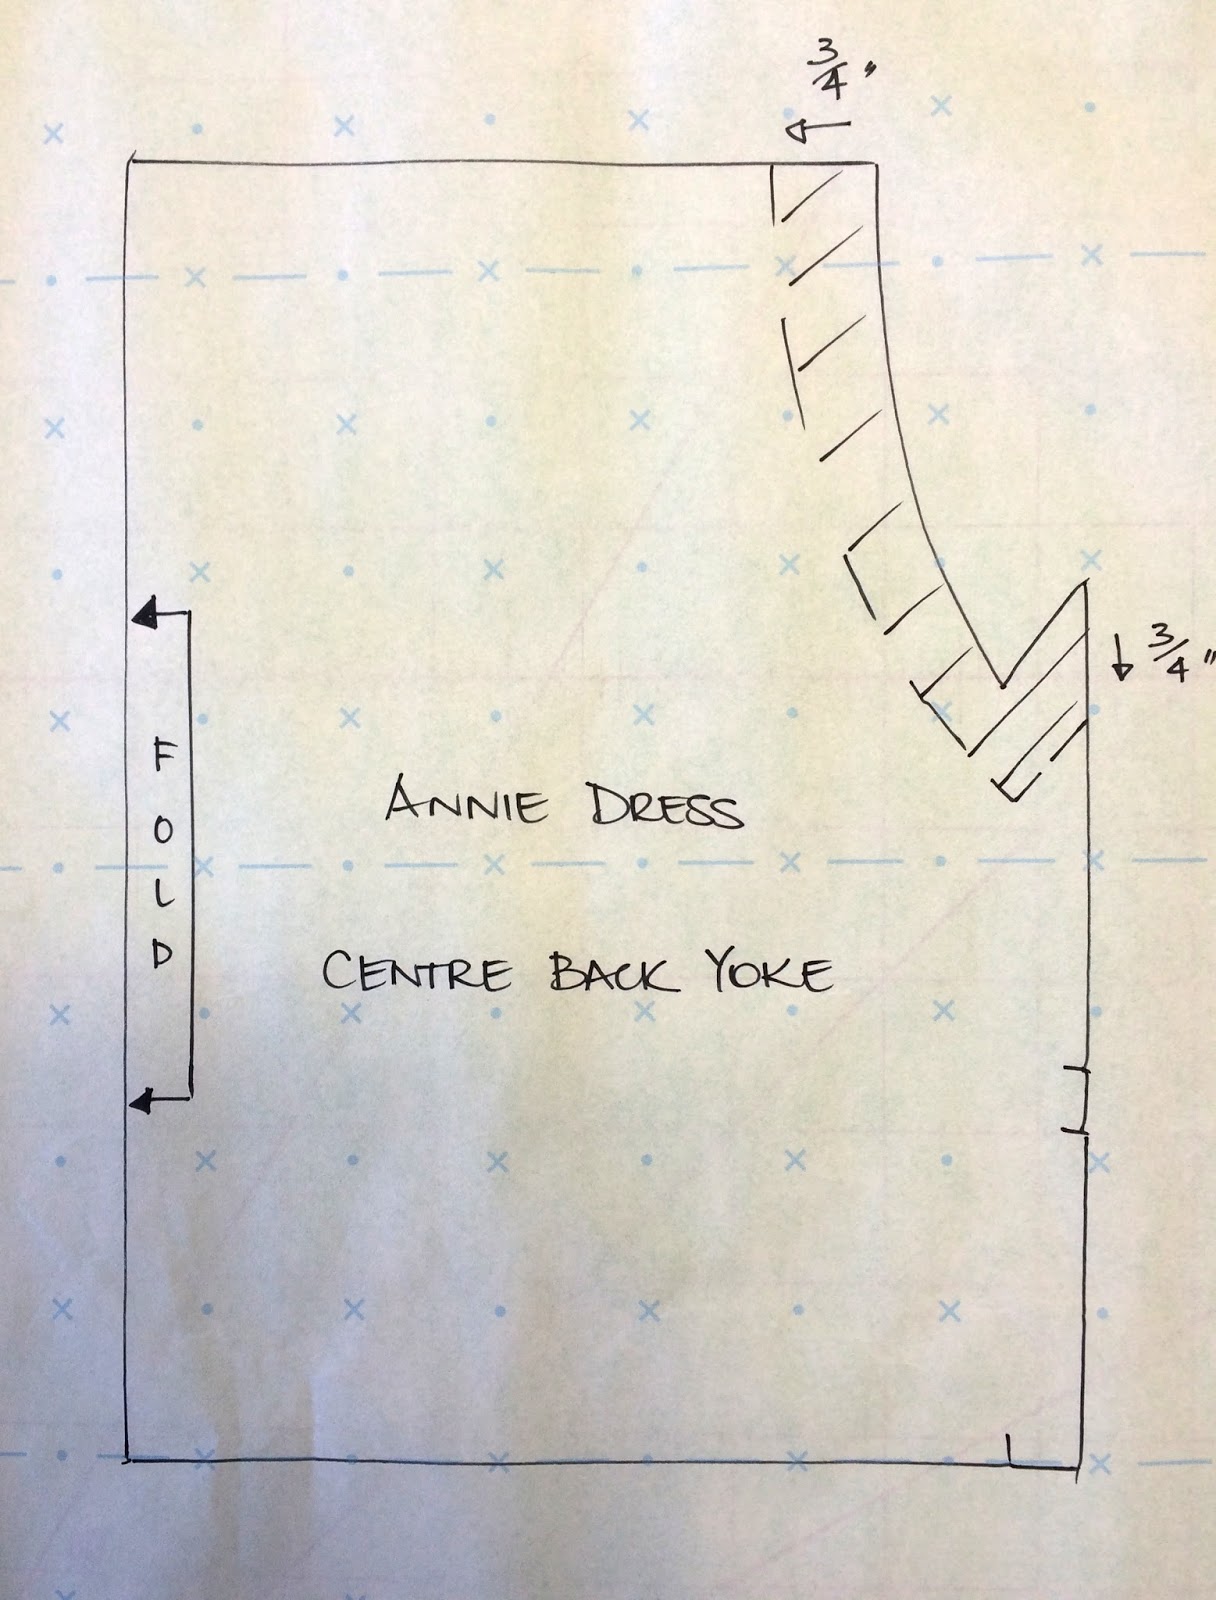
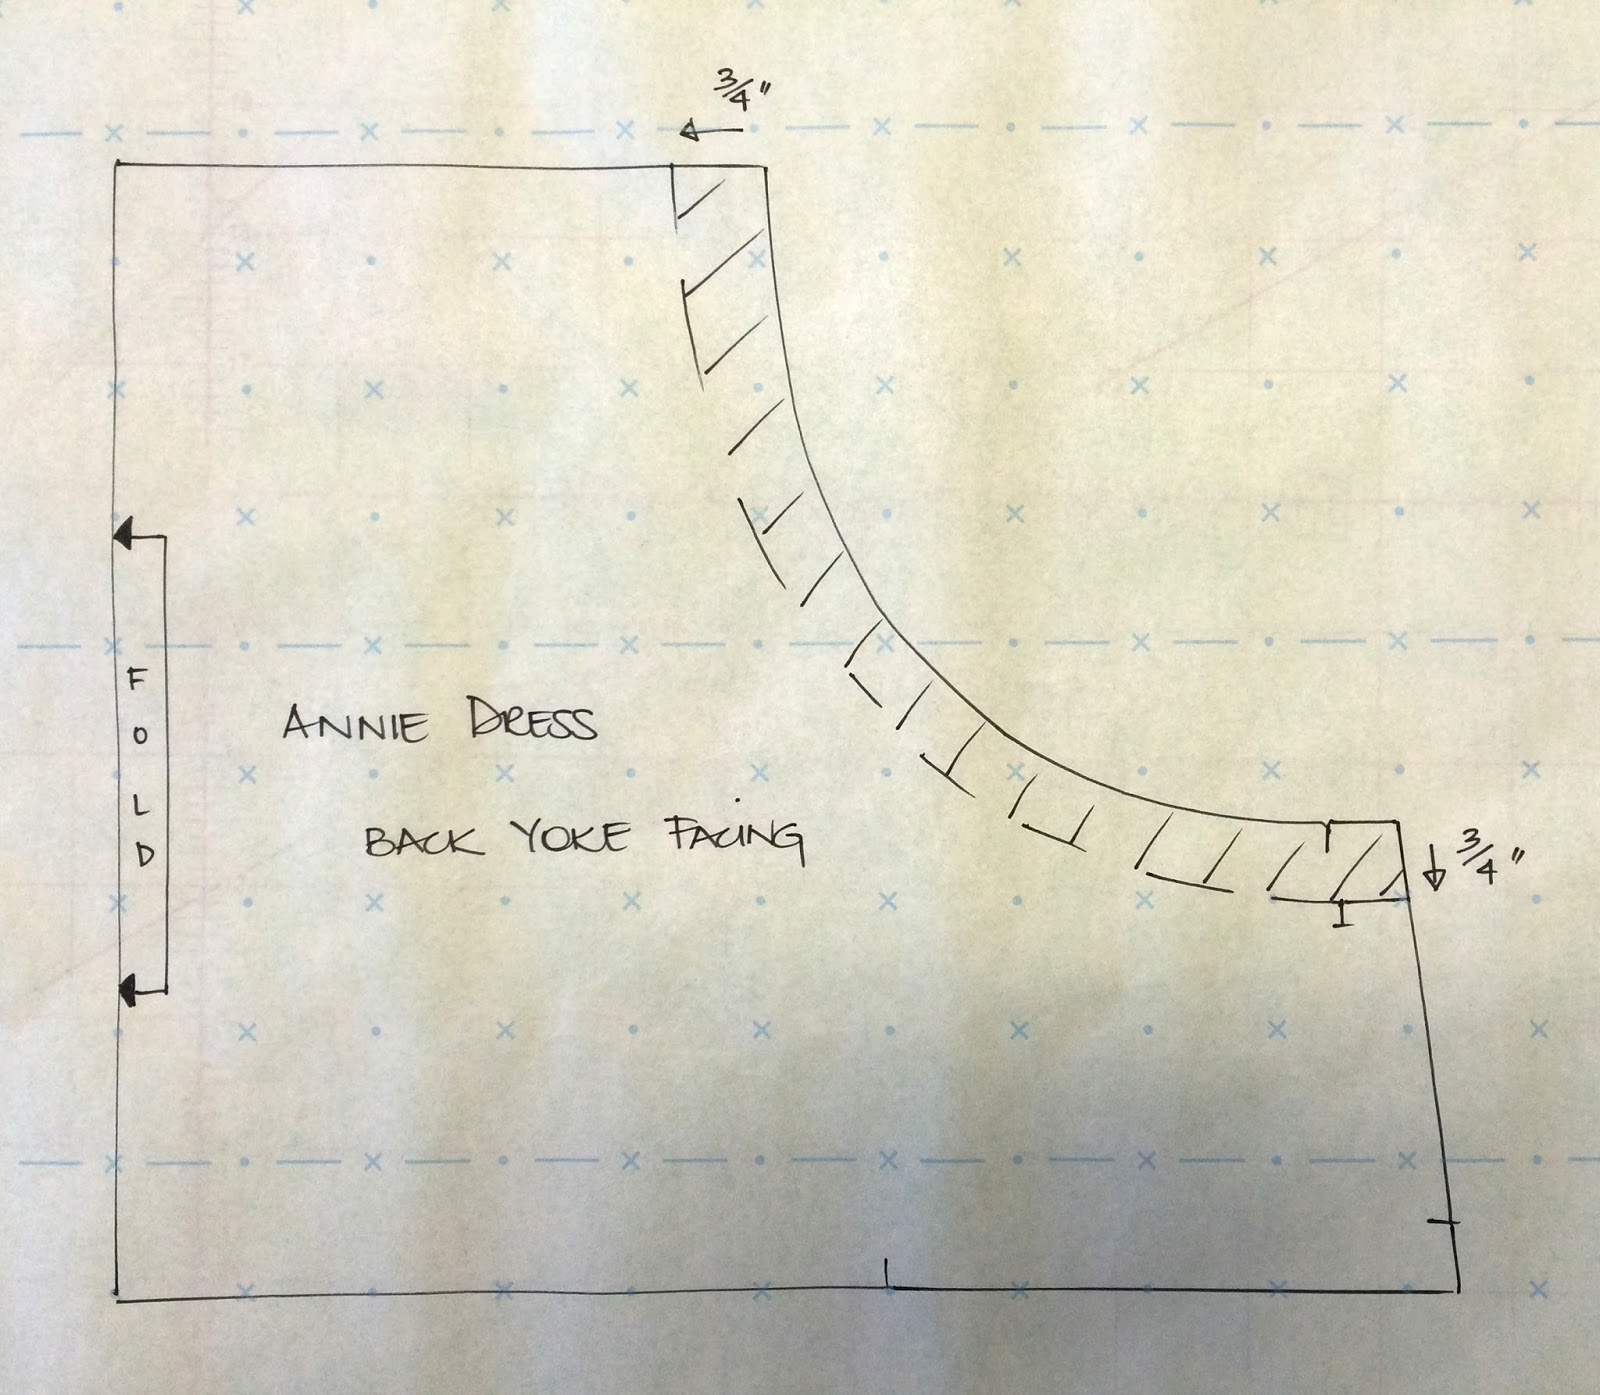
Please note changes to pattern pieces used – To create the new yoke bodice on my modified Annie Dress I used the Centre Back Yoke, Side Back Yoke and Back Yoke Facing pattern pieces only.
The Centre Back Yoke pattern piece is brought in by 3/4″ at the top edge and the armhole edge is lowered by 3/4″. This helps to bring the narrow straps in closer to the neck. This new pattern piece then becomes both centre front and centre back yoke pattern piece. This needs to be cut x 2 on fold.
The Side Back Yoke is lowered 3/4″ along the armhole edge. This new pattern piece then becomes side front and back yoke. This needs to be cut x 2 pairs.
The Back Yoke Facing pattern piece is brought in by 3/4″ at top edge and the armhole edge is lowered by 3/4″. This new pattern piece then becomes front and back yoke facing. This needs to be cut x 2 on fold.
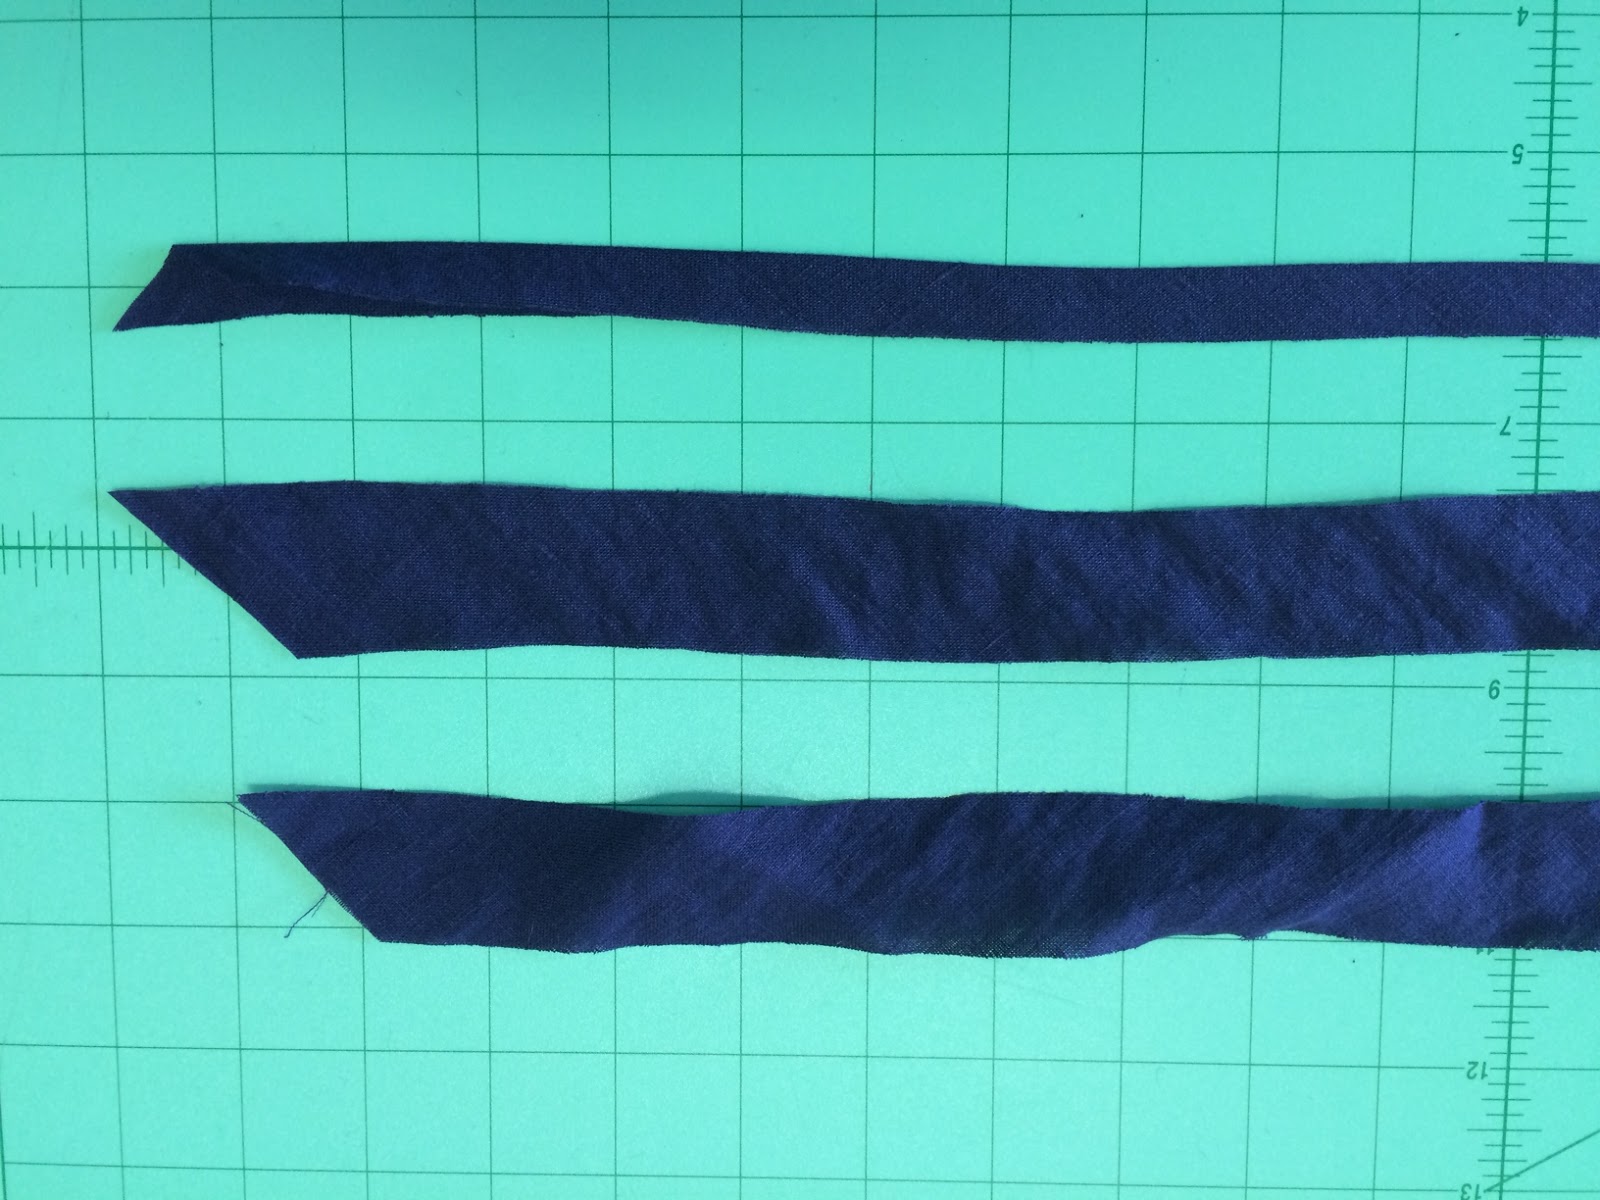
Cut three 1 1/4″ (3.2cm) bias strips 70cm long. One is pressed in half lengthwise with wrong sides facing. This bias strip will be used to bind the top edge of front and back yoke bodices. With the remaining two bias strips, DO NOT PRESS these in half as they are to be left open to bind the armhole edges of front and back yoke bodices and to create the narrow straps.
To create the dress, you also need to cut the original Front Dress, Back Dress, Pocket Bag and Pocket Facing pattern Pieces.
Sewing instructions are as follows:
– Join centre front/back yoke and side front /back yokes together. Press seams open.
– Next go to steps 12 ,13, 14 in sewing instructions –
Attach pocket facings to
front dress, prepare pocket bags and attach pocket bags.
– DO NOT JOIN SIDE SEAMS TOGETHER
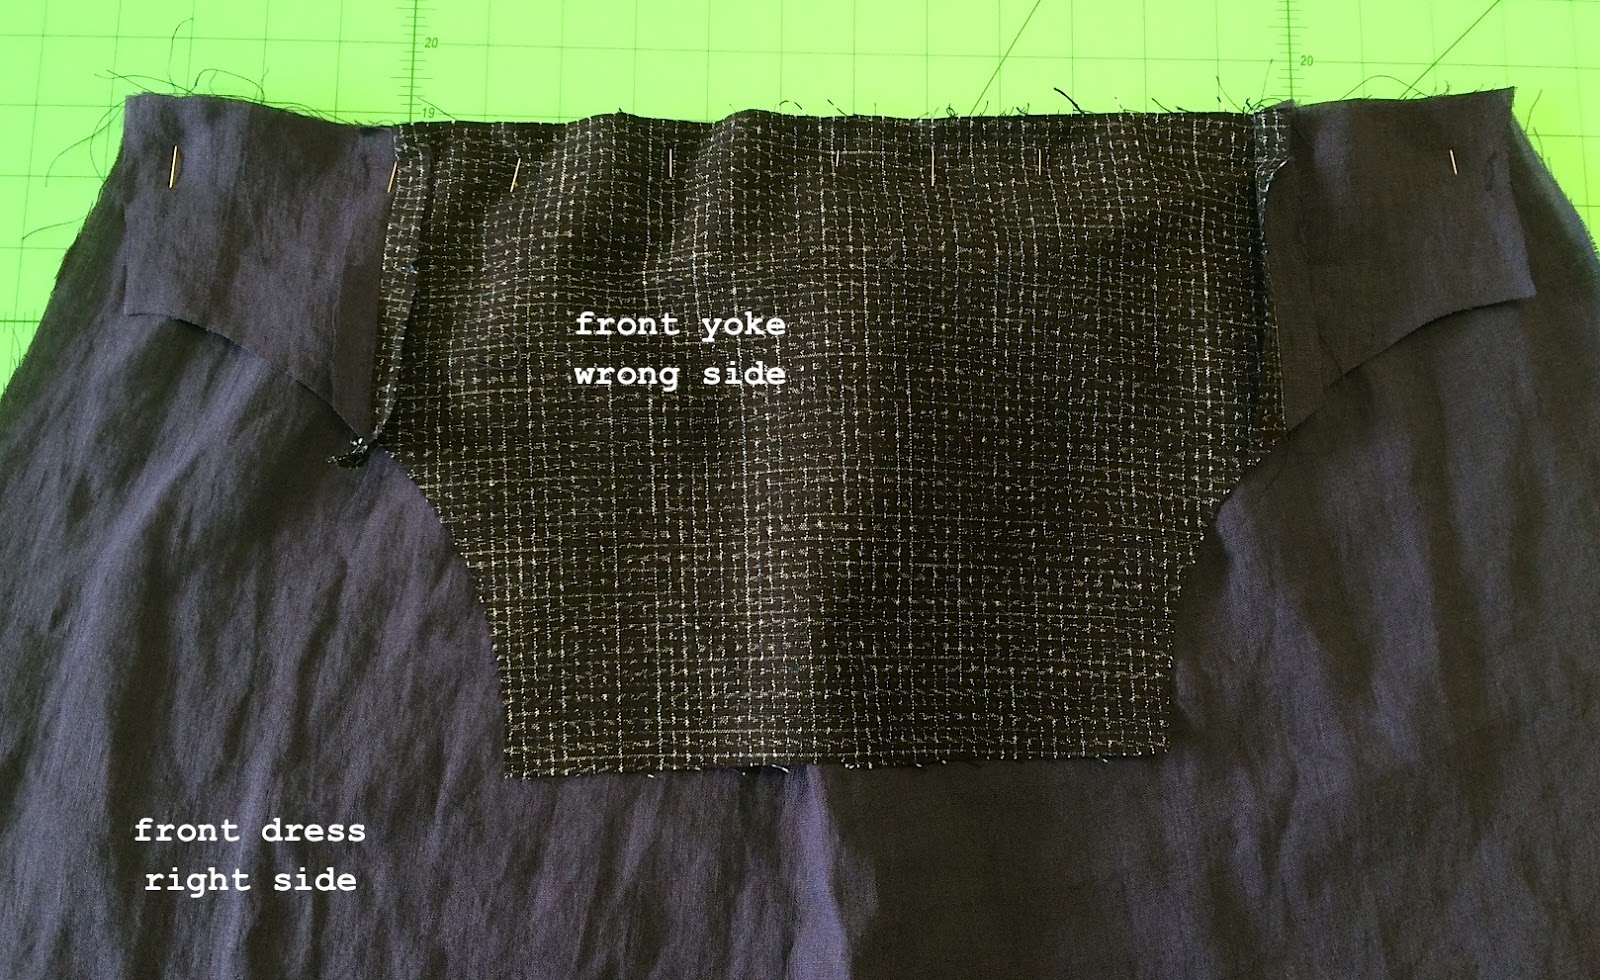
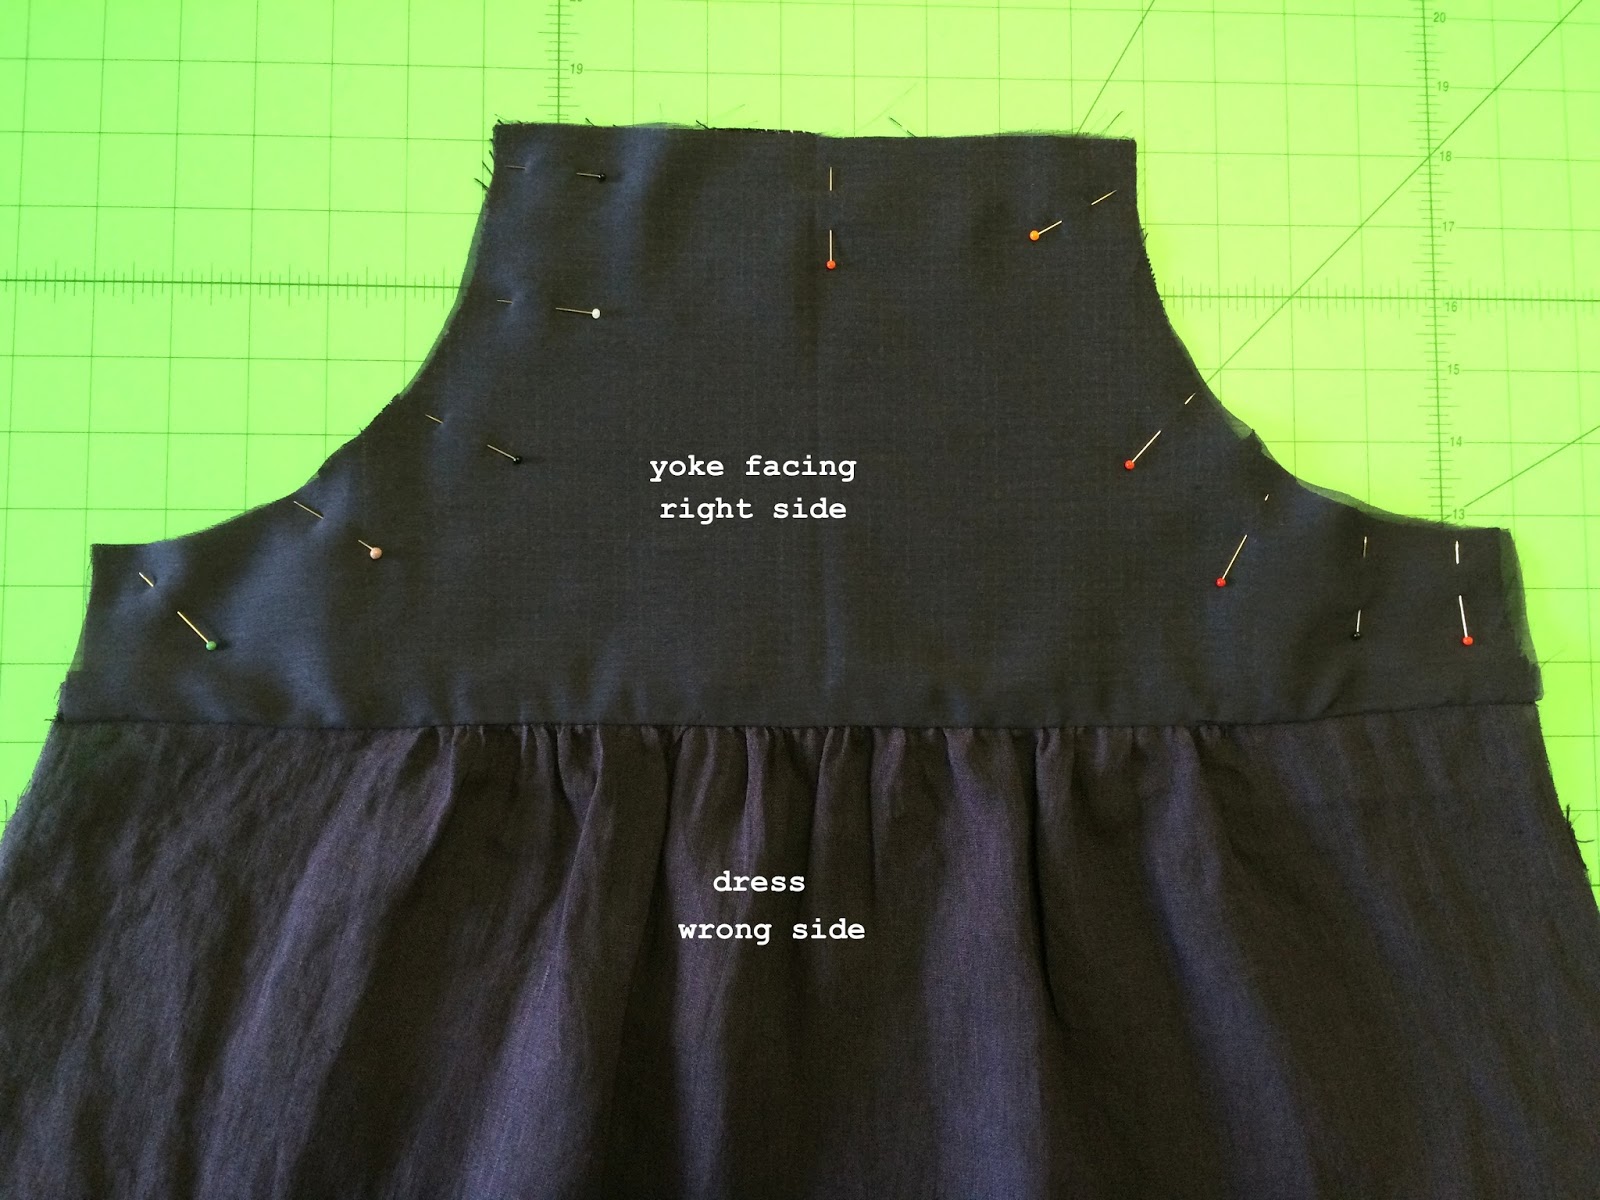
– Attach front and back yokes to front and back dress: sew two gathering rows of long ease stitching between notches on top edge of front and back dress. Gather up between notches until the top edge of the dress fits bottom edge of yoke bodices. With right sides facing, pin front yoke bodice to front dress and back yoke bodice to back dress. Sew 1/2″ seam allowance.
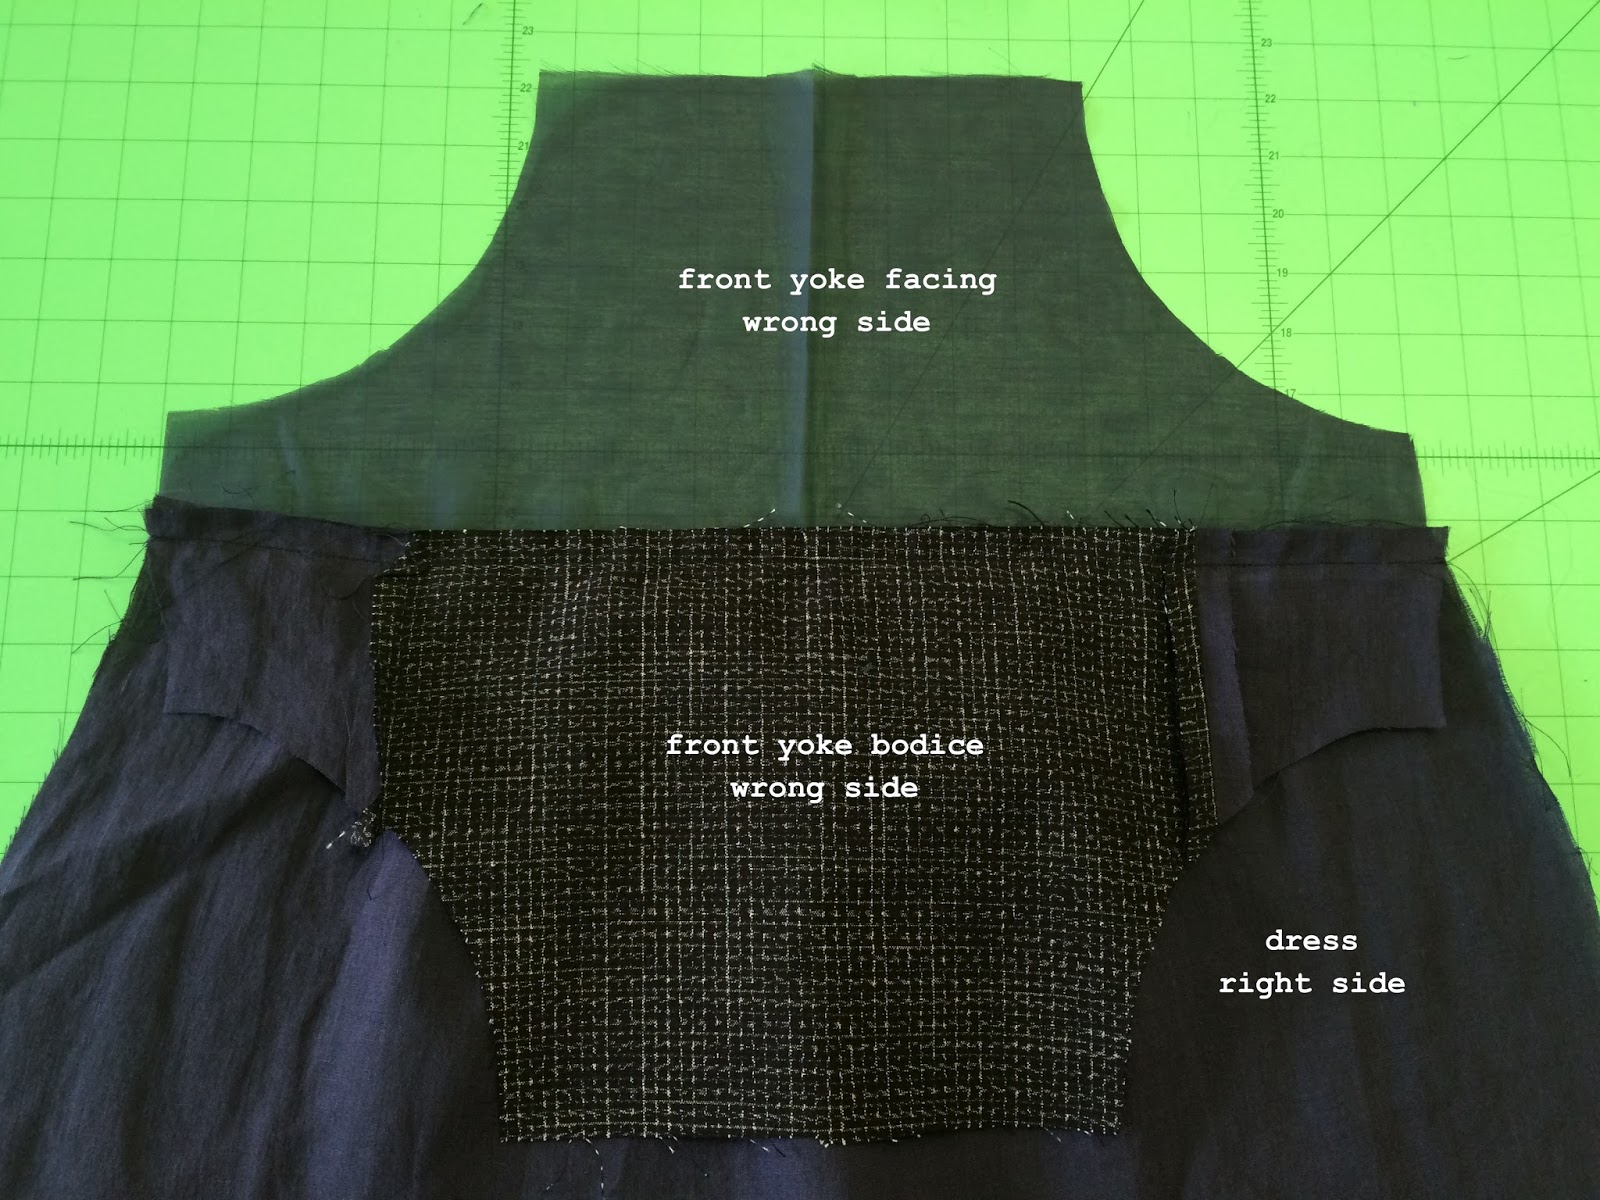
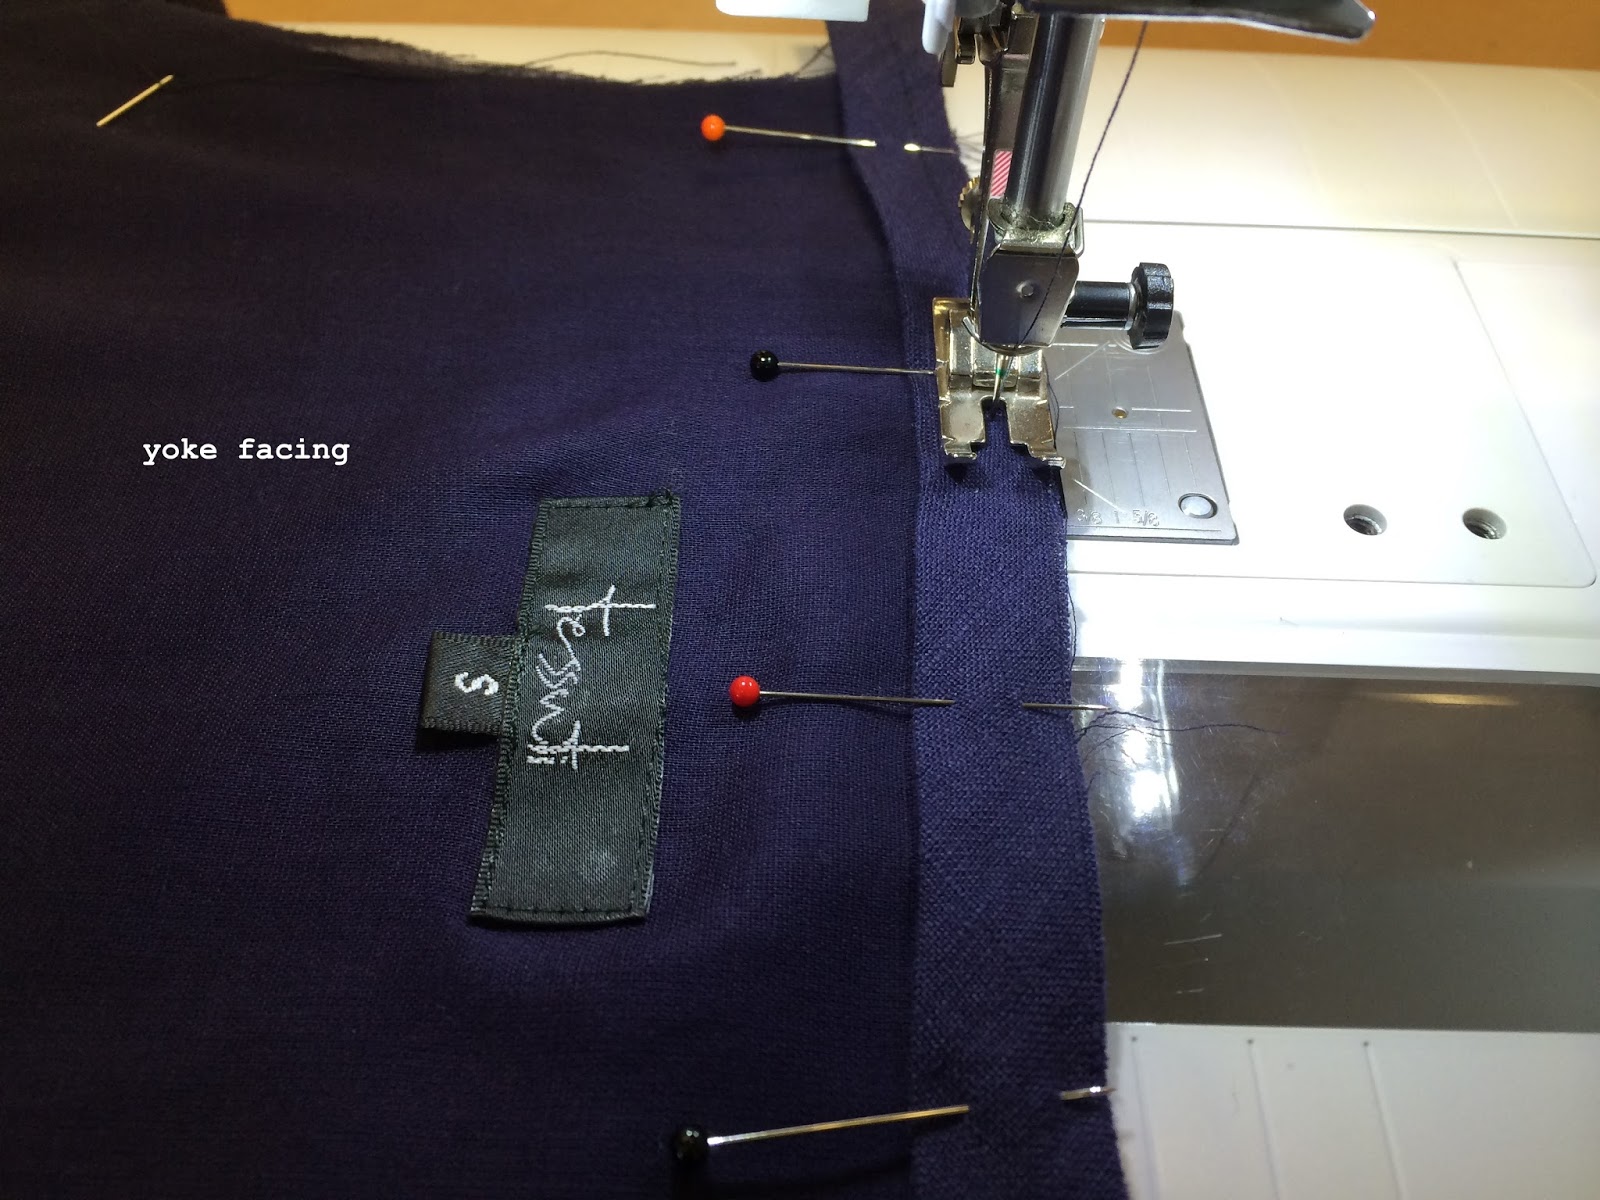
Attach front and back yoke facings to front and back dress: Next pin right side of front/back yoke facing, to wrong right side of front/back dress. Sew 1/2″ seam allowance.
Press seam allowance upwards toward yoke bodice/facings…
…and turn out of yoke bodice and yoke facing away from dress and pin wrong sides together, along top edge and armhole edges. Note: The front and back dress is now sandwiched between the outer yoke bodice and yoke facing.
Staystitch armhole edges together (or alternatively sew tear-away Vilene shields to wrong side of armhole edge).
Press only one of the bias binding strips in half lengthwise with wrong sides facing. Divide bias strip in two, long enough to bind top edge of front and back bodices. Pin raw edges of binding to wrong side of top edge of front and back bodices and sew 1/4” seam allowance.
Turn all of binding over to right side of bodice and pin edge in place. Sew in place along bottom edge of binding.
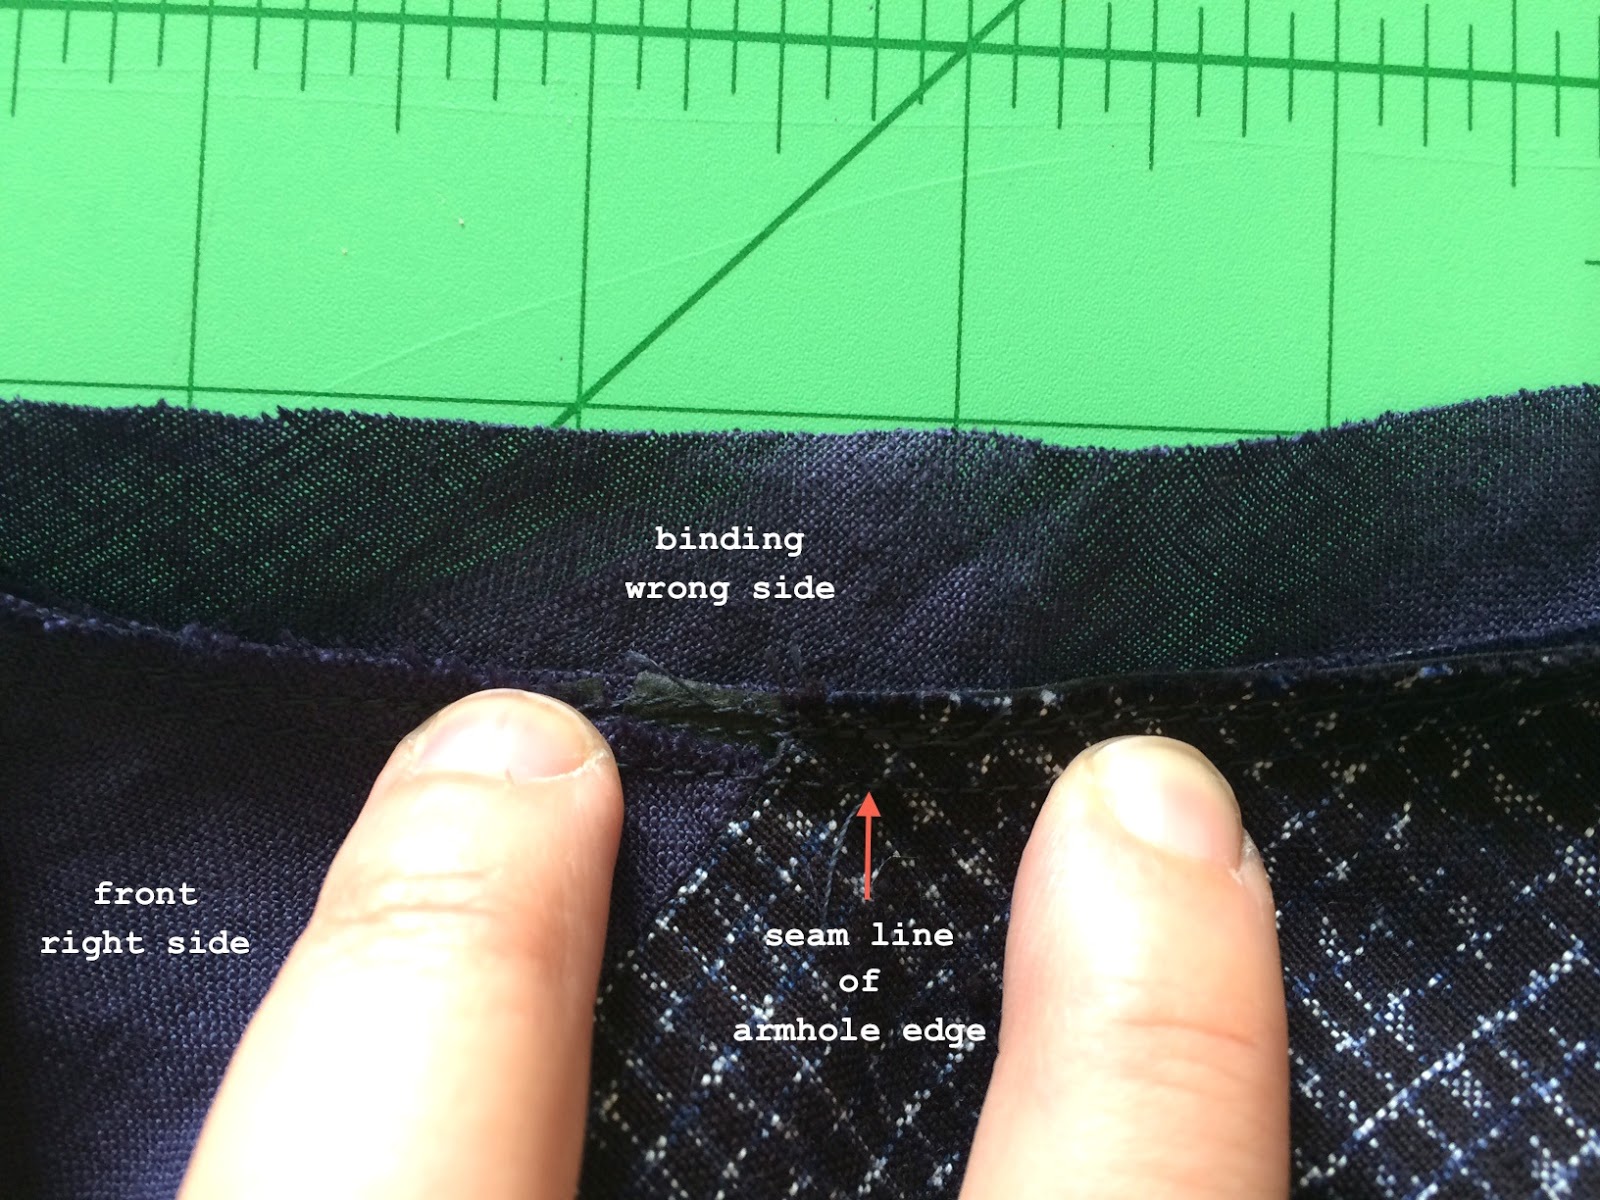
With the remaining bias strips (on the open and not pressed in half), pin right side of binding to wrong side of front/back bodice (along yoke facing armhole edge), making sure to stretch the binding slightly as you pin in place binding around armhole to finish at top edge of front/back bodice.
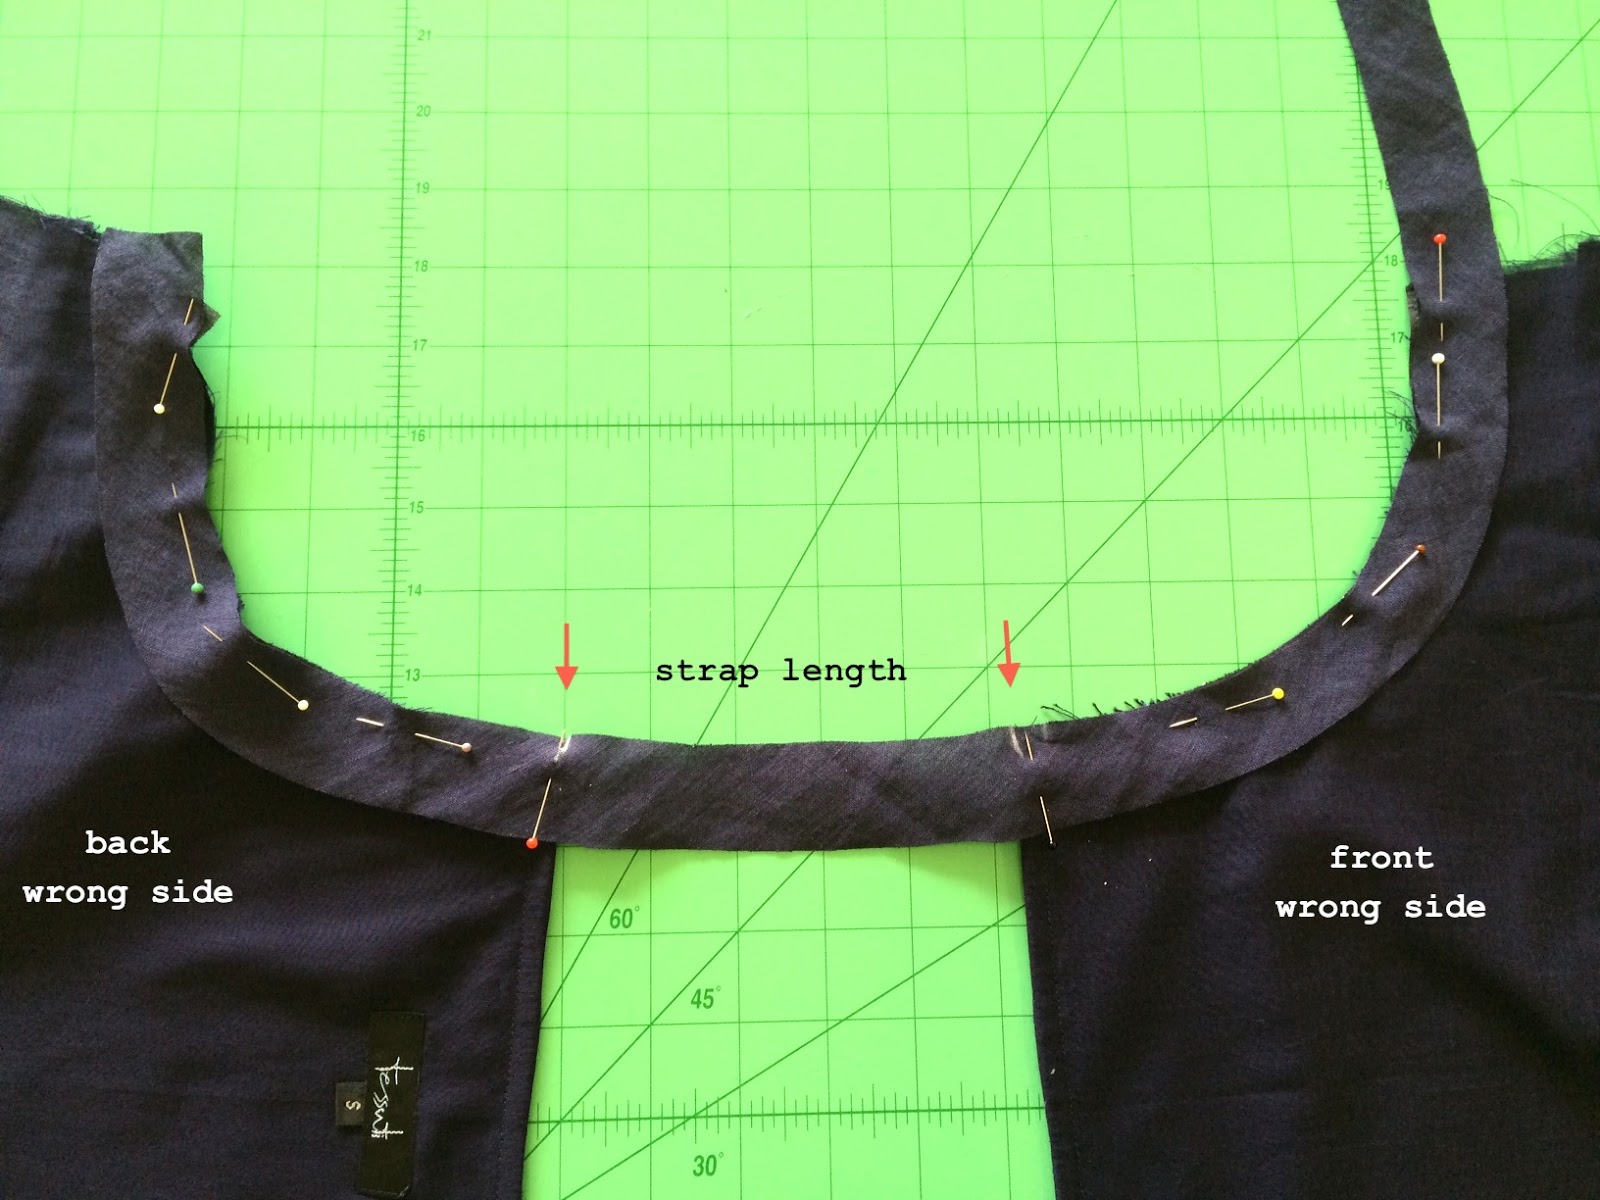
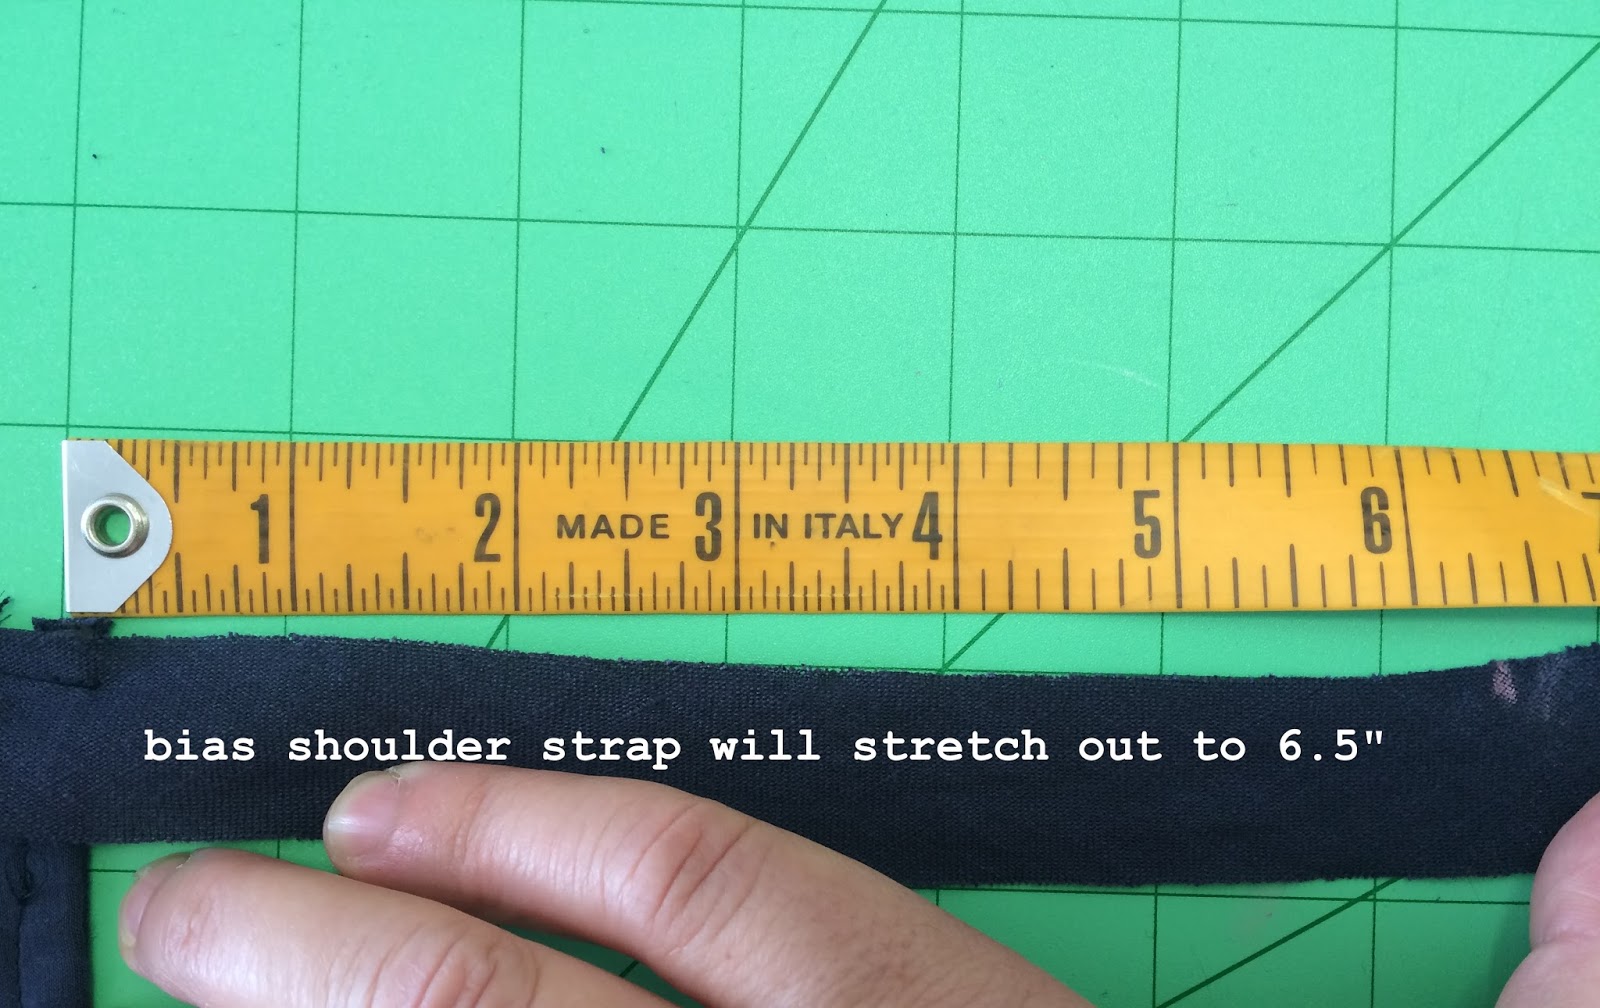
Measuring for strap length: IMPORTANT – This can vary for each individual and depends on your body requirements so check to see what works for you to gauge finished measurement.
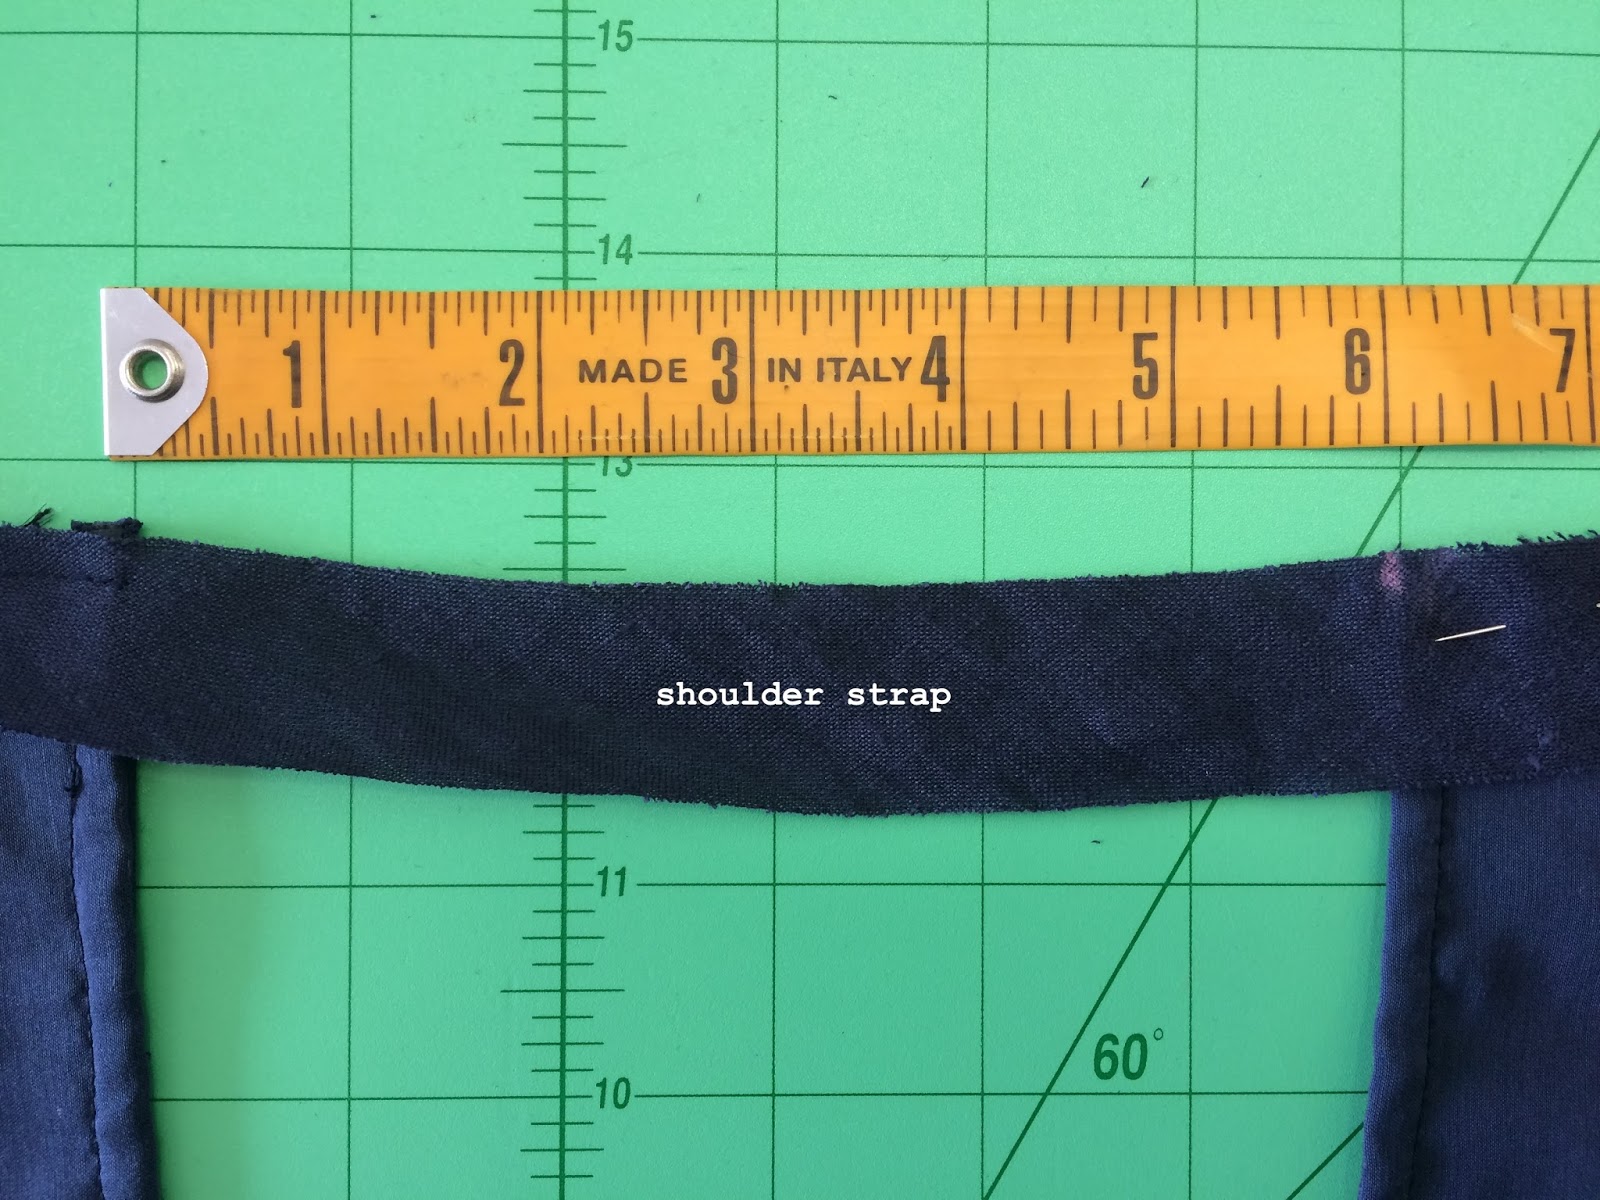
Place a chalk mark at approx 6-6.5” (or your preferred length).
Note: Due to the bias stretch of the binding, the shoulder strap will stretch slightly more when on the body (by approximately another 1/2″ or 3/4″ maximum). If measuring the shoulder strap to 6″, the finished straps measurement will finish at approx 6.5″ (anywhere between 6.5 – 7″ is suitable) from top edge of front bodice to top edge of back bodice.
Join the binding at the chalk mark to opposite top edge of front/back bodice and pin rest of binding, stretching slightly as you pin around opposite armhole edge. Repeat on other side of armhole edge. Starting at the underarm point, sew binding to armhole edge, taking 1/4″ seam allowance. Make sure to back stitch at top edges of bodices.
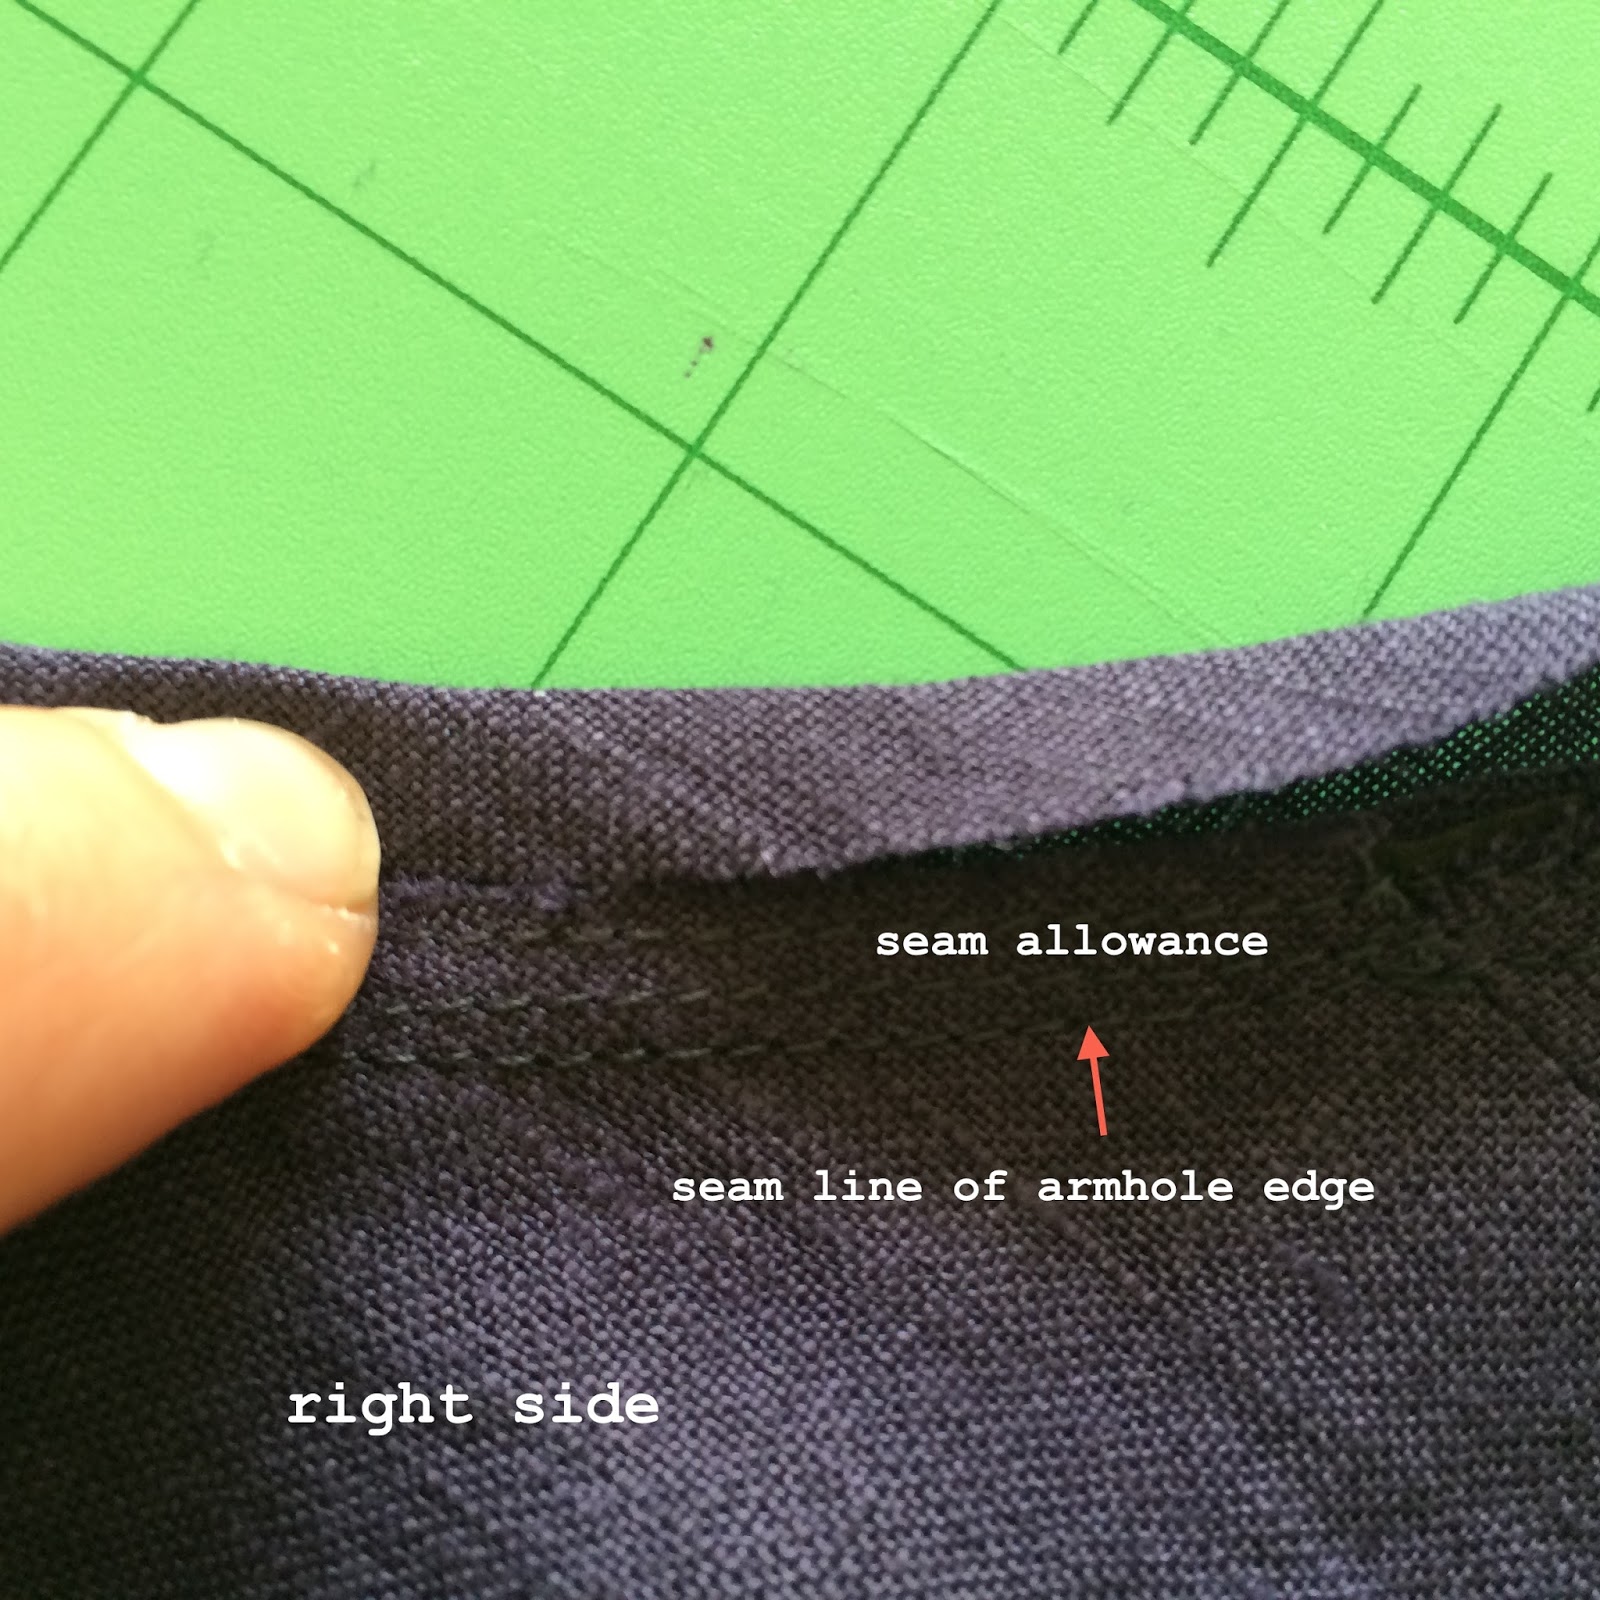
With right side of armhole edge facing you, push seam allowance towards wrong side of binding.
Meet raw binding edge to raw seam allowance edge.
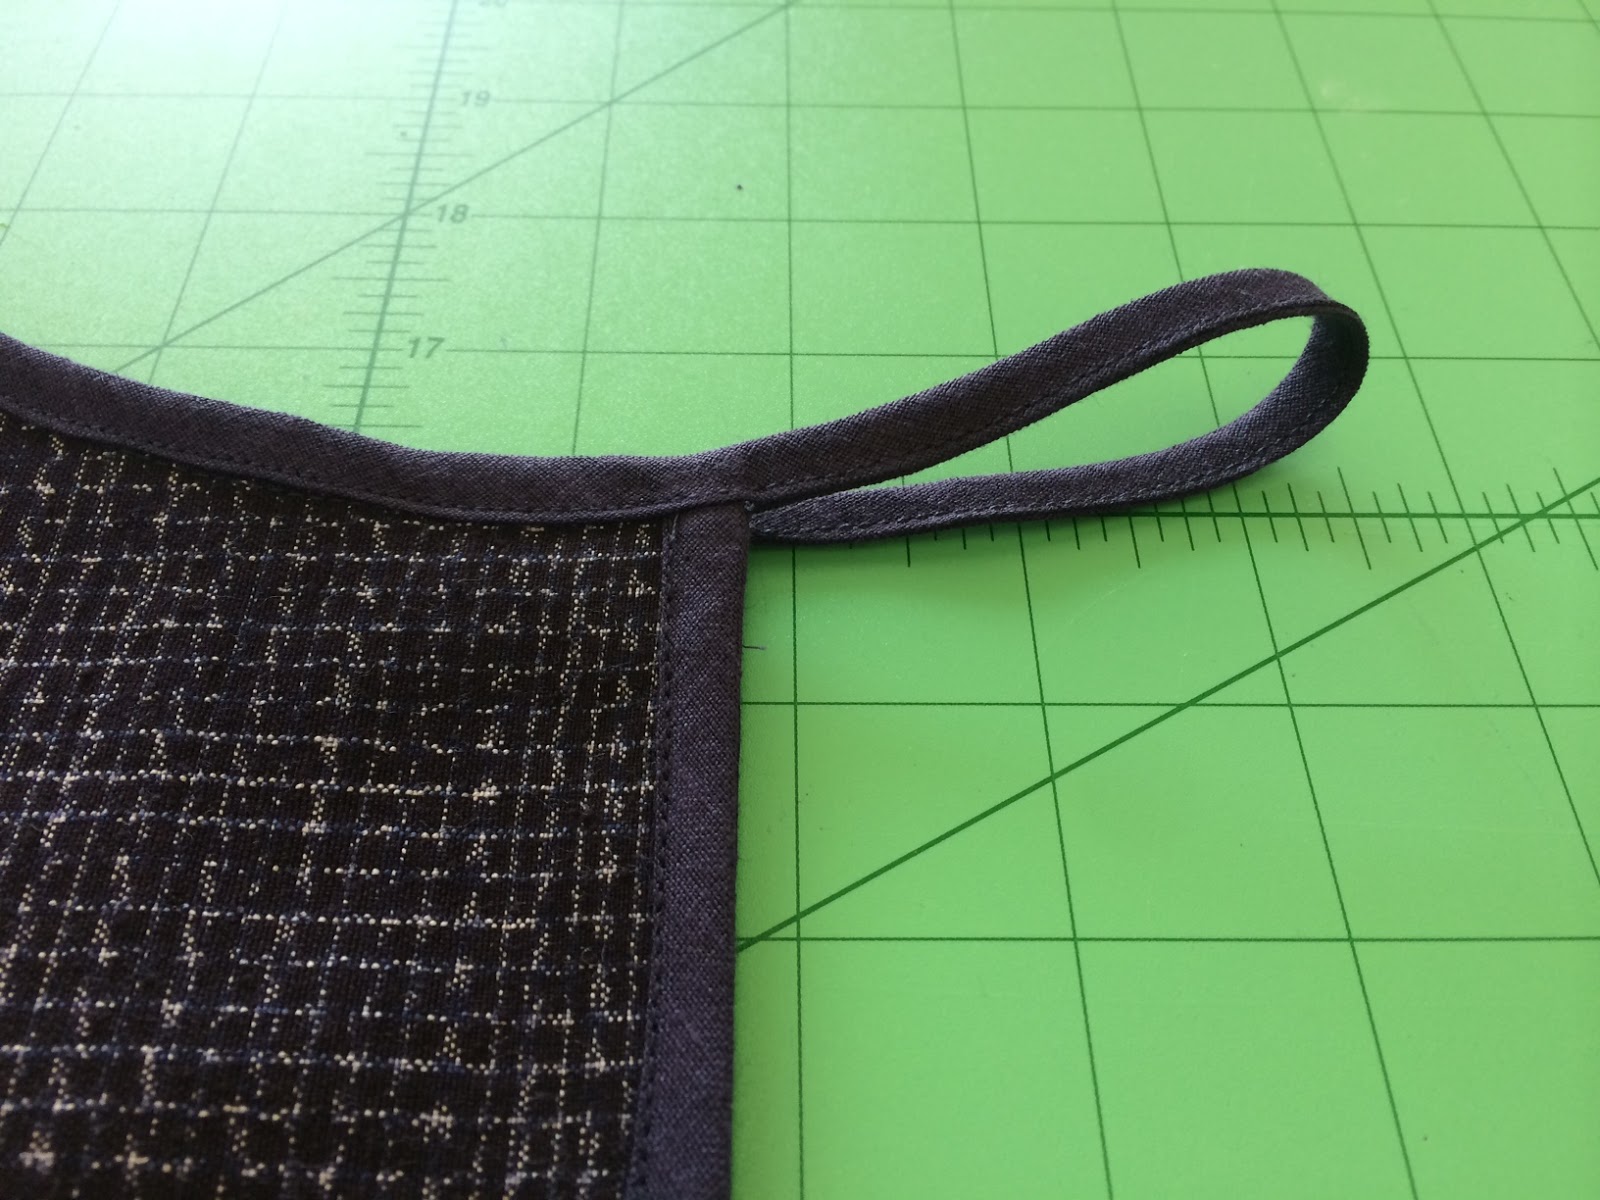
Turn binding towards right side of yoke bodice, and pin in place at edge, just covering stitching line. Note: At shoulder strap point, meet raw edges towards the middle then fold in half, the straps should finish the same width as exposed binding edge on bodice.
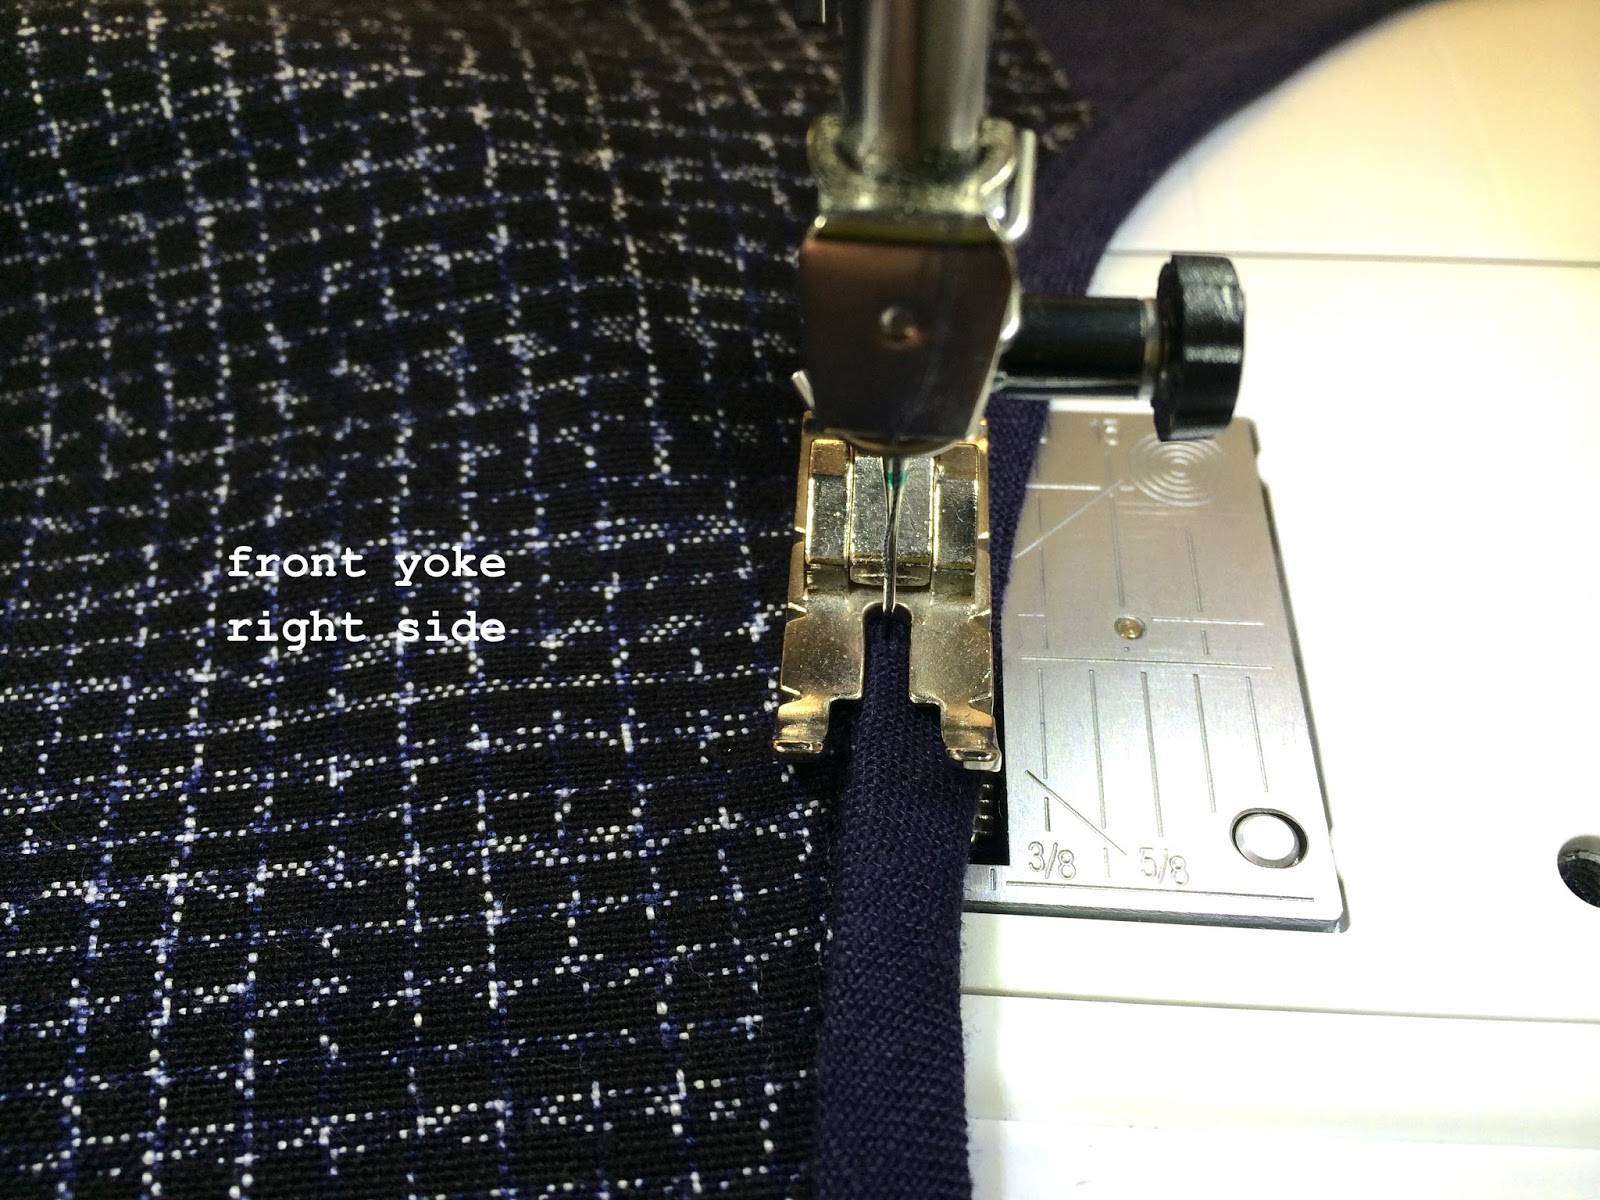
Starting at underarm point, sew binding in place along bottom edge of binding around armhole edge…
…continuing to sew shoulder strap binding together, to finish sewing binding in place around opposite armhole edge.
Pin side seams together with right sides facing, matching up binding edge, bodice seam, pocket notches and hemline together. Sew 1/2″ seam allowance. Overlock seam allowances together and press towards the back. Lastly catch seam allowance in place at armhole point, by stay stitching (and back stitching a few stitches) along binding edge.
Enjoy wearing your new version of our Annie Dress. And speaking from experience, it’s completely perfect for balmy summer days and nights!


 Colette and Lisa collaborate to bring you this here Tessuti blog. Follow us to keep your finger on the pulse of new pattern releases, reviews, tips, techniques and a healthy dose of love and appreciation for all things fabric and sewing!