
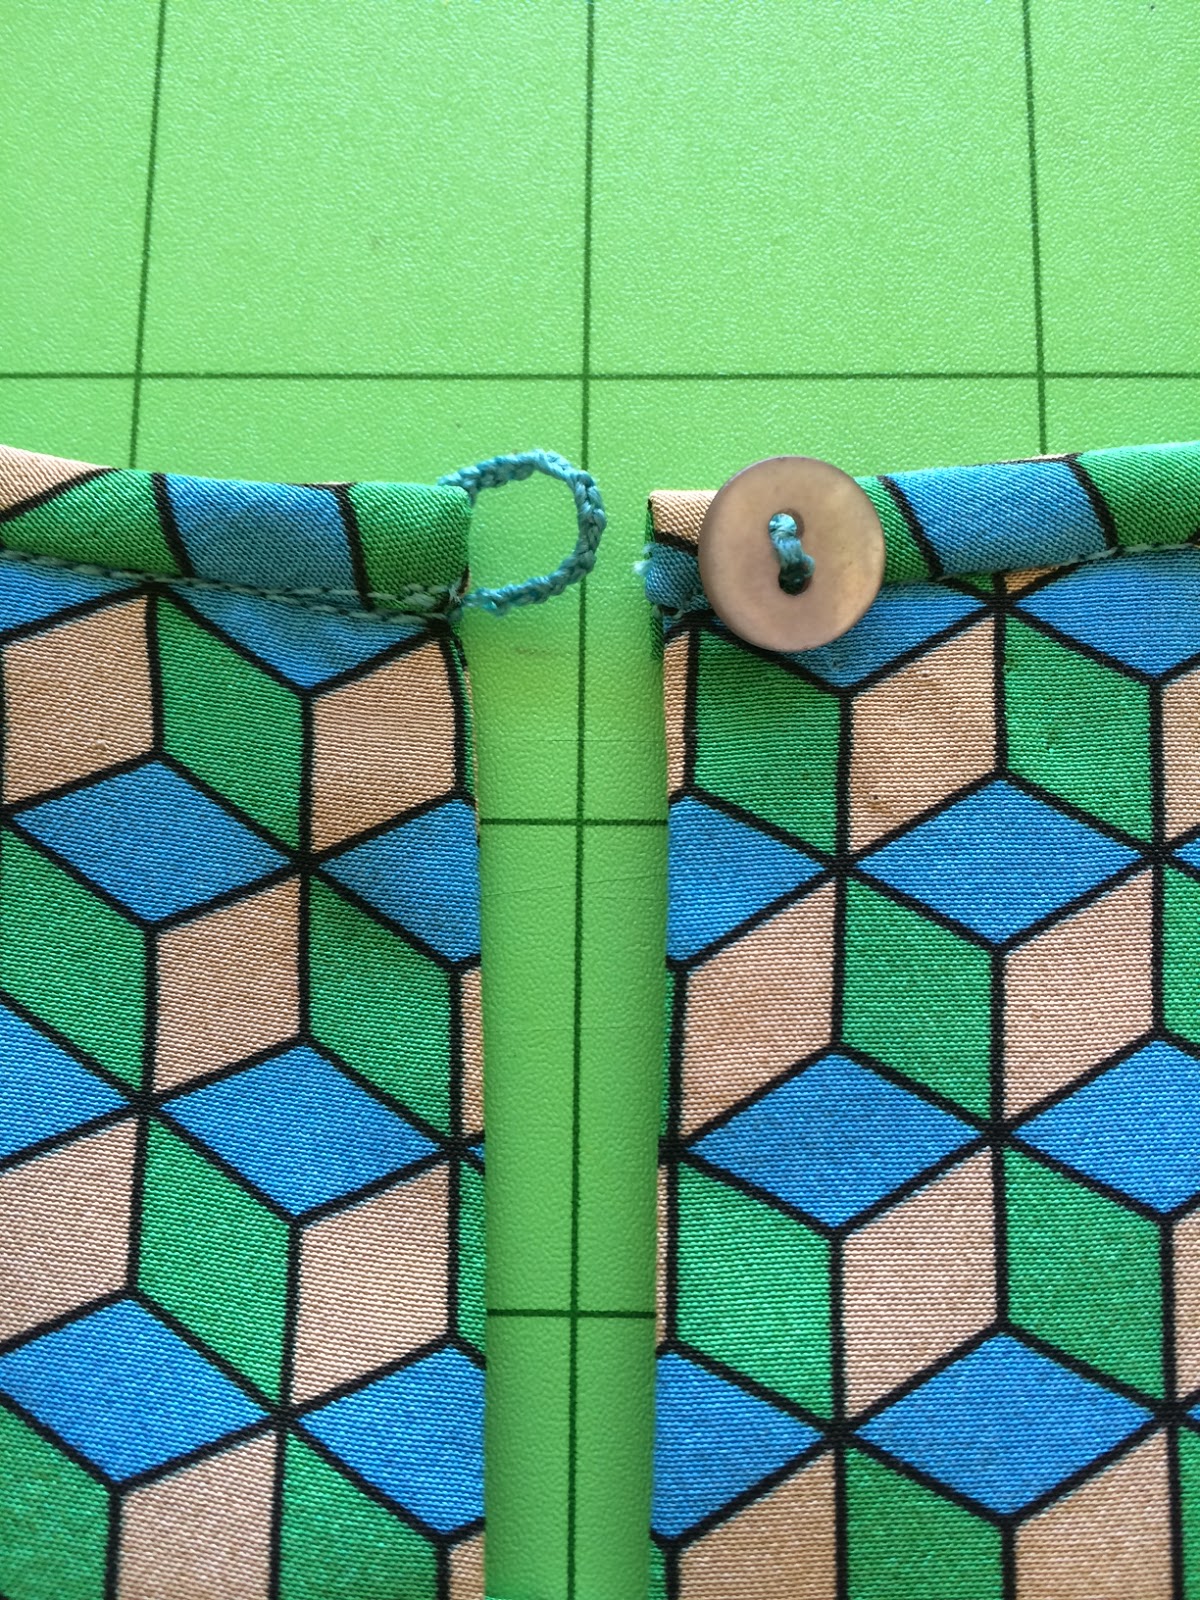
Tutorial/Video: How to sew a thread button loop
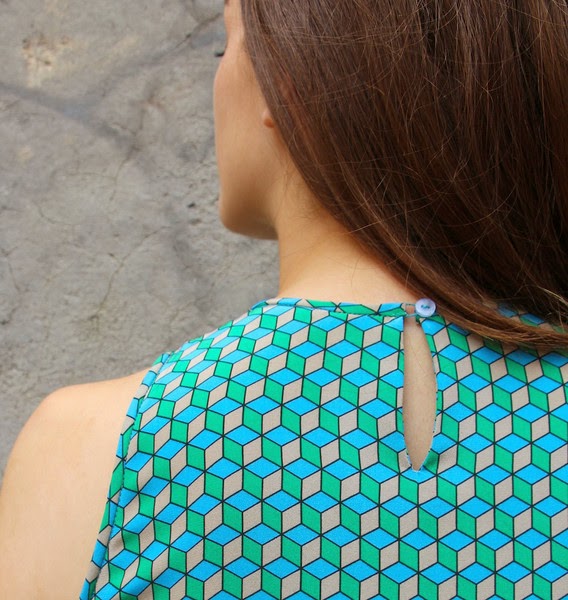
Our Ruby Top pattern has a delicate button/loop closure at the back of the neck, that requires a thread button loop. We have had a few enquiries asking how to do this. So here’s the method I use when making my thread button loops which I find a whole lot easier than making teeny tiny fabric rouleau loops! This method can be used when making delicate belt carriers for dresses too.
For those who prefer a quick visual, check out the video tutorial below (Note: in the video I’ve used contrast purple thread to help make it more visible):
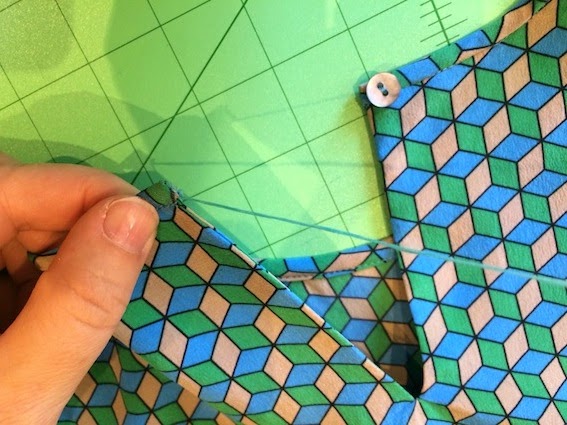
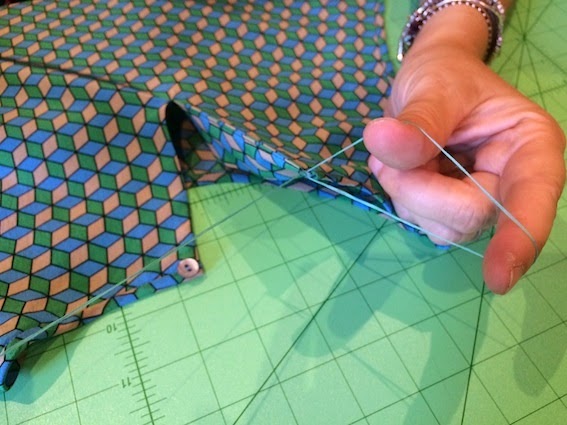
There’s also this step by step tutorial showing you how, please click on images for a closer look:
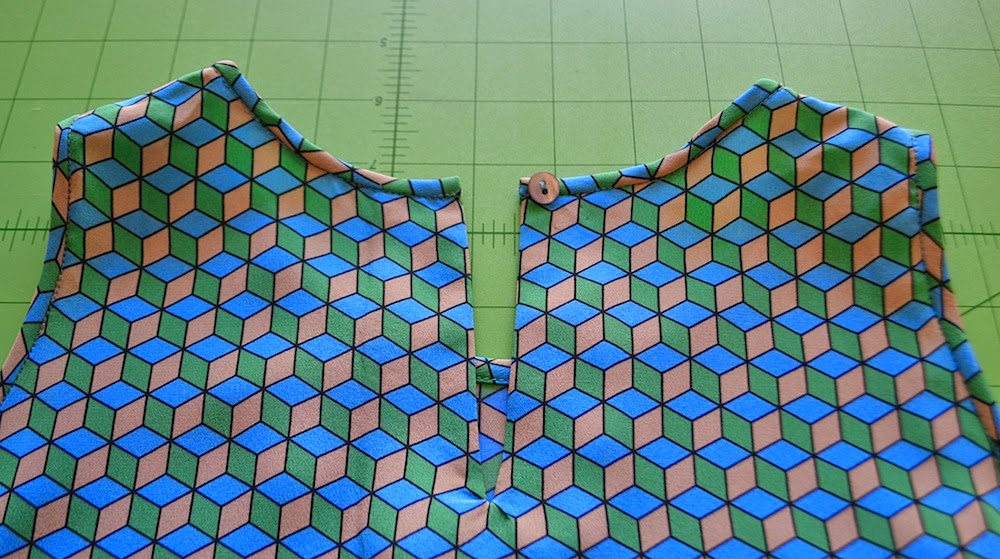
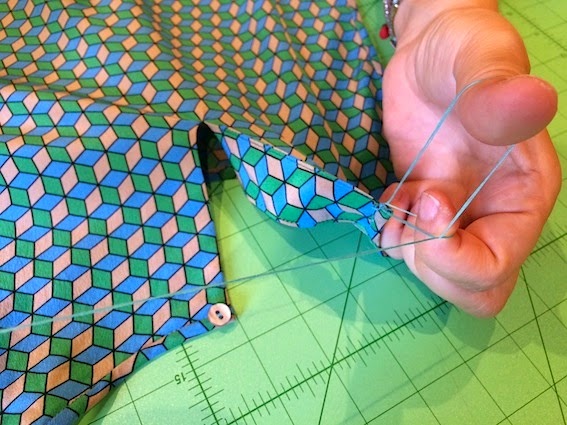
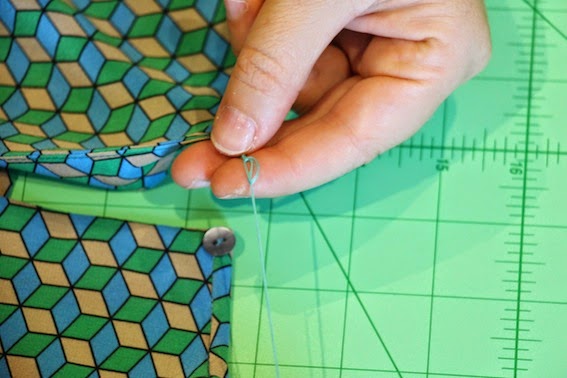
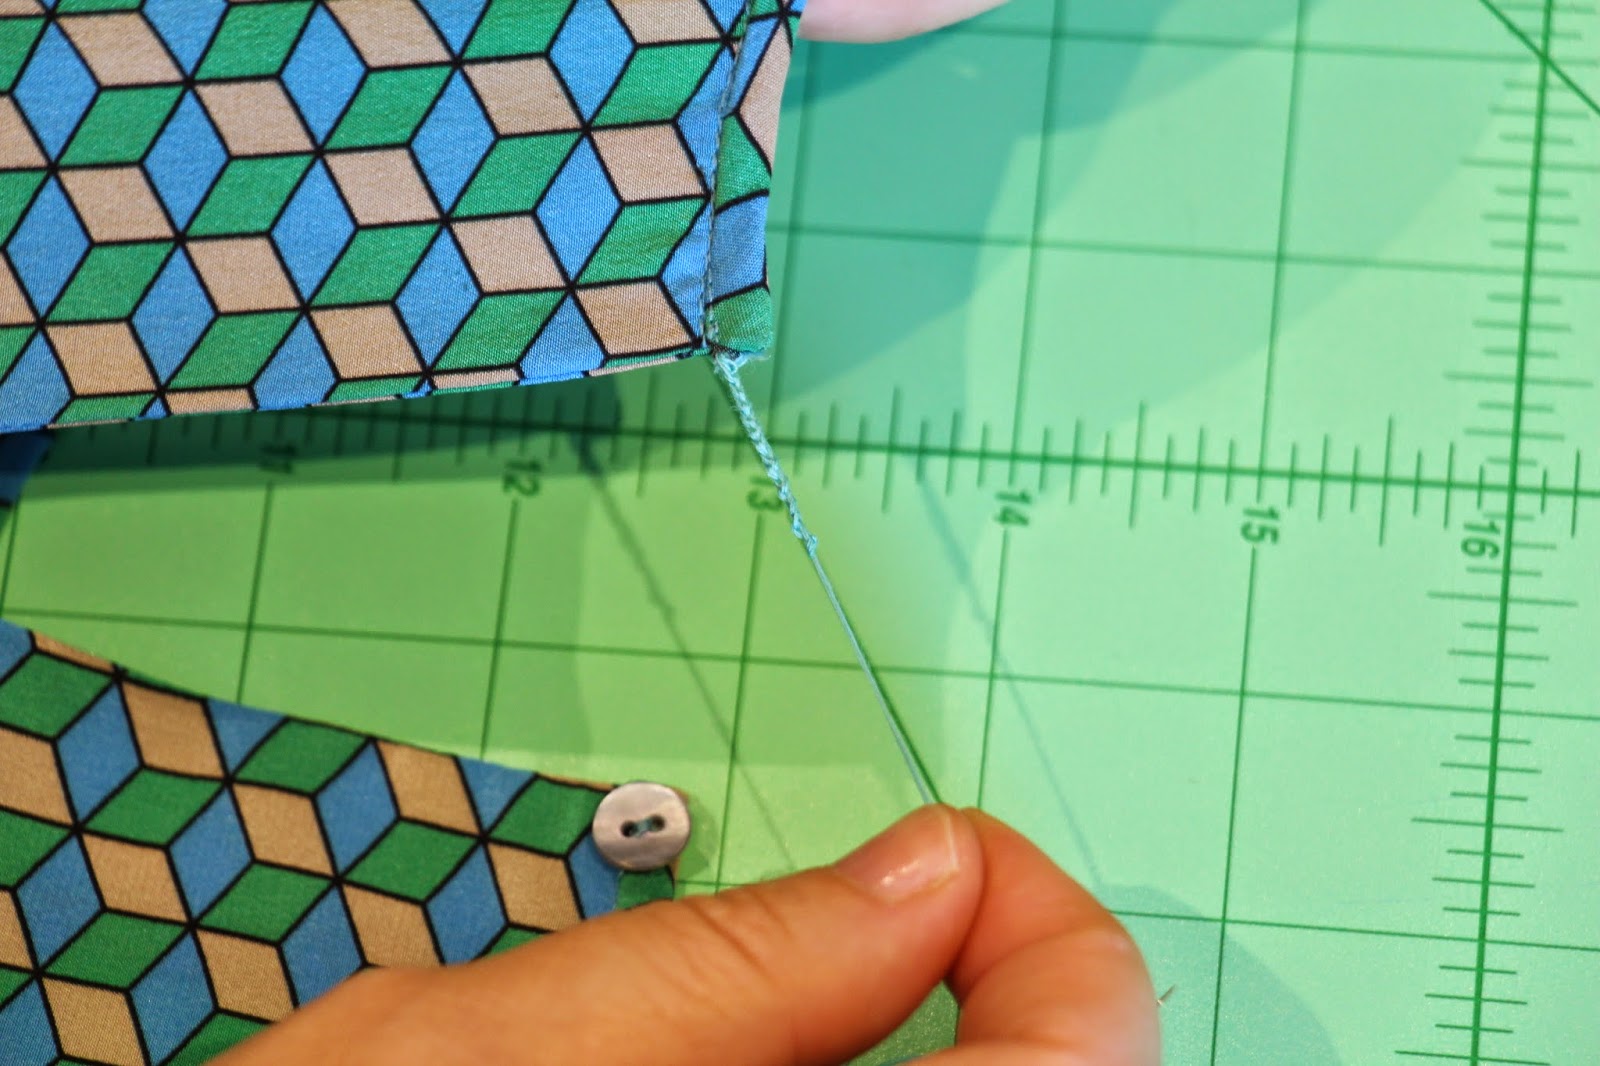
Sew your button on the right hand side of your back neck opening, you will need your button sewn in place so that you can check measure how long to make your thread loop
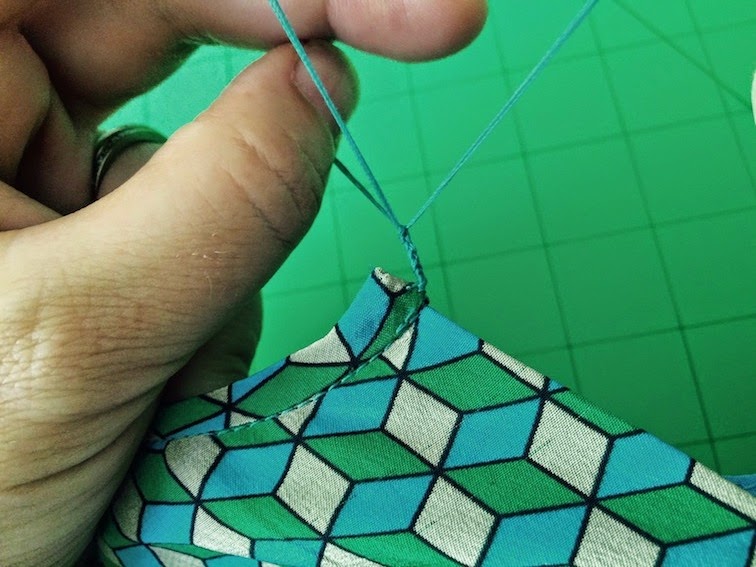
Double thread your needle so that you have four strands of thread,


 Colette and Lisa collaborate to bring you this here Tessuti blog. Follow us to keep your finger on the pulse of new pattern releases, reviews, tips, techniques and a healthy dose of love and appreciation for all things fabric and sewing!


This is very cool! The other method that I like is grabbing 4-5 threads about 20cm long, then zigzagging using a short stitch over the bunch of threads – useful if you want to quickly make a longer length of thread loop. Then I use a large eyed needle to attach it.
Chain stitching is a great way to join a skirt lining to a skirt while still allowing a bit of movement. Never thought to use it as a closure though!
Thanks for the explanation. Can you please give any tips into how to avoid puckering at the bottom of the neck opening?
Hi Miss Adelaide, it sounds like you may not have clipped close enough to the tapered point (on page 5 in the sewing instructions) before turning your facing through to the back. You need to cut right to the point, but not through your stitching.
I use the same method that FabricTragic mentioned above and I have a quick video tutorial on my blog showing how it is done. Hope someone finds it useful 🙂
Hi Colette, thanks for sharing your tutorial. I, like Fabric Tragic above, use my machine to make thread loops and have posted a video tutorial over on my blog that you may find interesting.
Thanks for the tutorial Colette. It makes it so easy to do. Why didn't my mother teach me this years ago 🙂
Thanks for this! It's so much more efficient than the way I learned to do it, which was making the button loop and blanket stitching over it…
Thank you so much for these easy to follow instructions.
Best tutorial EVER! This is something I have refused to try, adding snaps instead. This is so much easier!!! Thank you, thank you, thank you!
You’re very welcome Katie!
Thank you Tessuti for leaving these tutorials up on the internet and youtube. I made another Ruby top today for a BFF with fabric she had designed and printed. Needed this lesson again on a chain loop for the button….even thought I’ve done 3-4 before.