
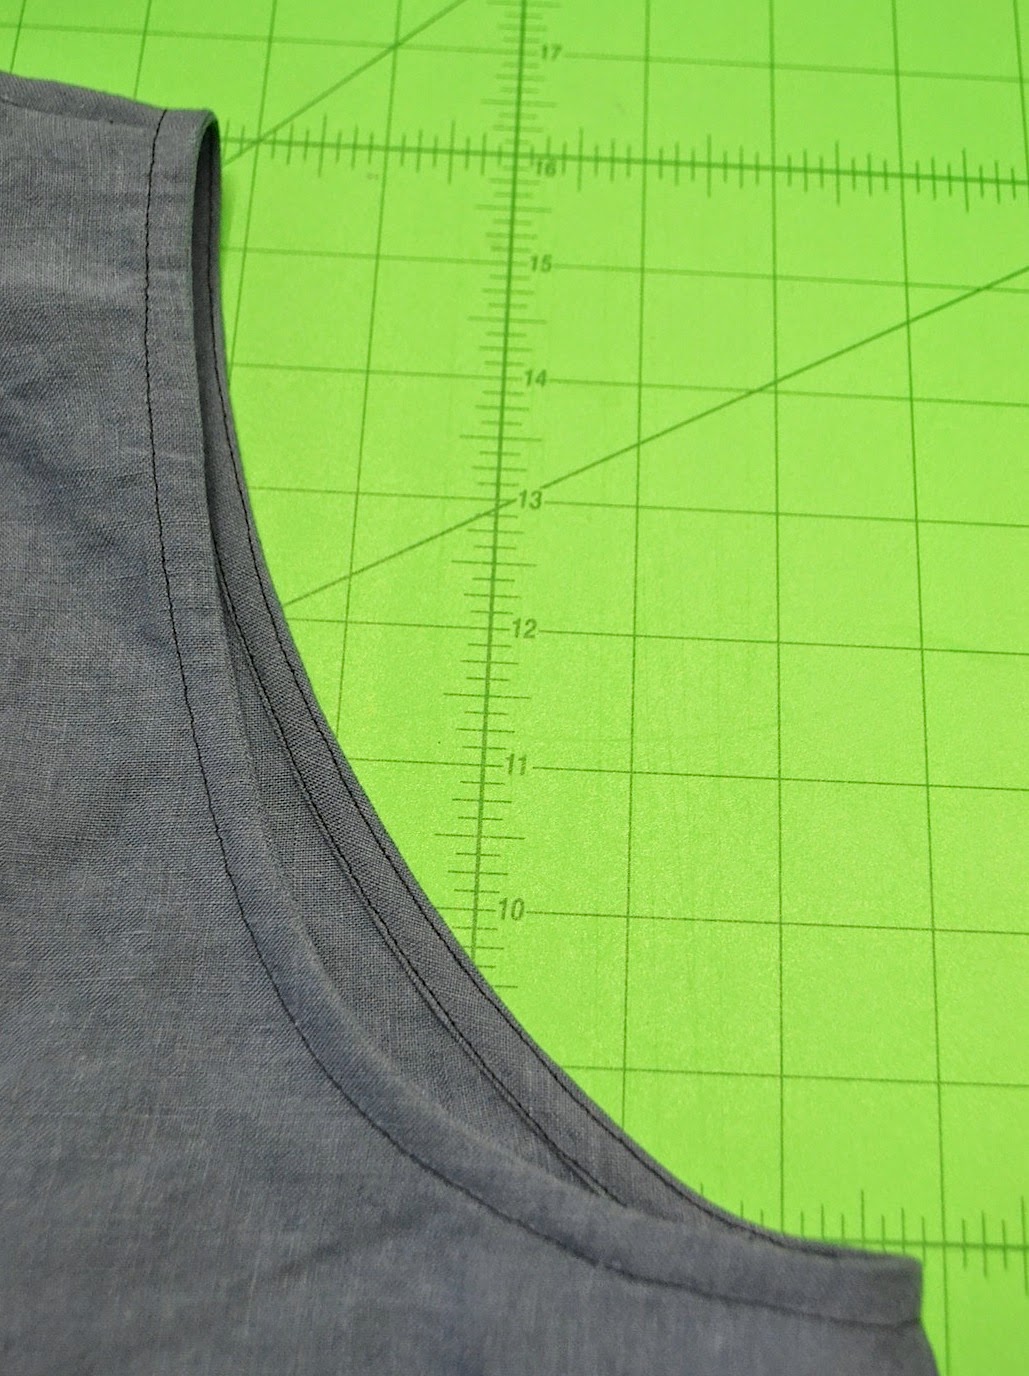
NEW Tutorial: Attaching and Joining Double Fold Bias Binding
Back in Jan 2013 we published this tutorial showing you how to sew and join together double fold bias binding. We use this binding a-plenty in our patterns and this method has served us (and hopefully you!) well for both armholes and necklines….until now! Here is our NEW tutorial showing a different and – we think – much, MUCH easier method on attaching and joining double fold binding. Are you ready?
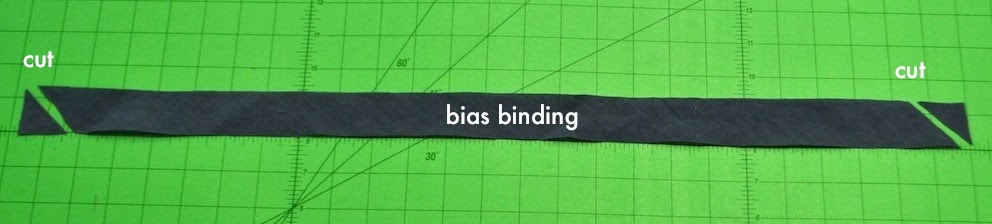
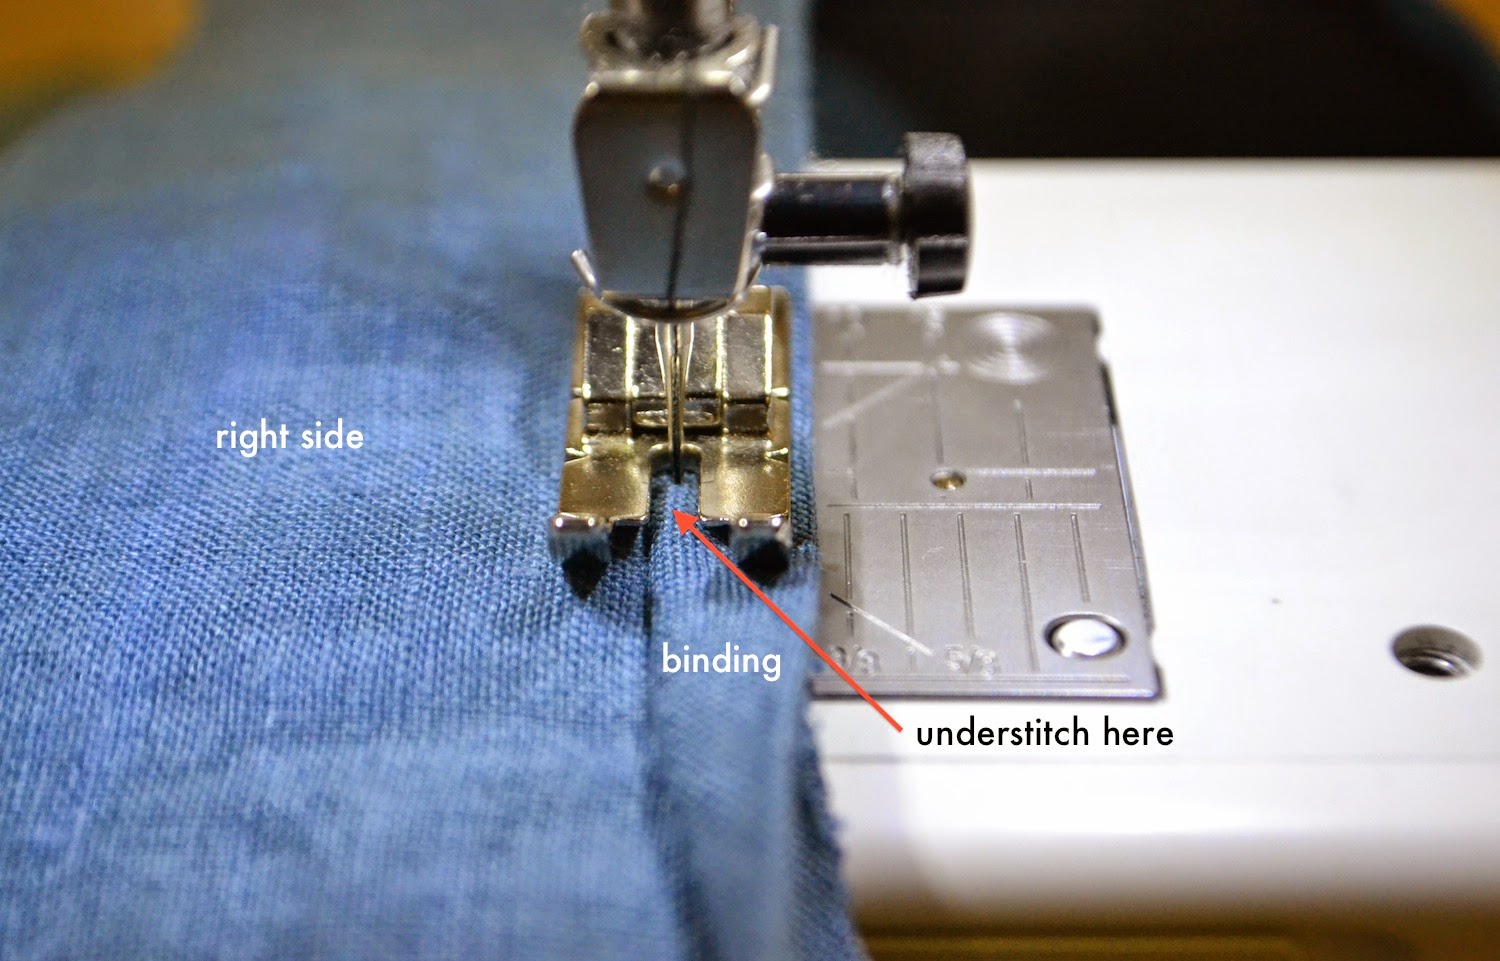
IMPORTANT: Cut your bias binding strip ends at 45 degree angles and ensure that both ends are cut in the SAME direction. Note: bindings are cut longer so you will need to check measure bindings around armholes before cutting off any excess.
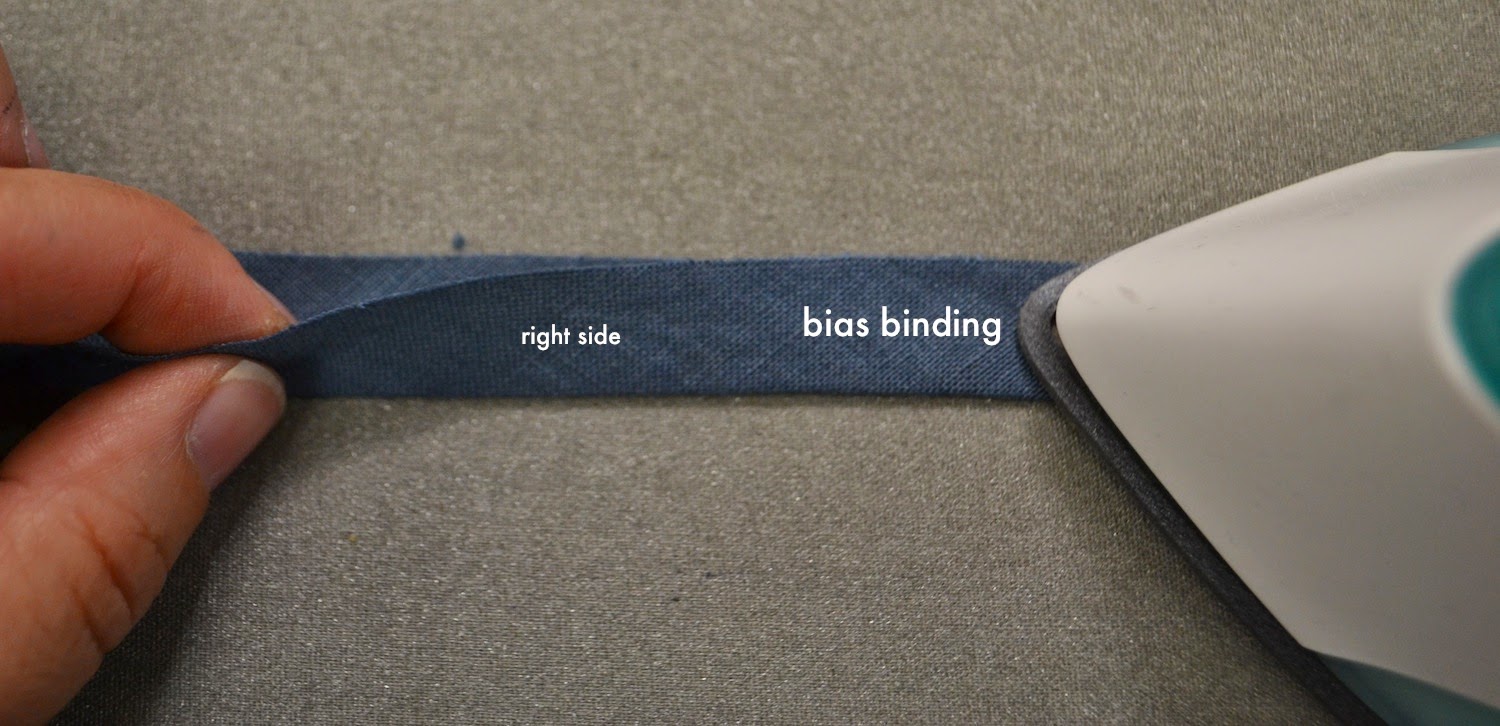
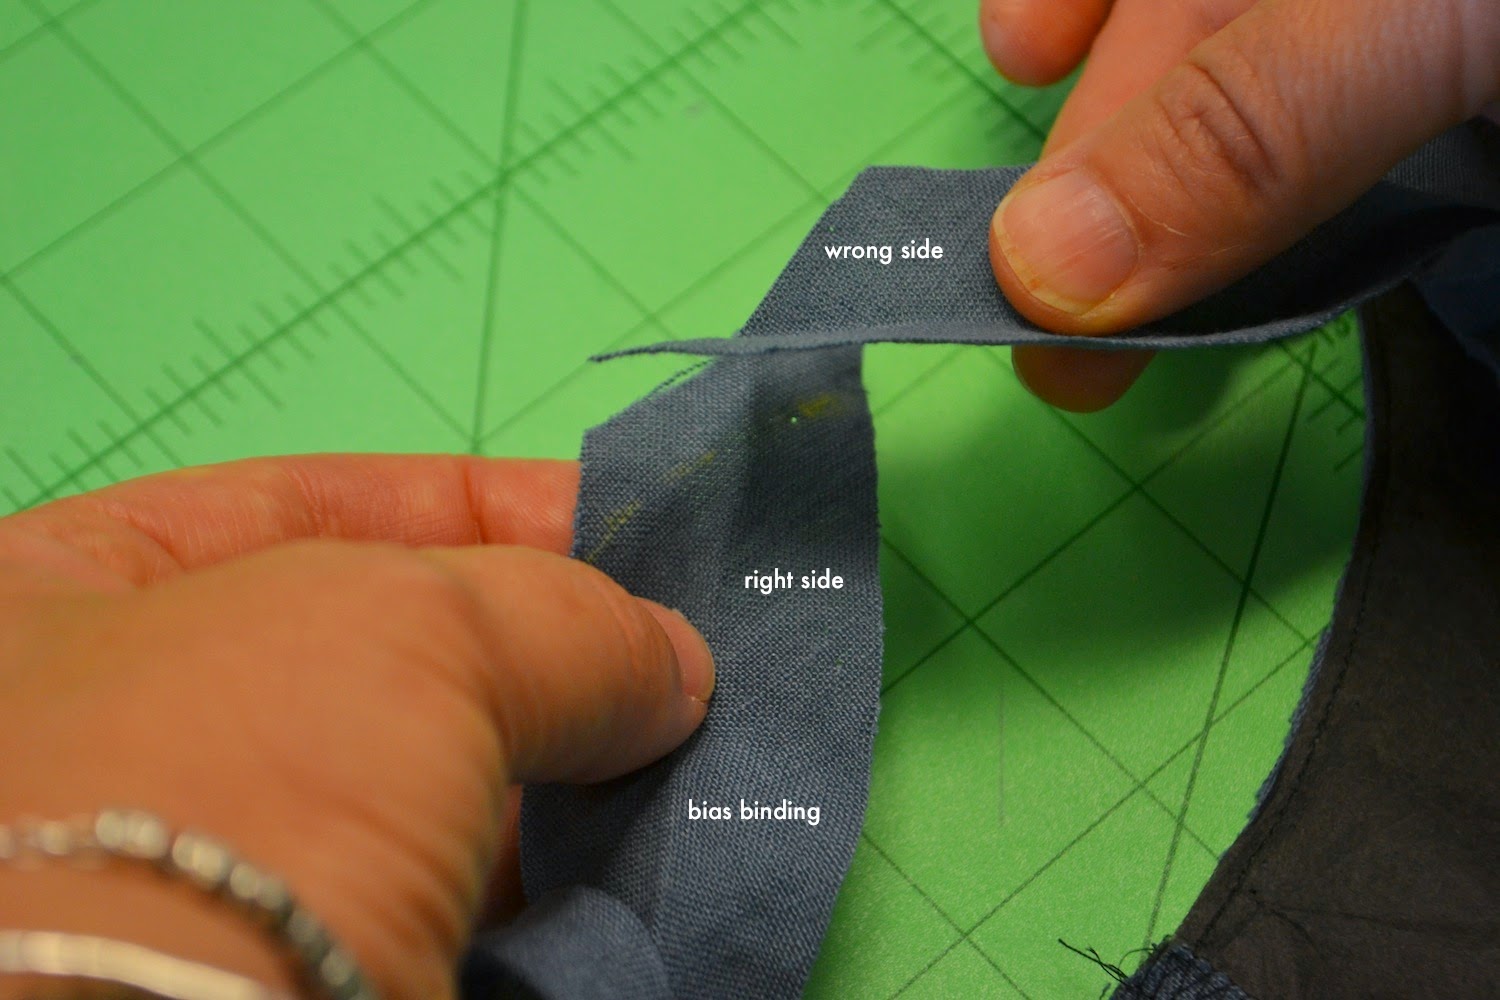
Press binding in half lengthways (wrong sides together), taking care not to stretch when pressing and making sure raw edges are flush. Note: when the binding is pressed in half the angled end will be shorter on one side (see image above).
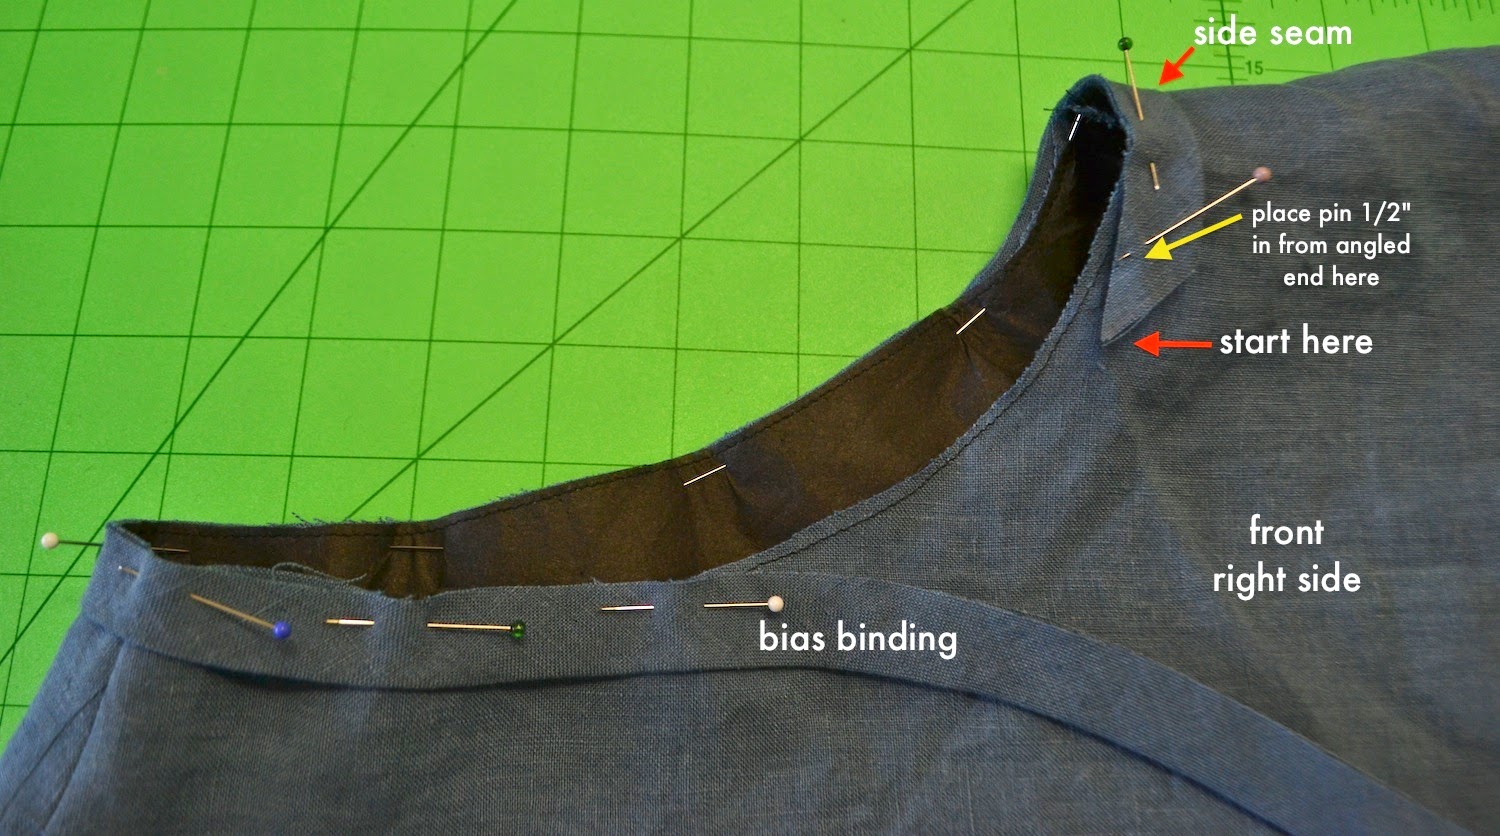
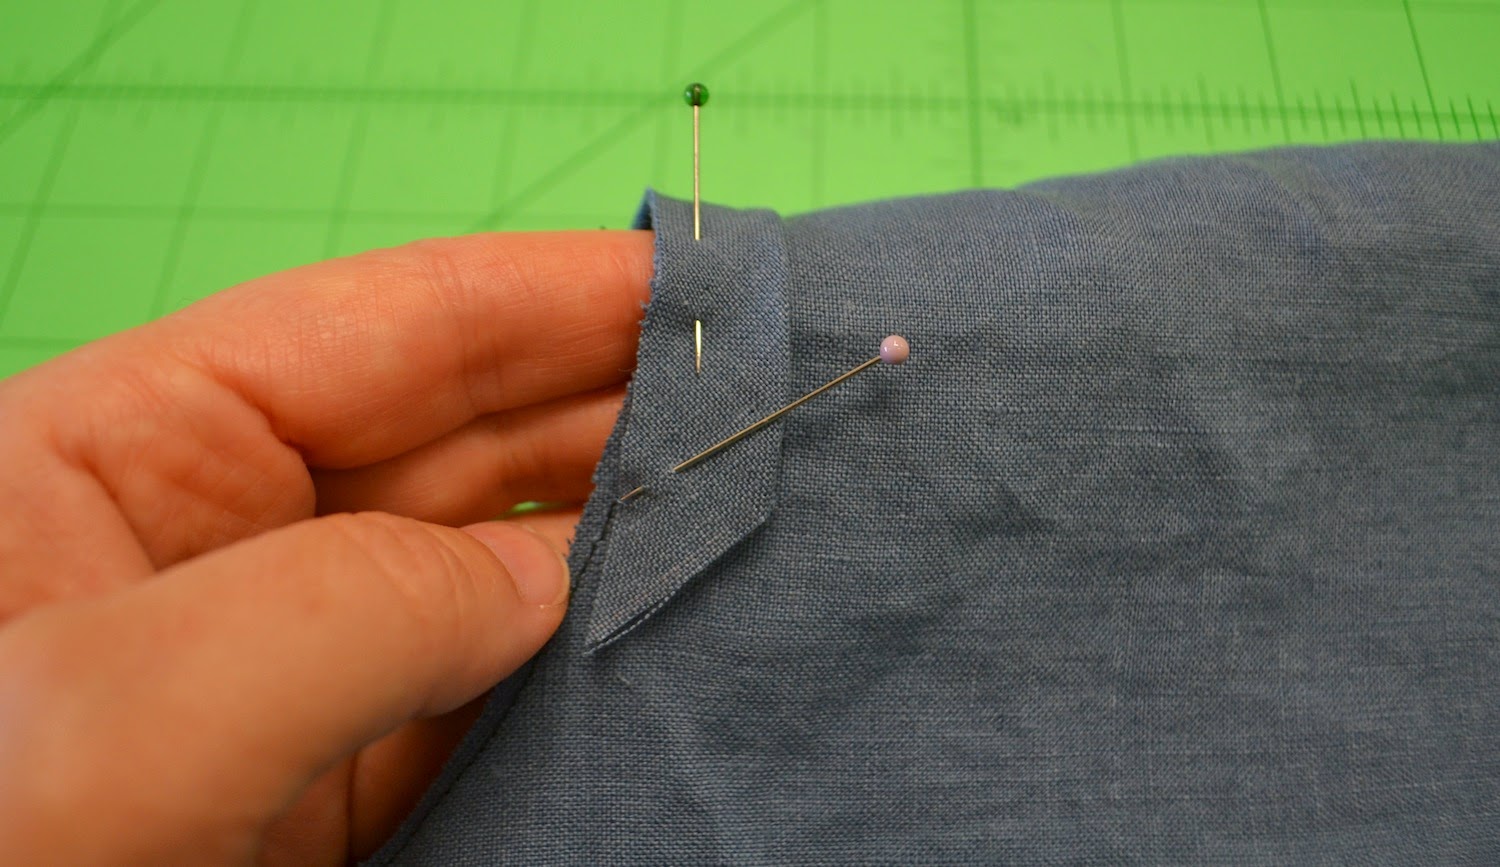
Pin raw edges of folded binding to armhole edge and starting approx 2″ away from side seam towards the front garment. This will help to avoid adding bulk to the underarm seam. Place a pin 1/2″ in from from angled cut edge (see images above).
(Note: As you pin bias around armhole edge, stretch the binding (ever so slightly) on the curve of the front)
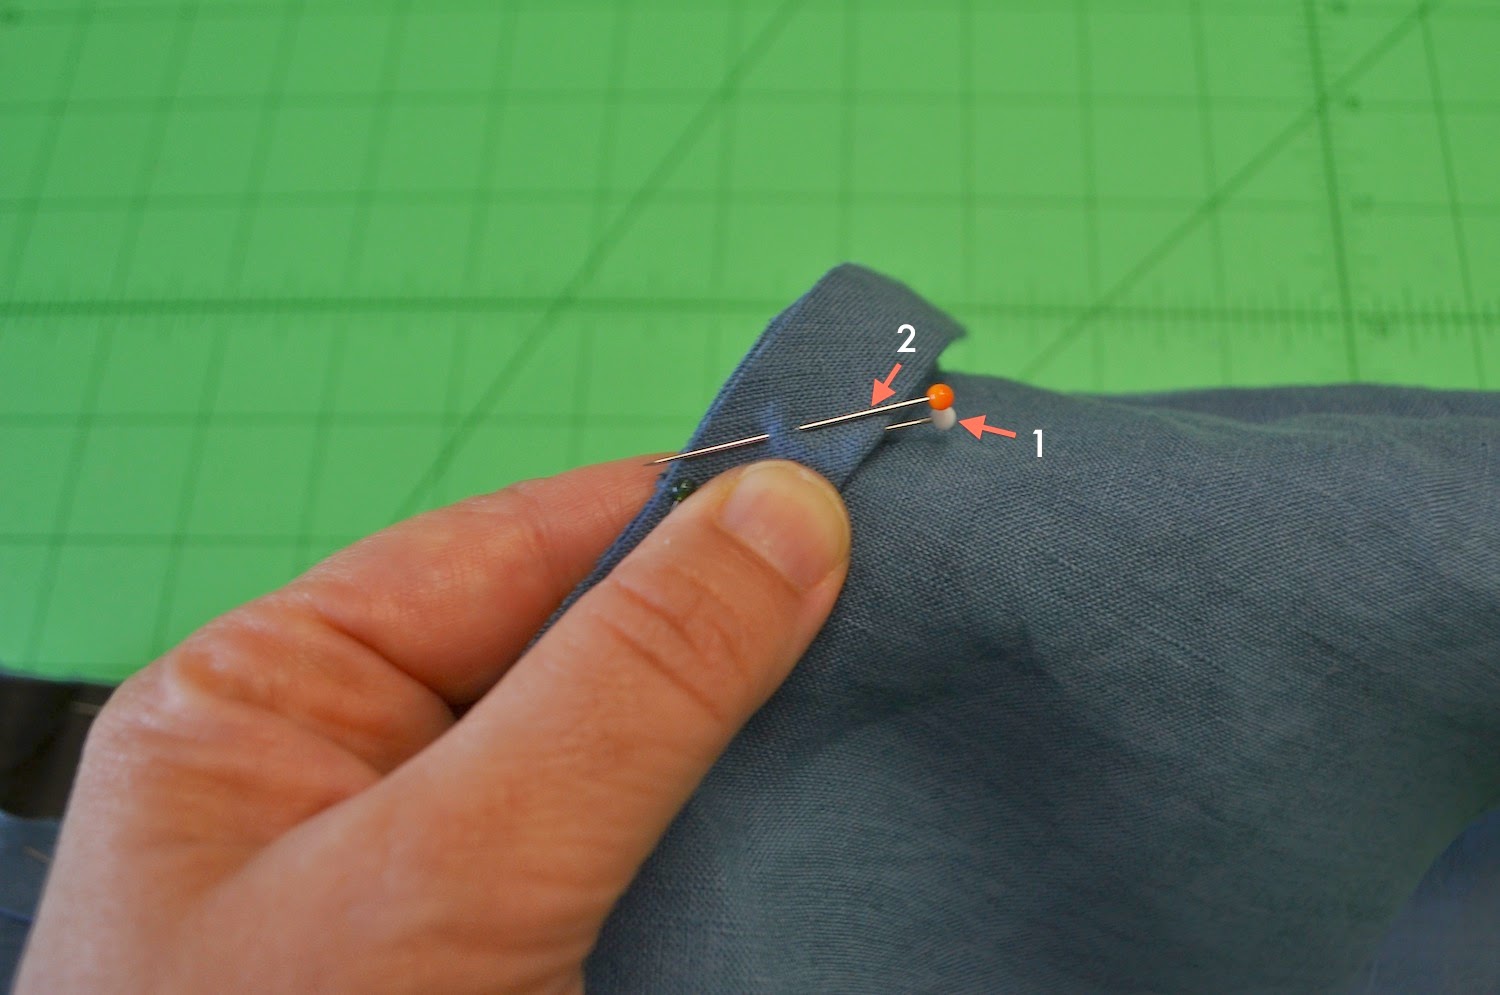
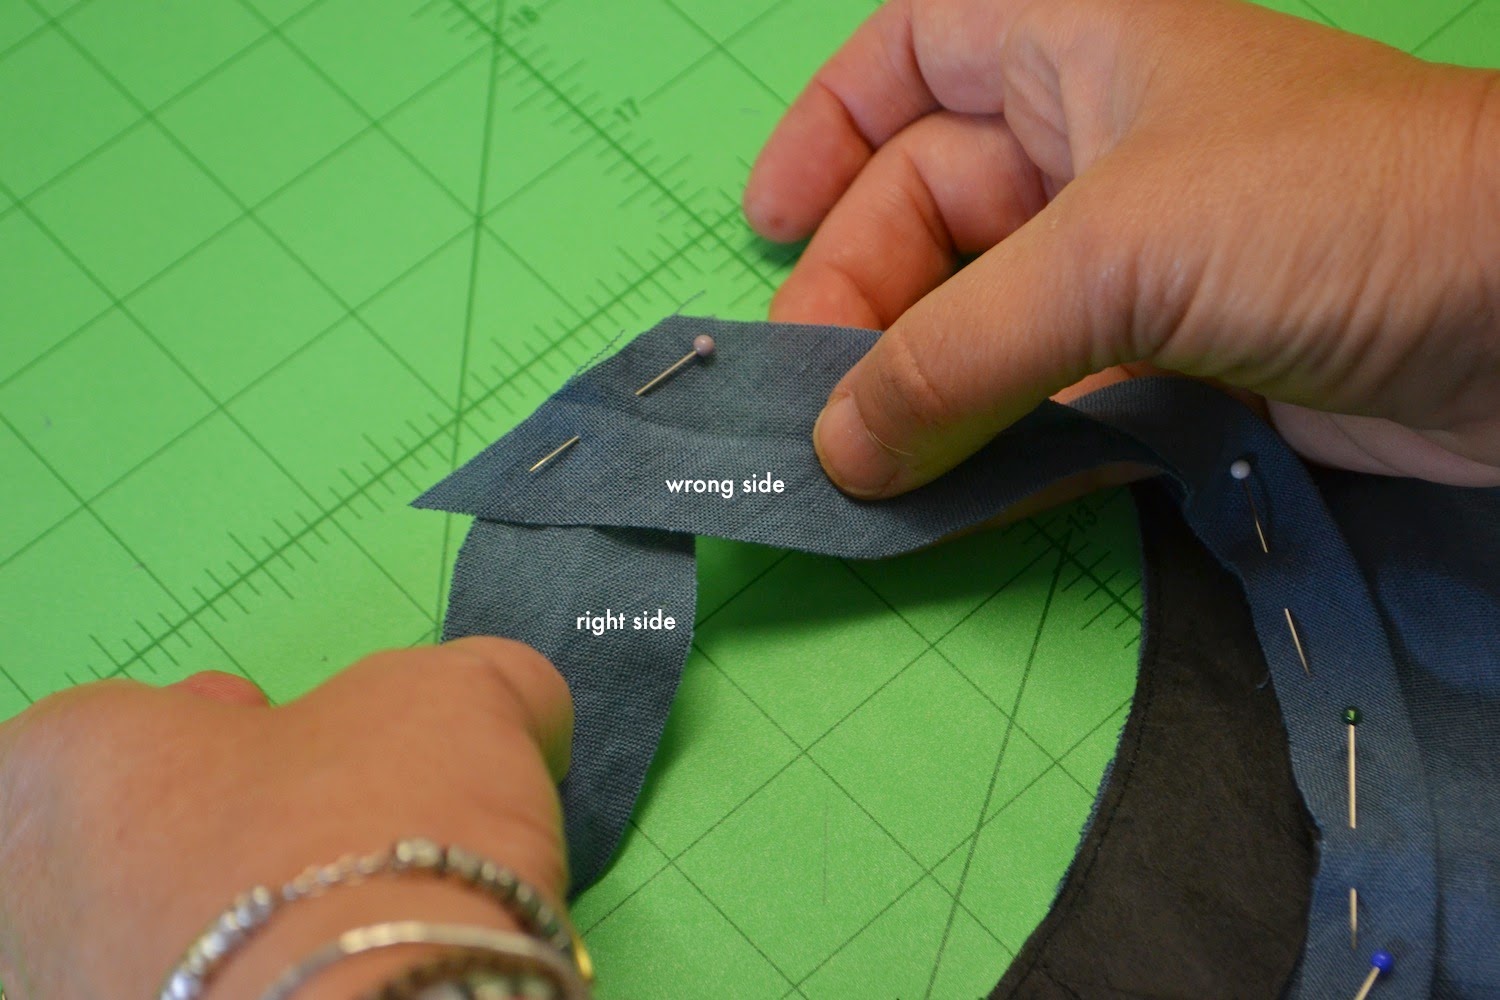
Continue pinning other side of binding end to overlap pin point (1) and place a pin (2) to correspond the position. Open up folded binding at point 2 and chalk mark position on straight grain of binding and at the same angle of bias end. Cut on chalk mark 2 only.
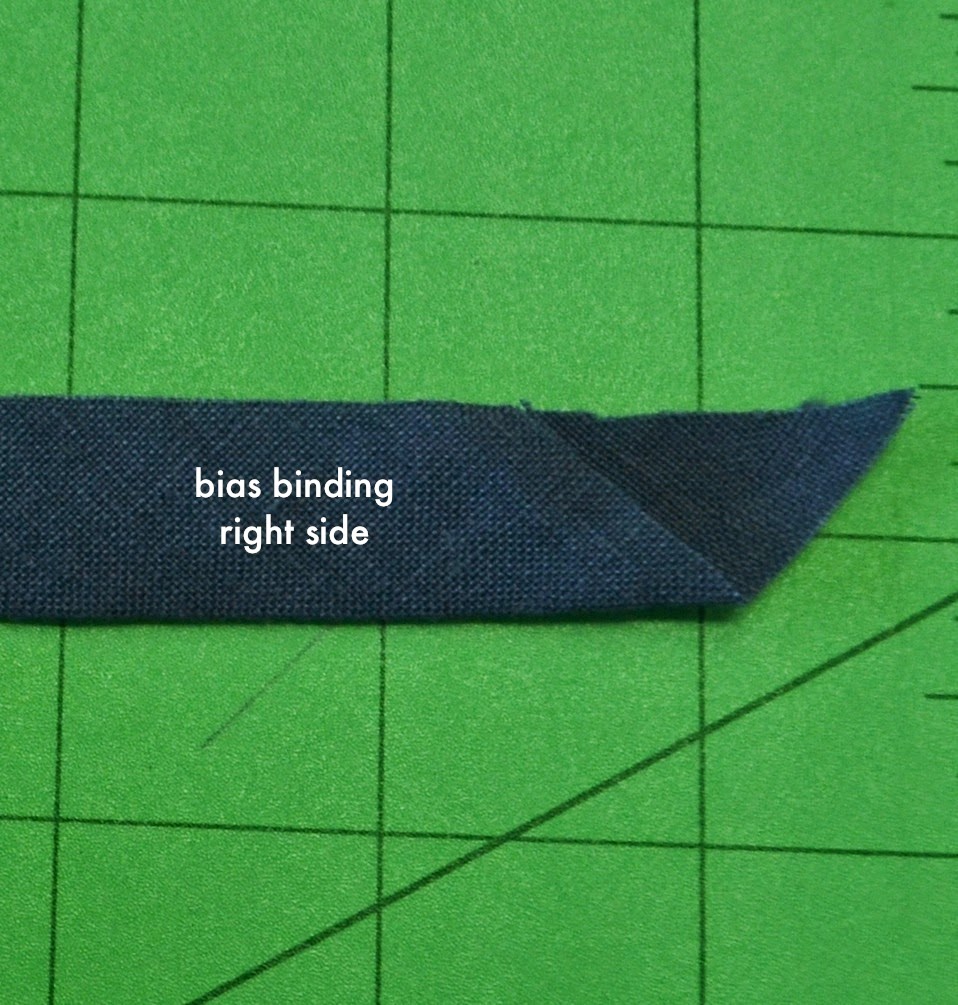
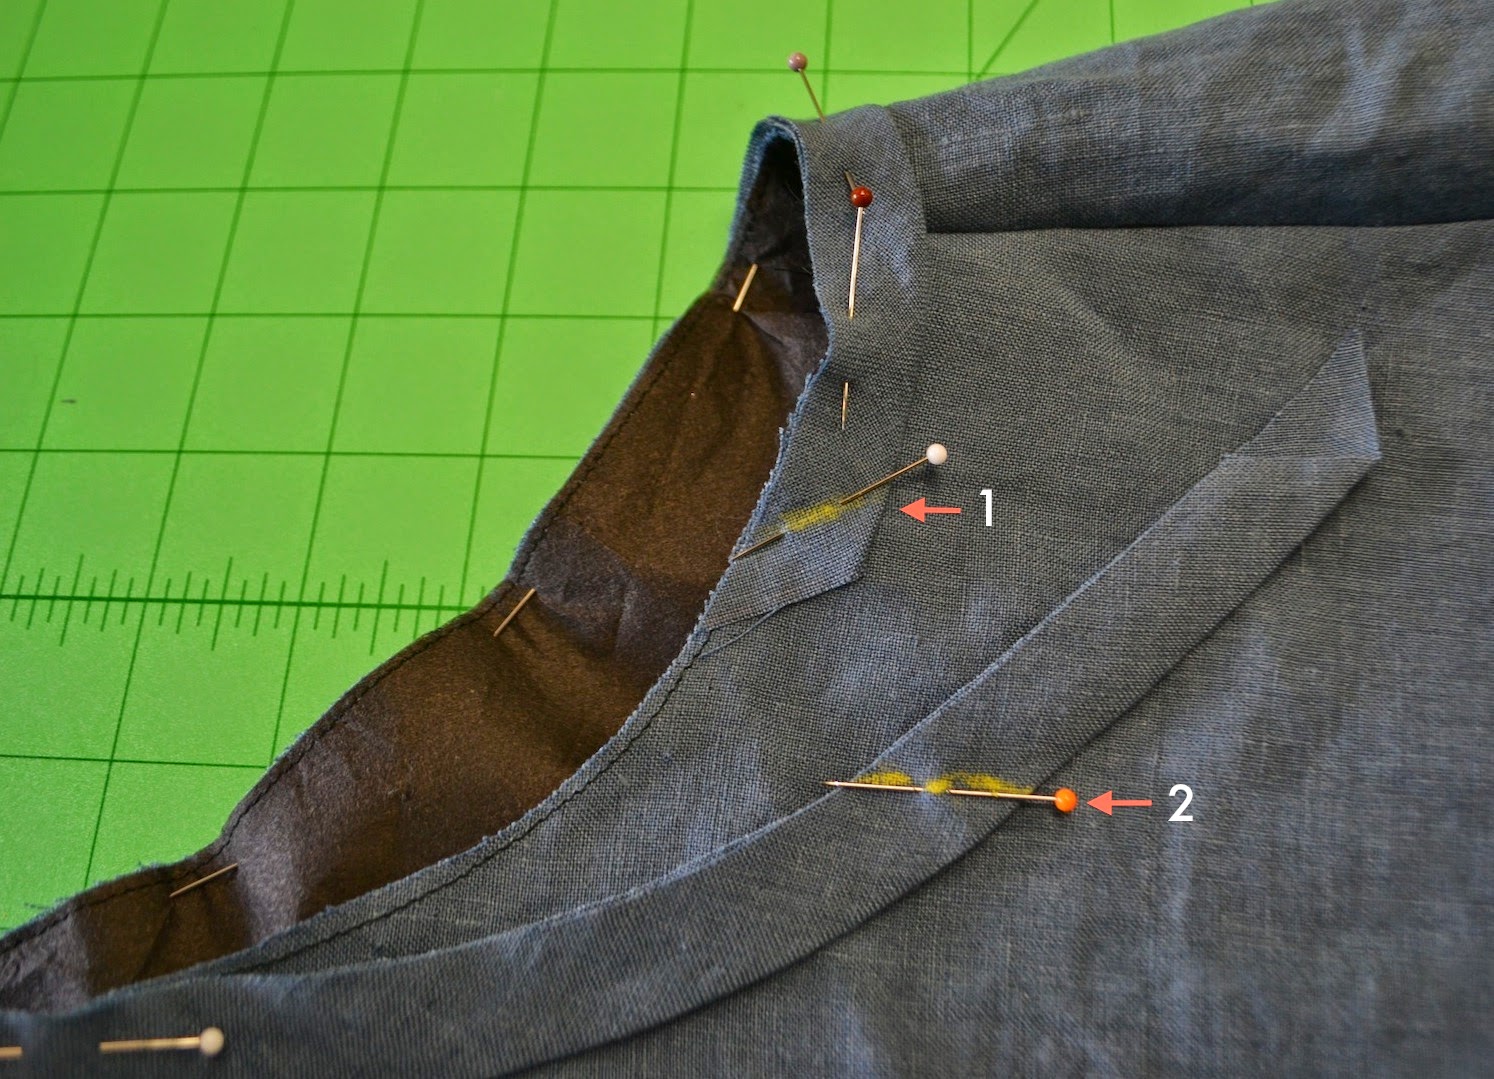
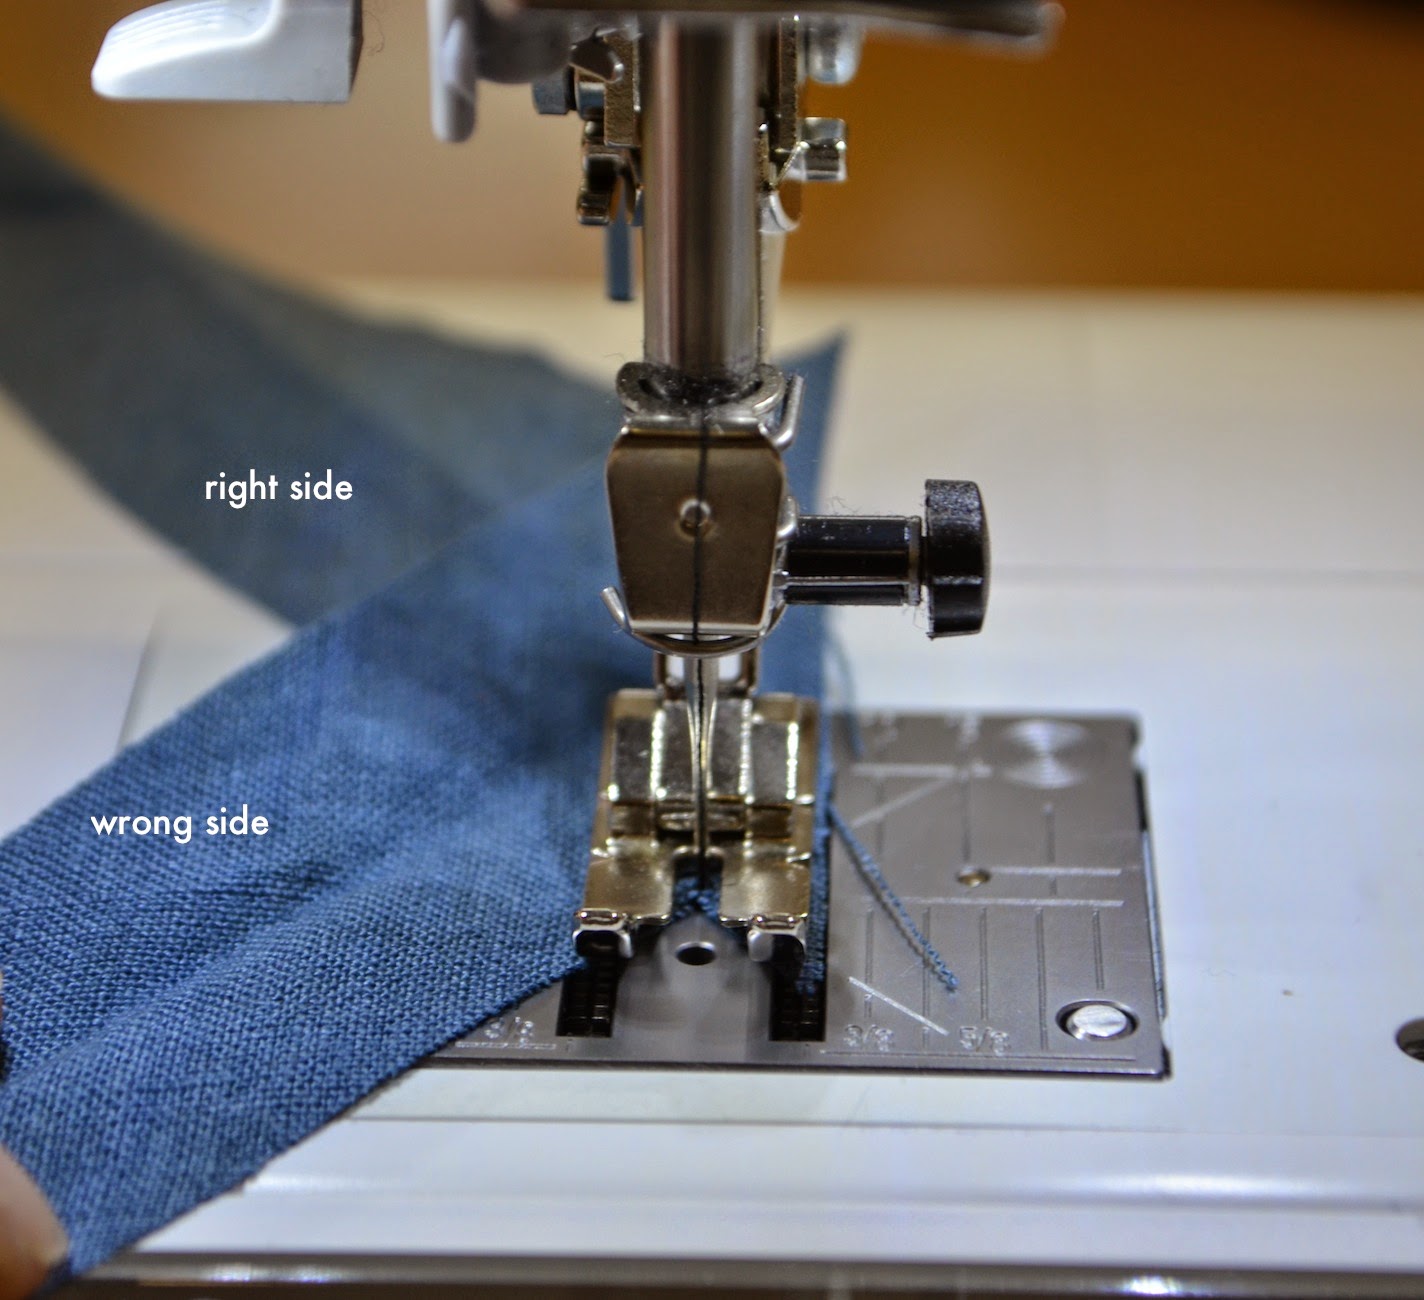
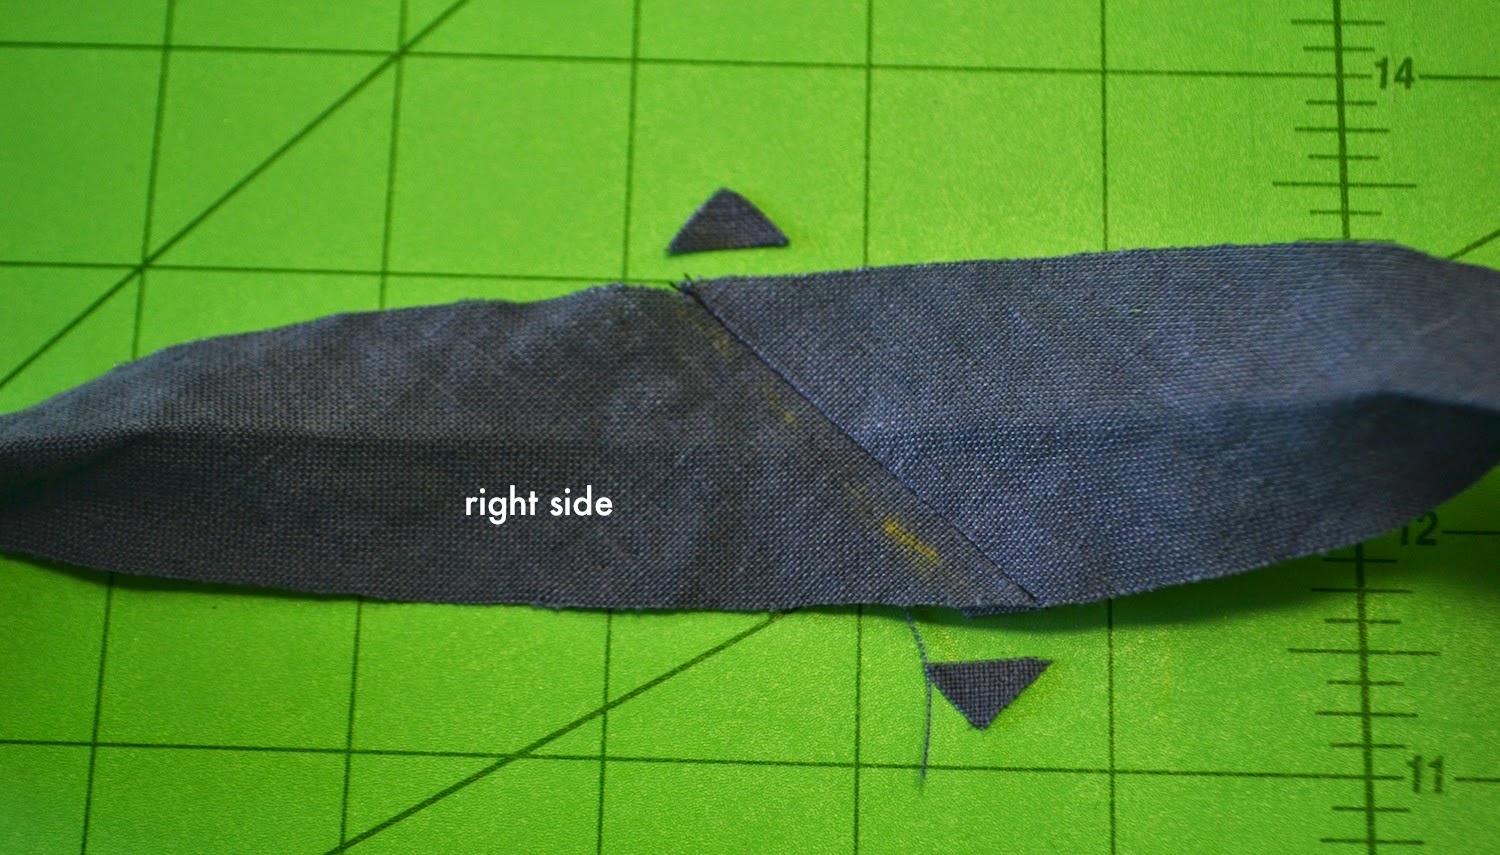
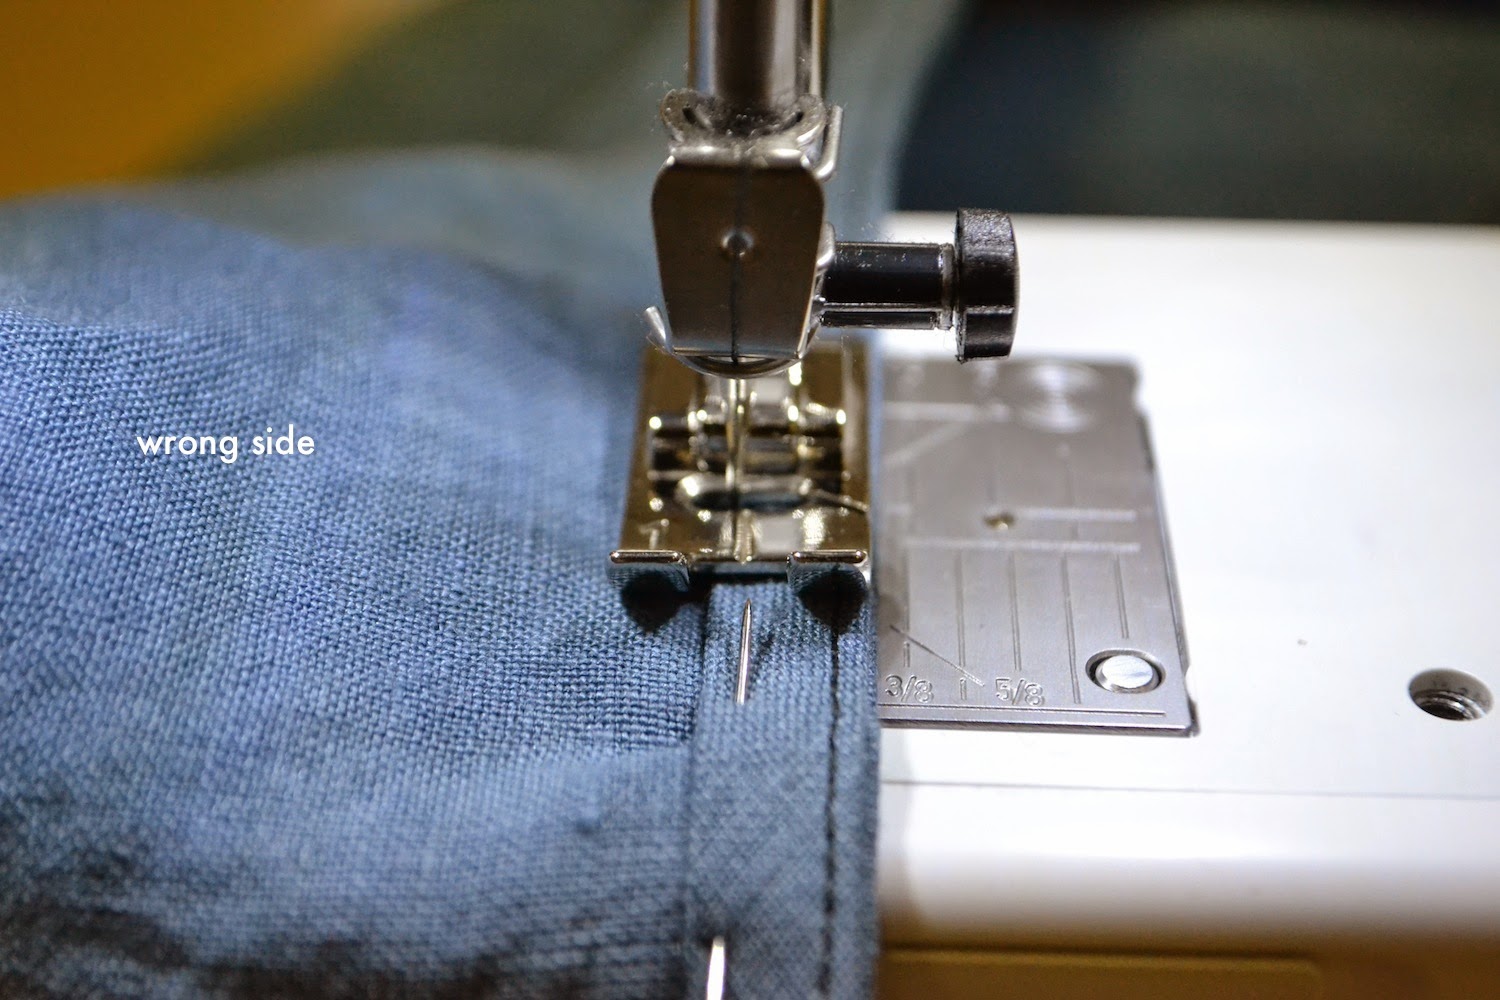
Place right sides of angled ends of bias binding together,


 Colette and Lisa collaborate to bring you this here Tessuti blog. Follow us to keep your finger on the pulse of new pattern releases, reviews, tips, techniques and a healthy dose of love and appreciation for all things fabric and sewing!


Very clear tutorial – thank you. Does anyone have any tips to help with the situation where the armscye edge looks flat but where the binding is sewn down looks tight causing the armscye to poke out a bit like a flange? Heck, was that as clear as mud? I'm having a lot of trouble getting a nice finish there and am about to abort future attempts!
I am having difficulty with the binding also. Seems the binding, once turned, has to cover a larger neckline area and will not lie flat. Help any suggestions.
Thanks so much for this tutorial – used it over the weekend twice and found it so much easier than my old method. VERY grateful!
This is wonderful, I have made two Eva dresses and used various YouTube sites to complete the bias binding (my first ever efforts at creating bias binding). So these steps even better. Thank you
I am trying to attach the bias to Eva (B) dress and having big problems trying to attach the neckline bias. You suggest I measure the neckline binding is the right length for the neckline!! Surely it should be right as I have cut it according to the pattern??
This tutorial is as clear as mud. I am having big problems attaching the bias to the neckline and the bias is NOT longer then required, and why pin it to then unpin it again??
Not impressed!!
Hi Janet,
When using self bias binding, all fabrics stretch differently from one another depending on weight, weave etc. So it’s always best to cut yoor bias binding longer, check measure it around your area and then cut and join together. We cannot cut the binding pattern pieces exactly as all fabrics used by our customers will vary. It’s always safest to cut longer and then remove any excess. This will save anyone who doesn’t have enough fabric to cut out again, if it isn’t correct in your chosen fabric. No issue at all with cutting it longer. It’s impossible to fit the bias exactly the same way in different fabrics that the Eva Dress has been made up since we released the pattern in 2103 (eg. cotton, linens, wool crepe, silk duppion, silk organza etc).
Regarding pinning and unpinning, we only ask that you unpin the area where the binding needs to be joined together (on the diagonal) after you have checked that you measured it around your area, using just the right amount of tension needed for your area to sit flat and not gape.
It’s just another way of doing things that you may not be used to, why not give it a try?
regards
Colette
Thank you -now I have the nicest bound neckline I’ve ever done.
Thanks for the lovely feedback Beate!
My first time using a Tessuti pattern; your instructions were amazing. The best I’ve ever used.
I have never attempted making my own bias tape. How much extra material would I need to make my own tape for neckline and armholes? If the material is flimsy, would I need to stabilize the material with iron facings? Thanks for any help.
Hi Patti,
We would recommend having an extra 50-60cm of fabric added to your meterage, in order to cut self bias binding.
No, we would not recommend to iron interfacing on bindings cut in flimsier fabrics. Just handle with care.
Thank you so much for this excellent tutorial. I successfully applied the neck binding to the Bella dress (in linen), and it turned out beautifully!
Yay!
I have just made a lovely bound neckline on a heavy linen version of the Bella dress. First time I’ve done it using a ready to fit closed circle and it worked really well, thank you. Now to finish the rest of the dress!
That’s wonderful to hear!
Hi! I bought a pattern from you that has this neck binding thing and after going in here to get help with how to do it, I still don’t get it. You should have a tutorial video so you can see how you flip and where to sew exactly, because the pictures don’t help me, I’m sorry. My main language are not English but I do understand the rest of the pattern but this neckline tutorial was not good and didn’t help me at all.