
A How To: Print-at-home and Copy Shop patterns
For many of our pattern buyers, the print-at-home PDF version can be a great source of bamboozlement if you’ve never been down that pattern-buying road before. With that in mind, we’ve put together this blog post for those of you who might like some more info on how it’s done. Don’t worry – while it can sometimes be a little time-consuming (especially the first time), there are great sewing pleasures to be had with this instantaneous method of purchasing patterns.
All our patterns are available to purchase and immediately download from the pattern section in our online shop.
Before you buy a digital pattern, be sure you have a PDF viewer. Adobe Reader is the most popular option so if you don’t already have this, you can download and install it for free at https://get.adobe.com/reader/.
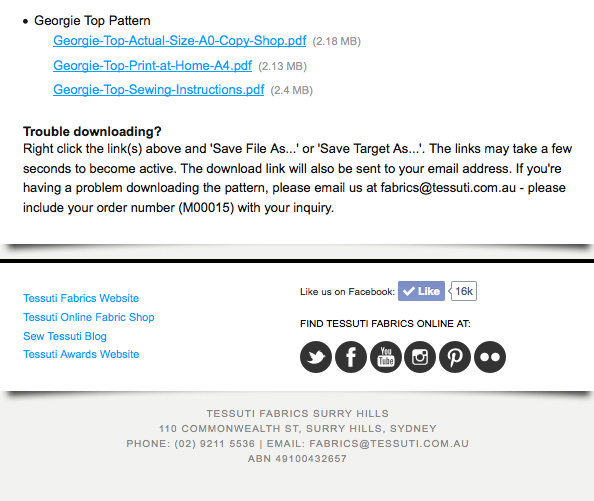
Once you’ve completed your purchase, you will receive an email like the one you see below. If you can’t find it, check your Spam/Junk folder.

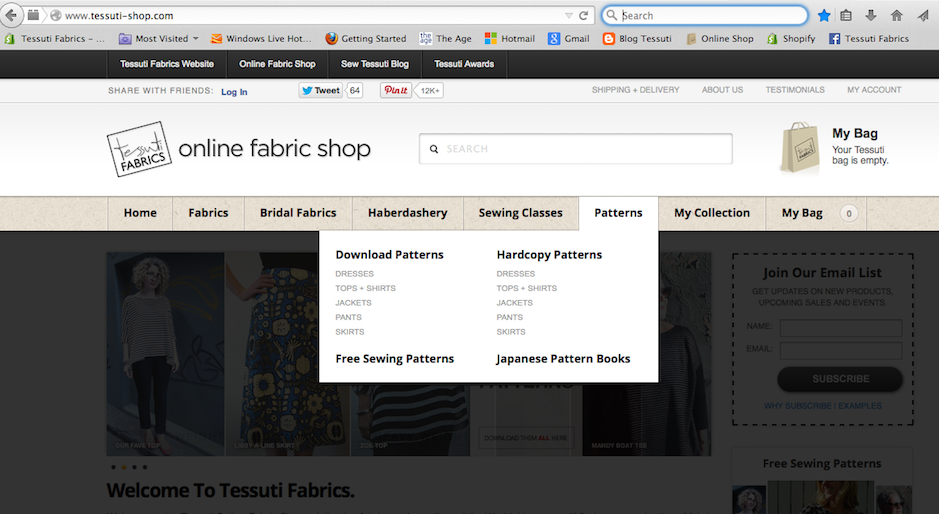
Click on the link which will take you to a screen that looks like this:
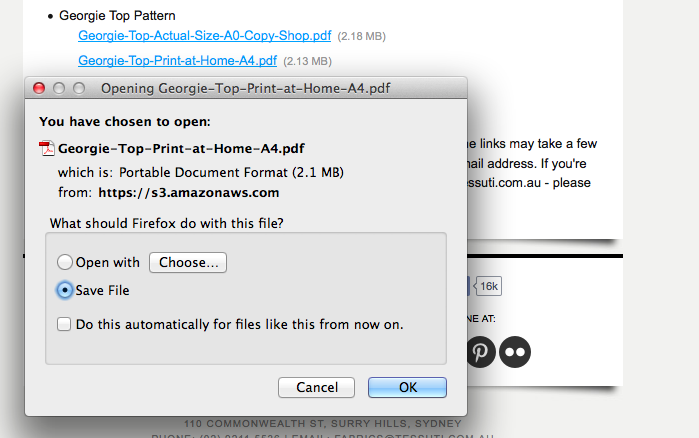
Immediately save your preferred file/s to your desktop or somewhere easy to find. Depending on your software of choice, the ‘Save’ screen may appear differently to that pictured below.
I’ve accumulated quite a few PDF patterns over the years so it’s a good idea to create a folder so that all your digital patterns can be saved to one place.
Next up, getting ready to print. Make absolutely sure you set your file to print at 100%. If you have any of the other features turned on, your pattern will print at the wrong scale.

To ensure that your settings are correct, print out your test square page first and check that it measures accurately at 10cm x 10cm.

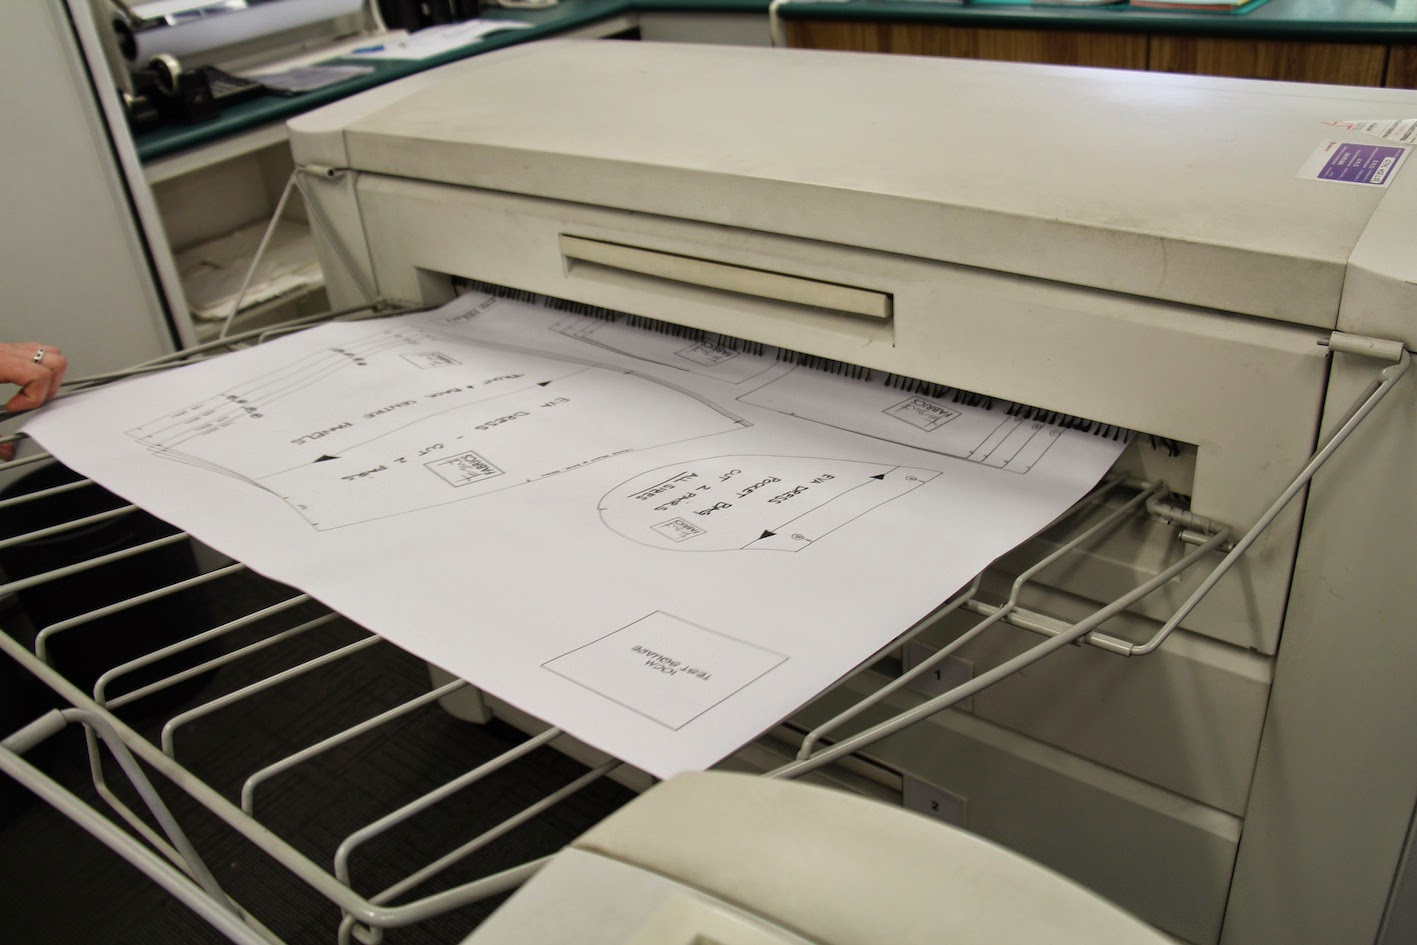
When it comes to print-at-home patterns, love (and patience!) can sometimes be lost. Especially when the pattern is a big one like our Lily and Eva dresses and the Ola Tunic Top. When you buy our digital patterns, you’ll always get two pattern files – a print-at-home copy for the method I’ve shown here AND an actual size copy shop version. If cutting and pasting induces great feelings of fear/dread/repulsion/impatience/scorn, then go with the copy shop version. All you need to do is find a print shop that can do plan printing (for architects, town planners etc.) on a toner based large format plan printer. You’ll need to provide them with the necessary sheet sizing and this info can all be found on the pattern product page. When looking for a print shop, do shop around! I’ve spoken to customers who’ve paid as little as $6 and as much as $20 per sheet!

If you have any more printing tips/links or can recommend some reasonable print shops, please feel free to share in our comments section.

 Colette and Lisa collaborate to bring you this here Tessuti blog. Follow us to keep your finger on the pulse of new pattern releases, reviews, tips, techniques and a healthy dose of love and appreciation for all things fabric and sewing!


$4.00 per page black ink size AO at Officeworks.
Glad that there is a copy-shop option as I don't have a printer at home (it's on its last legs and prints wonky). I have printed some patterns at Officeworks for $4 at A0 size like Angela above.
My local copy shop charges $0.75 per square foot. Are the dimensions of the page available on the pattern or sewing instructions? Thanks so much.
Hi Martha, all of the pattern product pages indicated the sheet sizes, most are standard sheet sizes like A0 and A1 however there are others that include sheet sizes that are outside of the standard measurements. All is detailed on their individual pages in the blurb.
On our latest Jane Dress pattern for instance:
You will also receive Print At Copy Shop version file (note: there are 2 files that need to be printed – Sheet 1 is A0 sheet size, Sheet 2 is A0 sheet size and Sheet 3 is A0 sheet size) along with the sewing instructions file (so that you can print these at home). Ensure that all printing is done on 100% Scale (or Full Scale).
hope that has answered your question 🙂
PS. also most printers will tell what sheet size by the file. But it's always best to check online before hand and to let them know. All printing must be done at 100%
thanks for emailing the patterns. I need 16 in the waist but 12-14 in hips and legs. Is it ok to cut the waist on the size 16 and then whittle down to 12-14?
Hi Margaret – Yes you can go by the size 16 waist then create a nice tapered line down to the hip size you require.
This is so cute. I do wish that the line drawings were easier to locate.
I have purchased both Felicia pinafore and Coni Tunic and notice for each design there are Sheet 1 & 2 for A4 print at home files. what is the difference between Sheet1 and Sheet 2? do I need to print both files or just one.
Hi Helen. Yes, you need to print both sheets.
I bought 4 patterns. Some have the option to “print US letter” files and some don’t. I know that A4 sizing is not an available size on Canadian/US printers. Will the patterns print out on a North American printer correctly if an option for US letter isn’t included in the pattern files?
Hi Dianne. Apologies for the delayed reply. as we state on all our product pages, all Tessuti patterns can be printed on both A4 and US letter size paper. The only difference is that when printed on US Letter size paper the bottom margin will be wider as on our A4 sheets (A4 sheets are longer and slightly narrower than US Letter paper). This will not compromise the pattern tile at all so you can print the Print At Home file on US Letter Size paper. Just ensure that your printer is set at 100%. When the printer is correctly set to print at 100% , Full Scale or Actual Size (all printers vary in their setup), you will see that the test square will measure correctly and the pattern will print to the correct scale.
I am so relieved to find this information (in your reply to someone else’s question). I just bought the Bella dress download, and I want to sew it up today. But I panicked when I saw the file specified A4, and I’m in the US. I will go ahead and print it. Thank you!
I had to print my pattern at 105% at get the test square to be 10 cm . I have concerns that I will lose measurements (length ) at the edges of pattern.
What is the solution for printing at home if the test square comes up 9 cm ?
You should always be printing at 100% scale. Are you printing from a laptop/desktop and using the latest version of Adobe Reader? Please email us fabrics@tessuti.com.au if you continue to have difficulties
I can’t see how I can create an account!
Hi Isabel. No need to create an account. Just add the pattern/fabric to your cart and check out as you would a normal purchase
Hi There,
Just purchased the Bella Dress pattern today and wanted the free apron pattern as well. I live in Texas USA and our
paper sizes for the Large Plan Printers at our copy shops are different. Can I still go to these copy shops to print out
your patterns and if so what instructions do I need to tell them. I went today and Office Max/Depot had these large sizes of paper 12 in X 18 in , 18 in X 24 in , 24 in X 36 in , 30 in X 42 in …. Will any of these work and if so which
one ? I really would like to print it on one large sheet of paper if possible. Please advise. Thank you.
Hi Laura. The actual size file name indicates the pattern sheet size and most large-scale printers should be able to accomodate the sizing. You can view the imperial measurements here
Do you just put your file onto a USB and take it to the copy shop? Thank you
Yes Sue. Alternatively, you can just email the files to the printer.
What do I need to take to Officeworks to have the pattern printed off there ?
Hi Kate. You can download the Copy Shop files and email them directly to Officeworks.
Hi! Thanks so much for the information. I’m in melbourne and struggling to find a good option for printing either A4 or A0. I have tried the self serve at officeworks which can do A4 printing, but it is not possible to choose scaling options. And A0 seems now to be $9 per page, which is getting a bit more expensive… although still reasonable… but I am just hoping that someone here has had better luck and can give me some advice! Thanks again for your blog – brilliant!
Oh my goodness… I have just found the $4.32 option per page! If I had a dollar for every time that I found a long-looked-for answer only after asking the question ‘out loud’….. Well I could spend all my days doing sewing and other hobbies…. Anyway, just in case anyone else is having trouble finding it, look at Officeworks website under Services> Print & Copy> Posters & Plans> Plans. Thanks for helping with my process! 😀
How did you make sure it was printed to the right size. AO isn’t an option that I am finding. maybe I am missing something
Hi Rachel. You’ll need to take it to a printer that does large scale format printing. You can view all the A series measurements here
How do I print the free pinafore apron pattern without using my credit card?
no need to use your credit card if you are ordering the free PDF version. But you will need to order the pattern via the online store and add in your email details so that we can send you the link to the pattern files via email.
Select the print at home – loads into your cart with no cost.
I tried to print out the pattern for the Mandy Boat Tee Pattern. The test square came out to 9.5cm instead of 10. No
Hi Kathleen. It should definitely be printing out at 10cm. Please read through our pattern download tips here
I also have issues with only my Tessuti patterns. The test square comes out at 9cm. I use exactly the same method I use for all other pdf patterns but for some reason yours always come out small. It is preventing me from making them.
Hi Lee,
If your test square is measuring 9cm it means that your printer has not been set correctly to print at 100% scale.
It sounds like it may be on the default setting ‘Shrink To Fit’ , each printer setup looks different so please check your printer manual. The test square must measure 10cm for the pattern to print to scale.
If your printer still will not print to scale, we recommend trying it on another printer (work or friends/family members printer) or taking/emailing it to a local copy shop and have them print it for you.
Plan Make Do in Melbourne now print A0 sheets in black and white or colour for the one flat price of $3 a sheet, and they are sewists themselves so they check the scaling of the print and make sure everything is perfect. Highly recommend them.
MDM Copy Centre in Carlton Victoria. They charge $2 each for an A0 Black and white and they will post it out to you. They are fantastic, been going there for years. If you are interstate, they will even post it to you. Amazing!!!!!
i am trying to take to a print shop but they dont know what size A0 is. can anyone help me on this?
Hi Rachel. You can see page dimensions here. Hope that helps, if you have any further questions, please email us fabrics@tessuti.com.au
Hi,
do your patterns have layers in Adobe so that I can hide all the sizes that I don’t need and only see the lines for my size?
thank you,
Olia
Hi Olia. No, we don’t offer layering at this stage
How much fabric do i need for this pattern? I am BRAND new to sewing and this will be the first piece I ever sew.
Which pattern are you referring to Monique? Each of our product pages online lists the meterage in the chart. Refer to the third or fourth image to find it.