Tutorial – How to attach your invisible zipper to a facing
November 14, 2015
Following on from our NEW invisible zipper tutorial, here’s how to attach your zipper to a facing with your sewing machine like a pro! NOTE: This tutorial is demonstrating a side invisible zipper (as used in our Chloe Pant and Libby A-line Skirt patterns).
Attaching Your Facing to an Invisible Zipper.
On wrong side of garment, lay wrong side of front
and back facings to waistline, matching up
notches.
and back facings to waistline, matching up
notches.
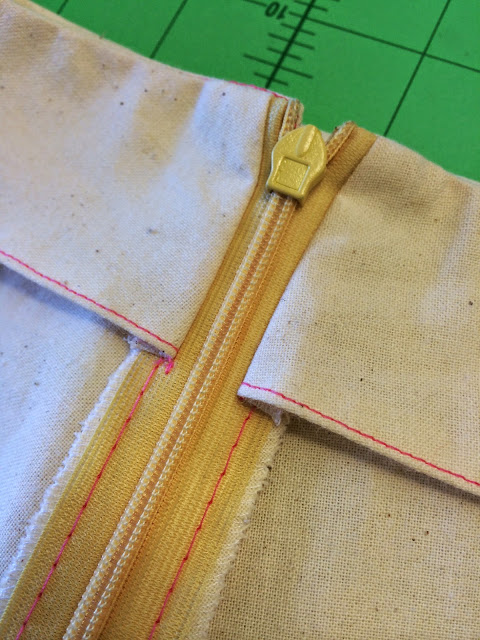
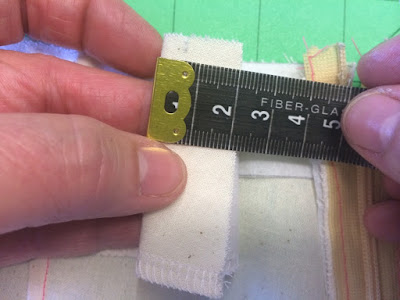
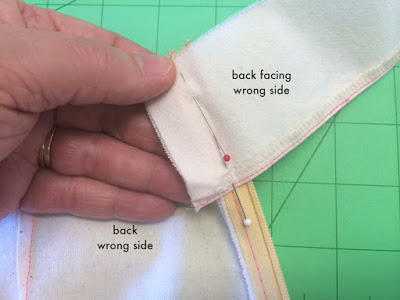
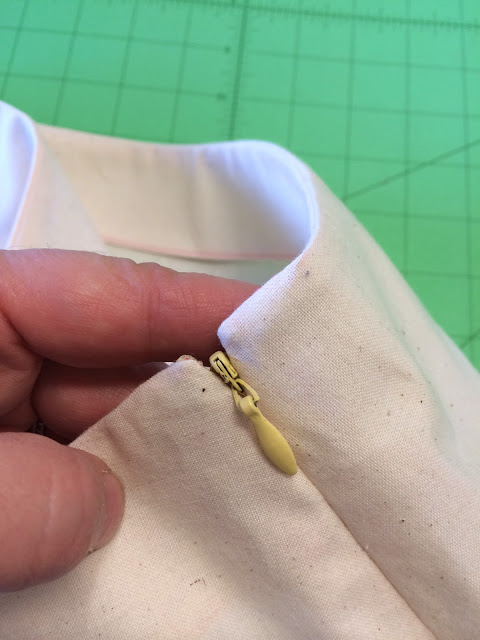
Fold back side seam edge of facing (at zipper
tape end) 3⁄4″ or 2cm towards wrong side of facing.
Pin in place on zipper tape.
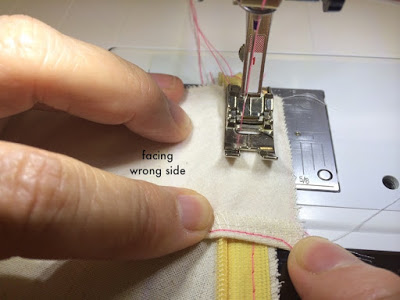
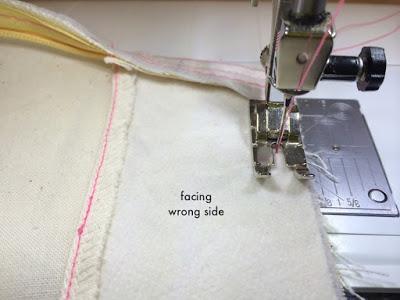
Next, reach in underneath facing, holding facing seam allowance to garment and zipper seam allowance.
Move needle position to the far left and stitch facing in place to garment seam allowance. (Note: Your machine foot should be butted up to zipper teeth)
Note: check that you have lined up facing waistline to garment waistline edge. Repeat on other side of zipper opening/facing with needle to the far right.
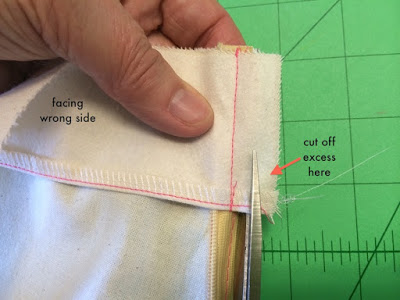
Cut off exposed tops of zipper tape and excess seam allowance on facing edges.
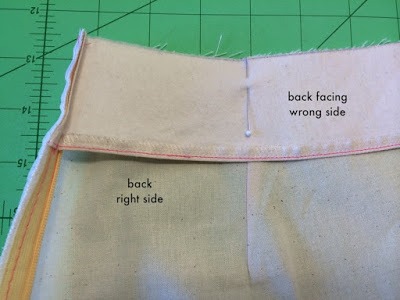
Next, with front and back facings turned towards the wrong side of garment you should have the lower edge of the facings lined up evenly.
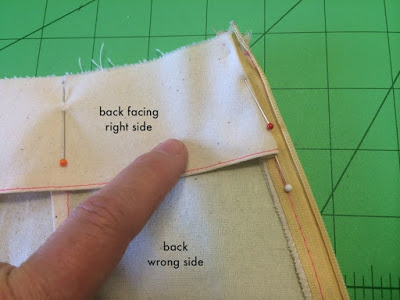
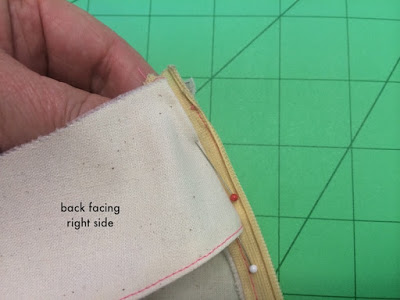
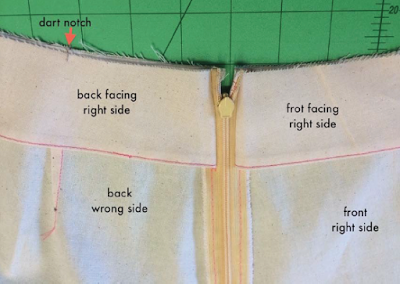
To finish off the waistline, open up zipper and pin right sides of garment and facings together. Pin in place matching up centre front and back, dart notches and closed side seam.
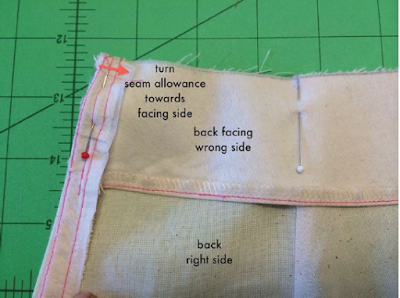
Make sure to turn seam allowance towards facing side and pin in place.
Sew the facing to the waistline taking the correct waist seam allowance, starting at one zipper opening and finishing at the other side of opening.
Tear away Vilene shields at waistline edge ( if you’ve use vilene shields on the waistline). Turn facing out away from garment and understitch on the facing, making sure to catch the seam allowance at the back of stitching.
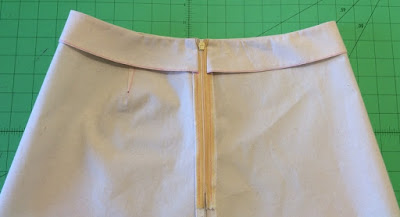
Turn facing and zipper in towards the wrong side of skirt. You’re done!



 Colette and Lisa collaborate to bring you this here Tessuti blog. Follow us to keep your finger on the pulse of new pattern releases, reviews, tips, techniques and a healthy dose of love and appreciation for all things fabric and sewing!


Thank you – this process always seems to perplex me, and this looks like a better method than what I had been using.
Thanks Jen L, it always perplexed me too, until I was shown this method by an awesome sewing teacher. Happy days!!!
I do mine a little different from your method. I always like to know more than one way of doing something; I will give this one a try as well. I think your method may be a little smoother. Thanks for sharing this information. I have book marked this tututorial.
Thanks Linda it's great to get your feedback! Yes that's the best thing about sewing, there's always another method to learn and try.
First ever insertion of an invisible zip and this tutorial was a fabulous help, thank you! Initially, I hadn't turned my seam allowance to the facing side (4th last pic above) and wondered why it looked a bit messy, but on correcting, it looks much better. I really enjoy reading all the blogs.
Love it! Thanks!
Cut zipper tabs off w/hot scissor blades or soldering iron to bond threads to keep them from raveling in allowing it to completely close as well as eliminating the bulk from folding it over to incorporate into sewing. Hope this helps!
Hi there. Thanks for the thorough tutorial Just a question…does the 2cm folded under on facing remain constant regardless of seam allowances. fyi I am constructing a garment with 1cm seam allowances. Cheers
Hi Frances,
Our sample includes a 1/2″ (1.27cm) seam allowance, so yours will be smaller, roughtly 1.7cm fold under if your seam allowance is 1cm.