
Ines Shirt – Pocket Tutorial

Our latest pattern – the Ines Shirt – features a neat little ‘floating’ patch pocket that is not your average patch pocket. To help guide you through the sewing process, we’ve put together this step-by-step tutorial which shows – in a little more clarity – how to get your Ines pocket just right. Alternatively, you might like to use this tutorial to create a similar pocket style on another garment that you’re making!
If you’re following along with the Ines Shirt instruction booklet, this tutorial takes up at Step 4 where you start to prepare and sew the pocket. And if you’re making your own, the pattern piece dimensions are 9″ x 10½” or 23cm x 26.5cm.
Let’s go!
Step 4 – Prepare pocket: At hem notch A, fold top of pocket 1¼” towards the wrong side. Press.

On the right side of your pocket, edgestitch at folded edge.

At hem notch B, turn top of pocket again 1¼” towards wrong side. Press but do NOT stitch in place.

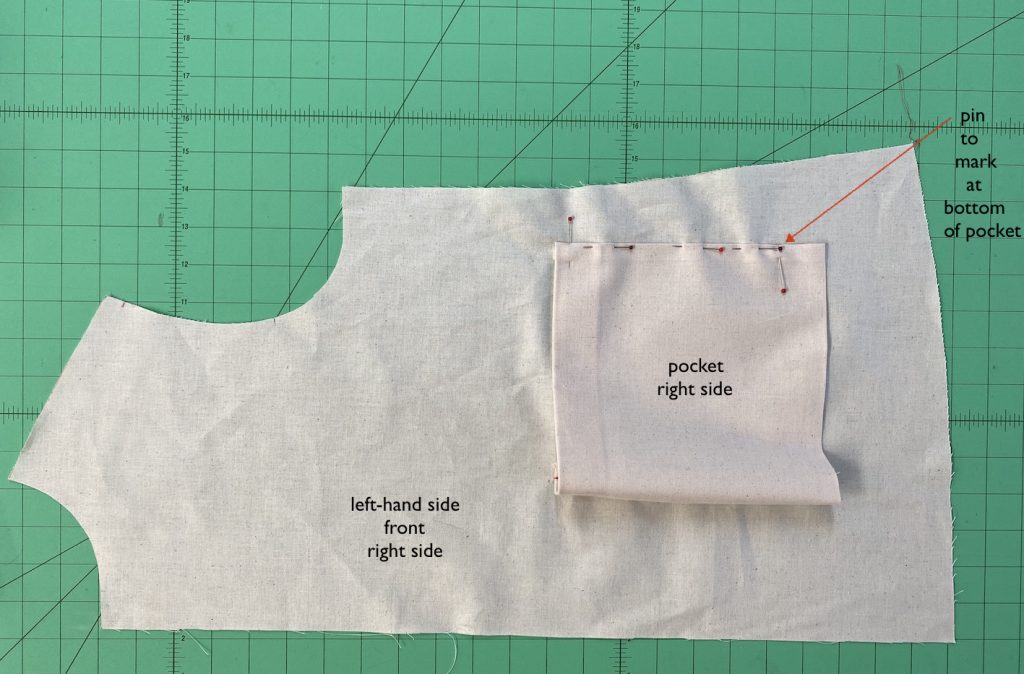
Press sides and bottom of pocket ½” towards wrong side. Using chalk/erasable marker pen or pin, mark side edges of pocket 1¼” up from bottom edge.

Step 5 – Attach pocket to left-hand-side front: This pocket has pleats at the side and bottom edges so the finished pocket appears to float. Using the pocket template provided in the pattern and lining up with the pocket markings on the right side of left-hand side front, mark the side and bottom edges of pocket with chalk/erasable marker pen.

With right sides facing, place your pocket on the left-hand side front with the pocket to the centre front side of the pocket template marking. Open the folded edge and pin the pocket to overlap the template marking line closest to centre front by ½”. The fold line will be on the template marking line. Line up the folded top edge of your pocket with the top of the template marking. The bottom of the template marking will be approximately 5/8″ past the mark near the bottom of pocket.

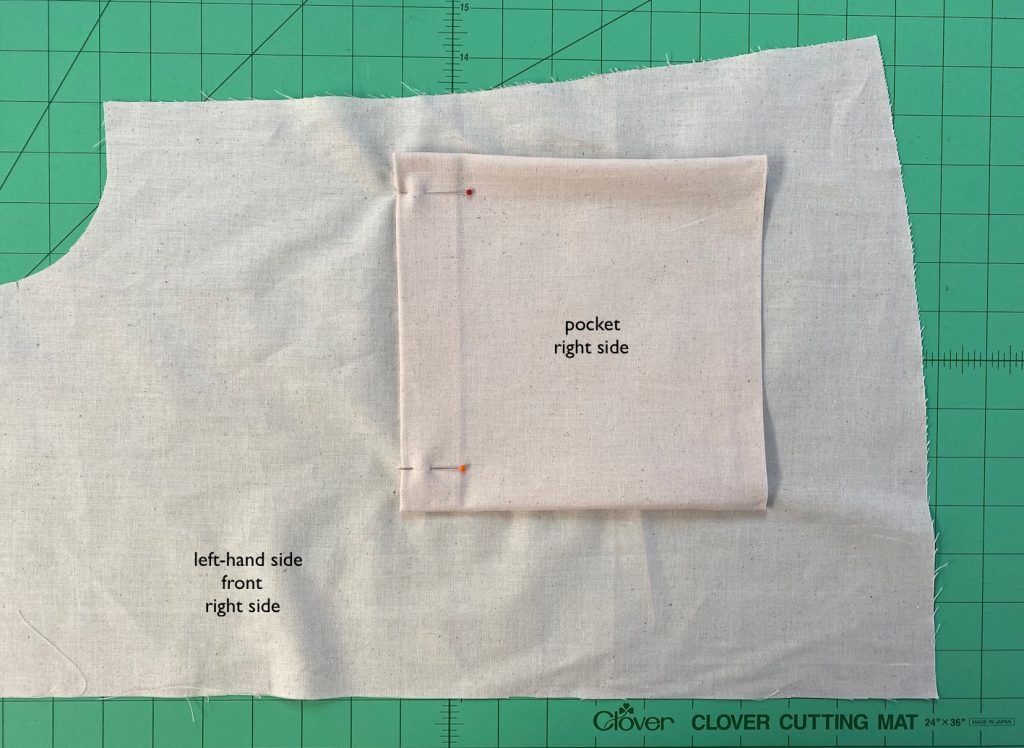
Starting at the folded top edge of your pocket, sew ½” seam allowance and finish at mark near the bottom of pocket. Take care that you do not sew past this point). Backstitch at the beginning and end.


Step 6 – Attach opposite outer edge of pocket to front: Turn wrong side of your pocket back to face the right side of front. Line up the fold of the other side of your pocket with the template marking closest to the side seam. Pin in place. Note that the pocket will not be laying flat.

Starting at the top edge of your pocket, edgestitch along the folded side edge and finish at the mark at the bottom of your pocket. Backstitch at beginning and end.


Now that pocket has been sewn in place at outer edges, distribute the excess of pocket evenly to both sides of pocket marking. This will create a pleat at the outer edges of your pocket and – depending on your fabric – the pleat will hang over the pocket marking by approximately 3/8″.

At the top edges of the pocket, tuck in the corners of the seam and pin in place.


Step 7 – Attach bottom edge patch pocket to front: Line up the folded bottom edge of pocket with the bottom line of pocket template marking (close to the hem). Pin in place. Note that, because of pleat at sides, the sides of the pocket will extend approximately 3/8″ past the template marking.

Edgestitch along folded bottom edge of pocket. Backstitch at beginning and end.


Create a pleat at the bottom edge of the pocket, just as you’ve done the pocket sides. Press.
Step 8 – Reinforce top corners of pocket: Reinforce the top corners and hold pleats in place by staystitching 3/8″ across top edge of pockets. Backstitch at beginning and end.


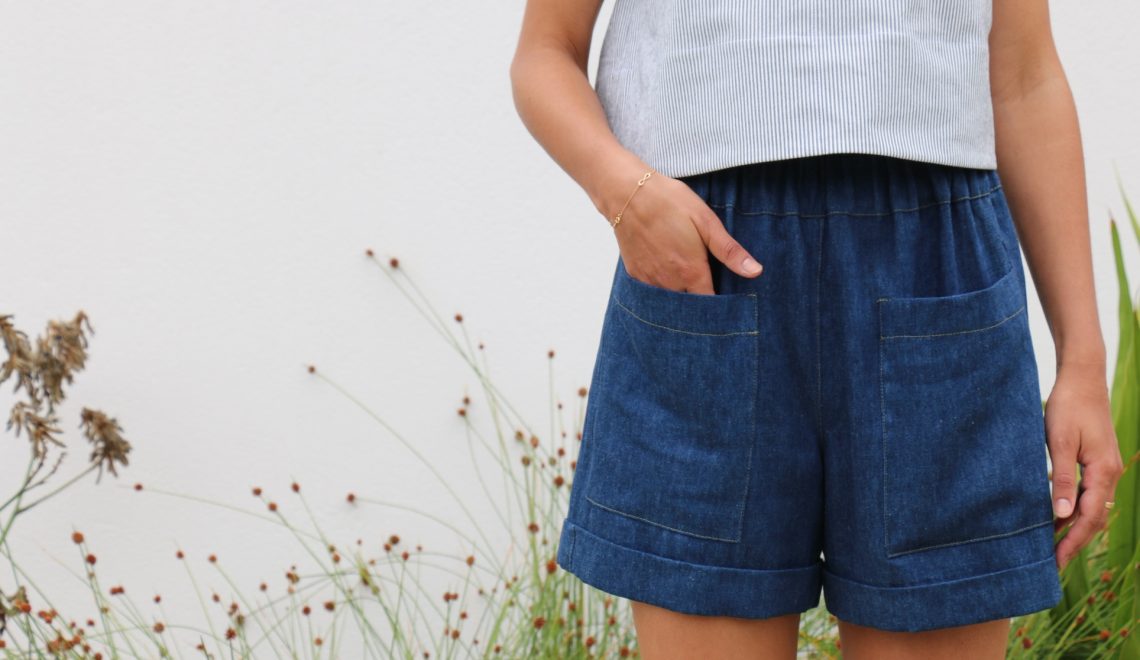
And your BEAUTIFUL pocket is done!


We hope you enjoy this simple variation on the regular ‘patch’ pocket and if you really, really love it, you might even consider adding a pocket to the other side as well.

 Colette and Lisa collaborate to bring you this here Tessuti blog. Follow us to keep your finger on the pulse of new pattern releases, reviews, tips, techniques and a healthy dose of love and appreciation for all things fabric and sewing!


Love the pattern, but I really love that little measuring device that’s pictured. How can I get one like that?
Hi Laura,
We are waiting on more stock of this measuring gauge from our supplier . Please email us at fabrics@tessuti.com.au if you would like to be notified
Hi Laura – we sell them online here and they’re a fantastic little tool! Currently out of stock but expecting more soon.
I am getting ready to add a pocket to a garment and will definitely try this method. I have that measuring tool and don’t use it. Thanks for sharing and inspiring me to try something new.
Hi there, I am just making my Ines shirt, love the pattern!
I (think I) have followed instructions to attach the pockets, but due to stopping the side seams 5/8” up from the bottom edge I have little unstitched gaps remaining in the corners of the pockets. Is this as intended? Is there any way to fix this? Thanks for any help.
Hi Jacque,
Apologies for the late reply. Yes that is absolutely what we have on our sample. It’s no issue at all, you will not see this.
Can’t wait to get started on this pattern! Where can I find the instructions on sewing the pattern?
Hi Jean. You can purchase the Ines Shirt pattern here. This includes both pattern and instructions.
I have made a toile of this pattern and managed pocket just fine. I am now making in a lovely Liberty lawn, and am having trouble with attaching bottom of pocket. I have 3/4” extending past sewn side edges instead of only 3/8”. What can I do, as can’t sew like it is.