
Tutorial :: Catching the Oslo Coat lining and hems together
 We’ve had a few emails asking for more (also, clearer) photos for Step 23 in our Oslo Coat instructions. This step details where you need to connect the hem of the coat and secure it in place to the coat seams. And it’s a really important step if you want to give your coat an even and professional looking hem finish. If you’ve never made a fully lined coat or jacket before, this part can be a little tricky so if you’re sewing (or plan on sewing) our Oslo Coat, read on!
For the purpose of being super clear in this tutorial, we’ve cut the coat in natural calico, the lining in contrast blue and we’ve used a contrast stitching as well. Let’s go…
Step 23 – Catch hems and facing edges together: Before bagging coat out to the right side, turn back coat hem 2″ up (at red notches) towards coat side, connecting hems to the corresponding seam allowance points.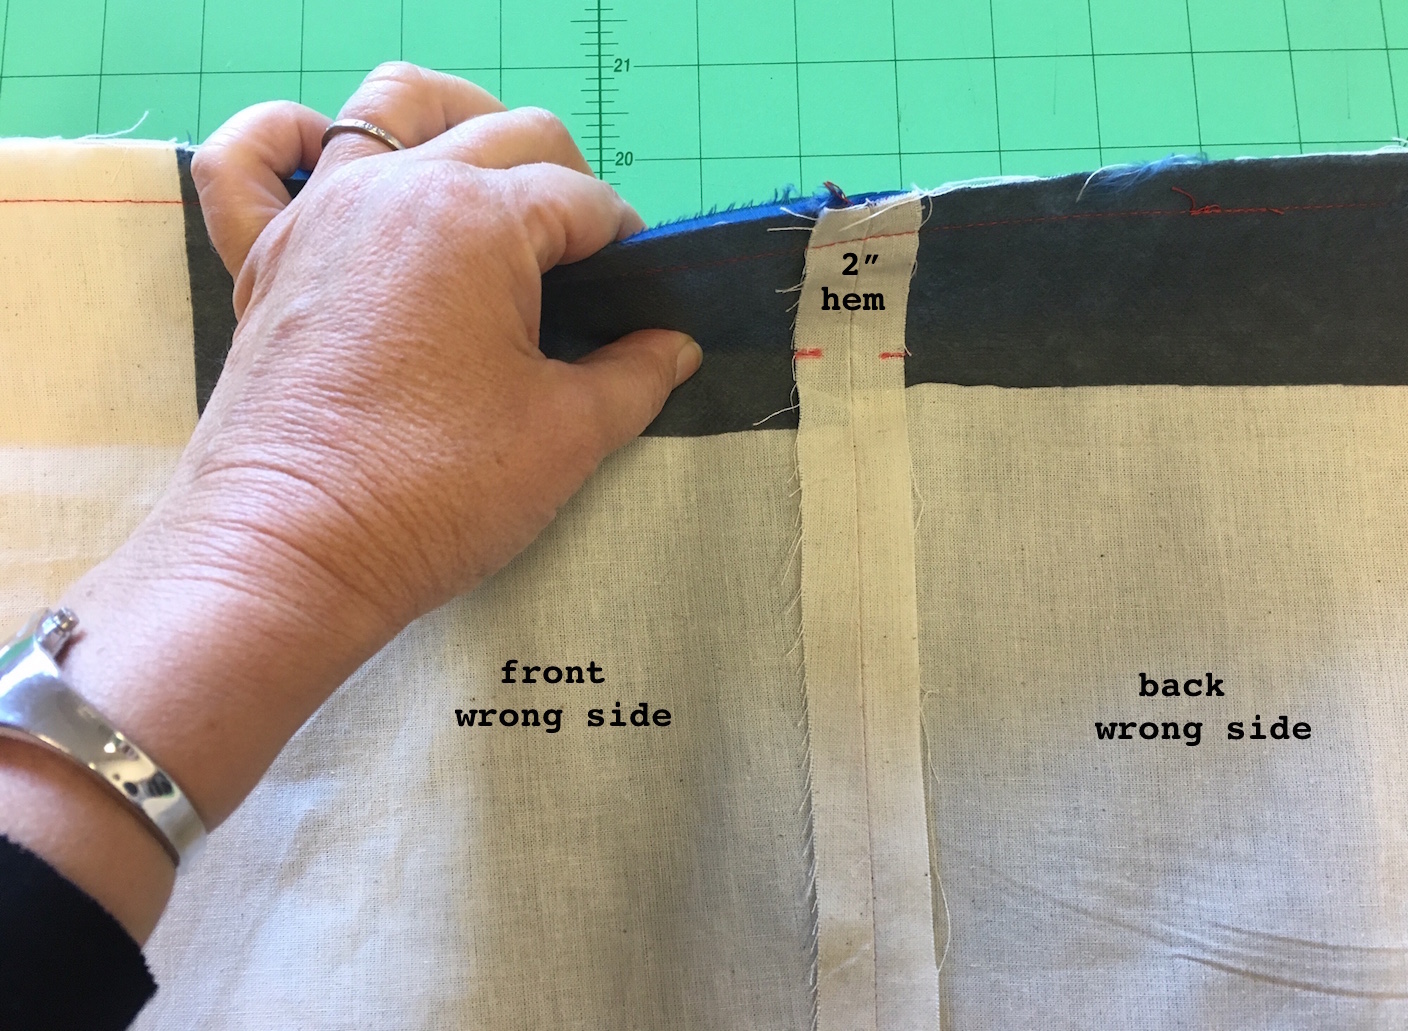
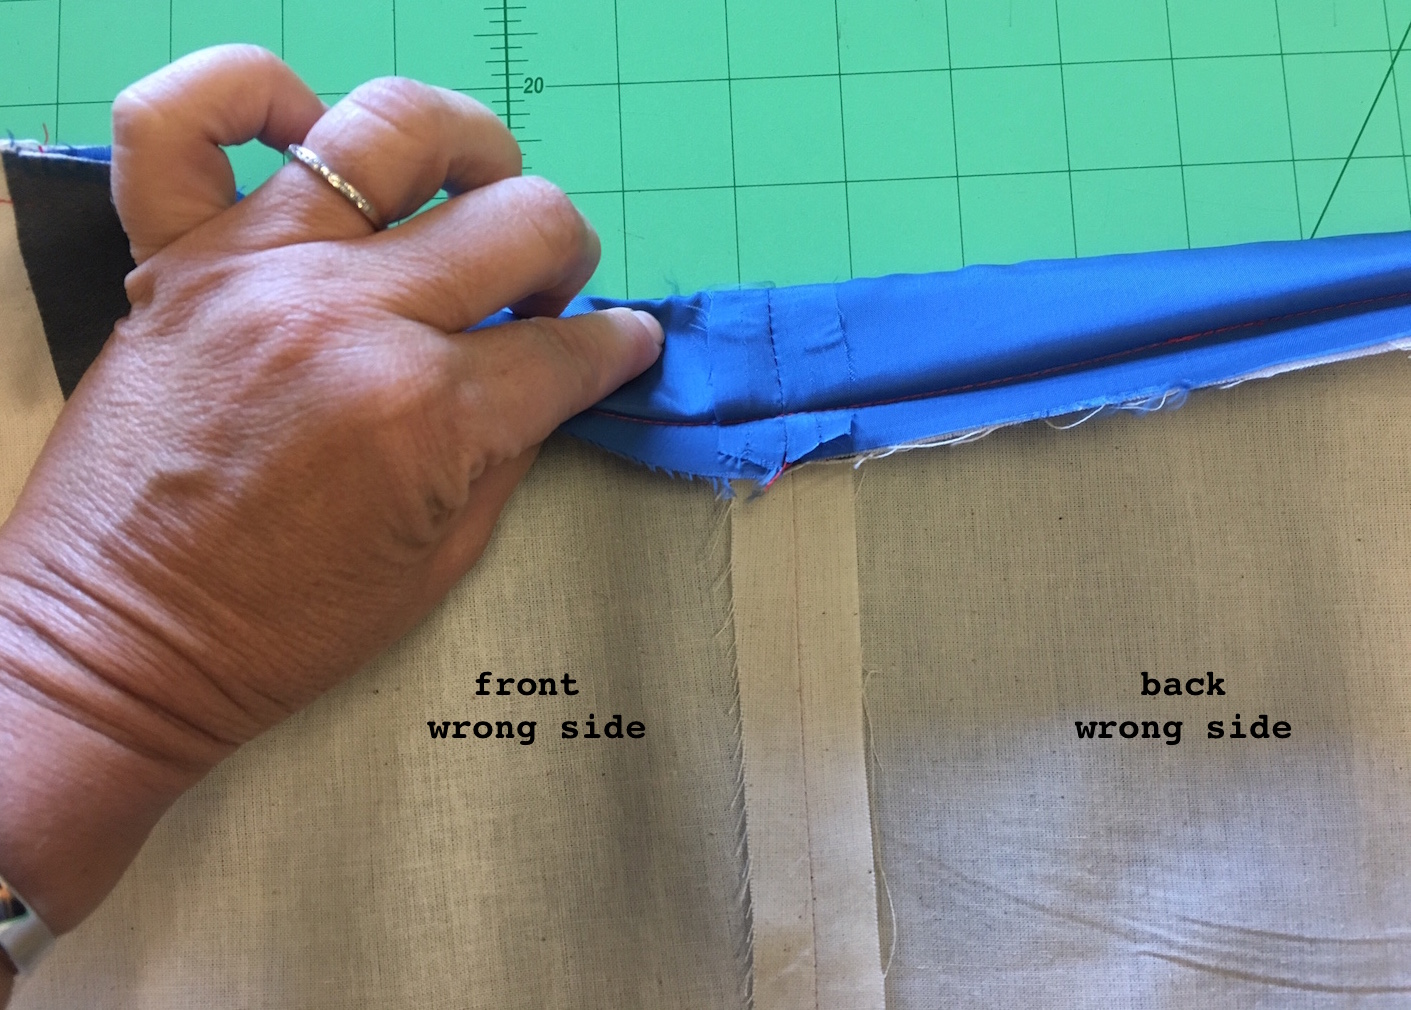 Baste stitch hem edge to the open side seam allowance.
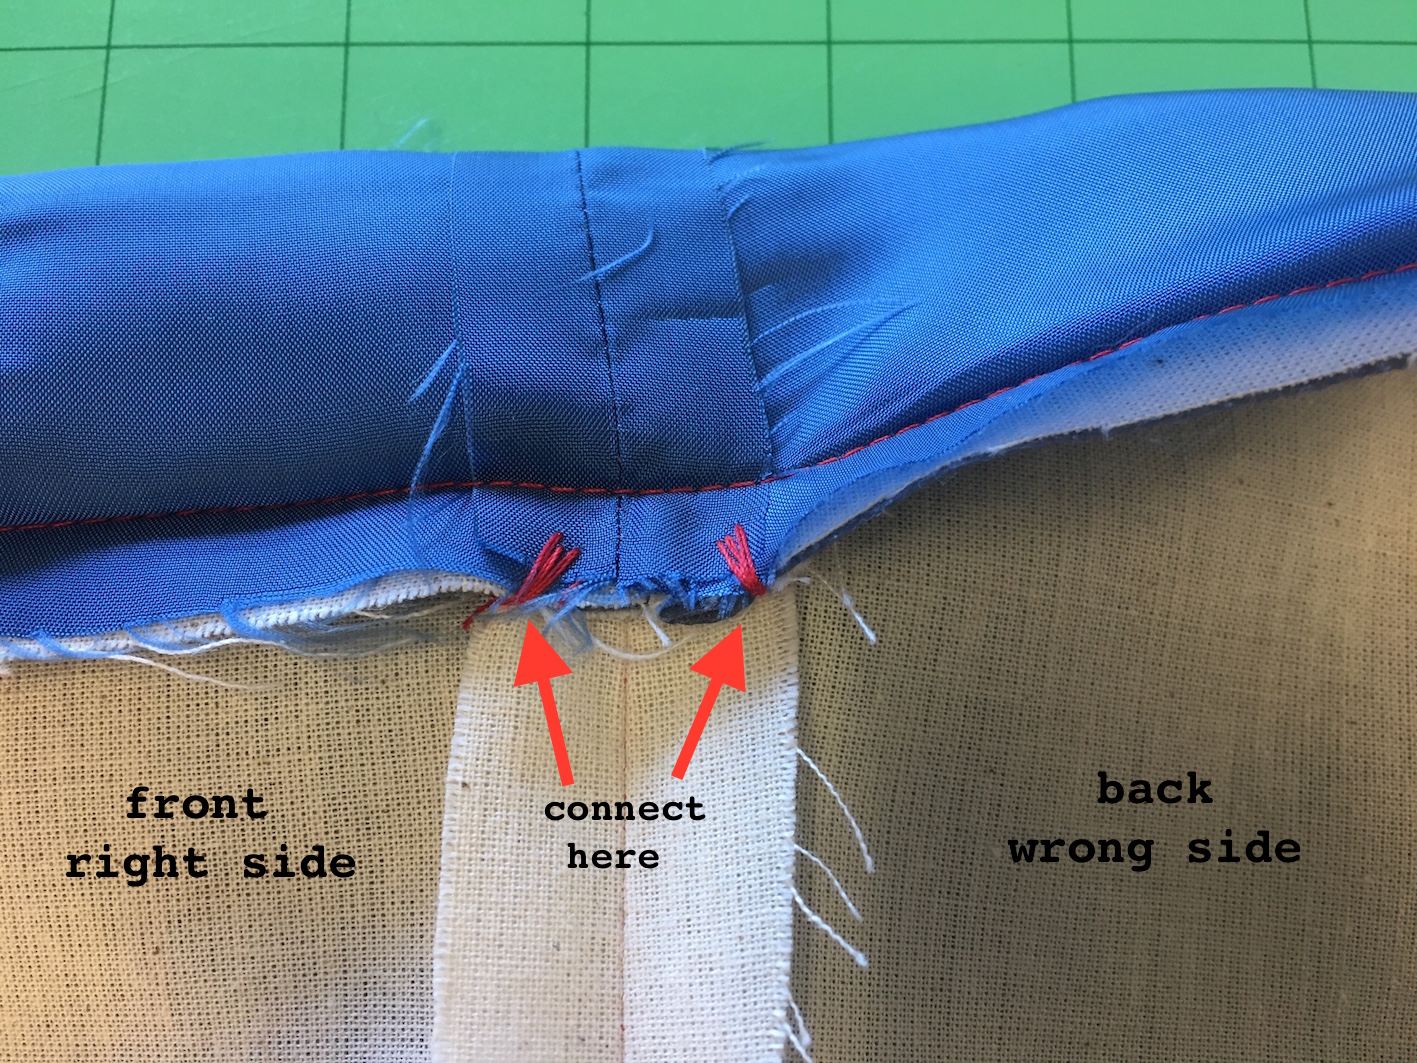
 As there is no seam allowance at centre back of coat, we recommend to catch centre back lining edge (like a blind hem) to centre back with just a few baste stitches to the coating.
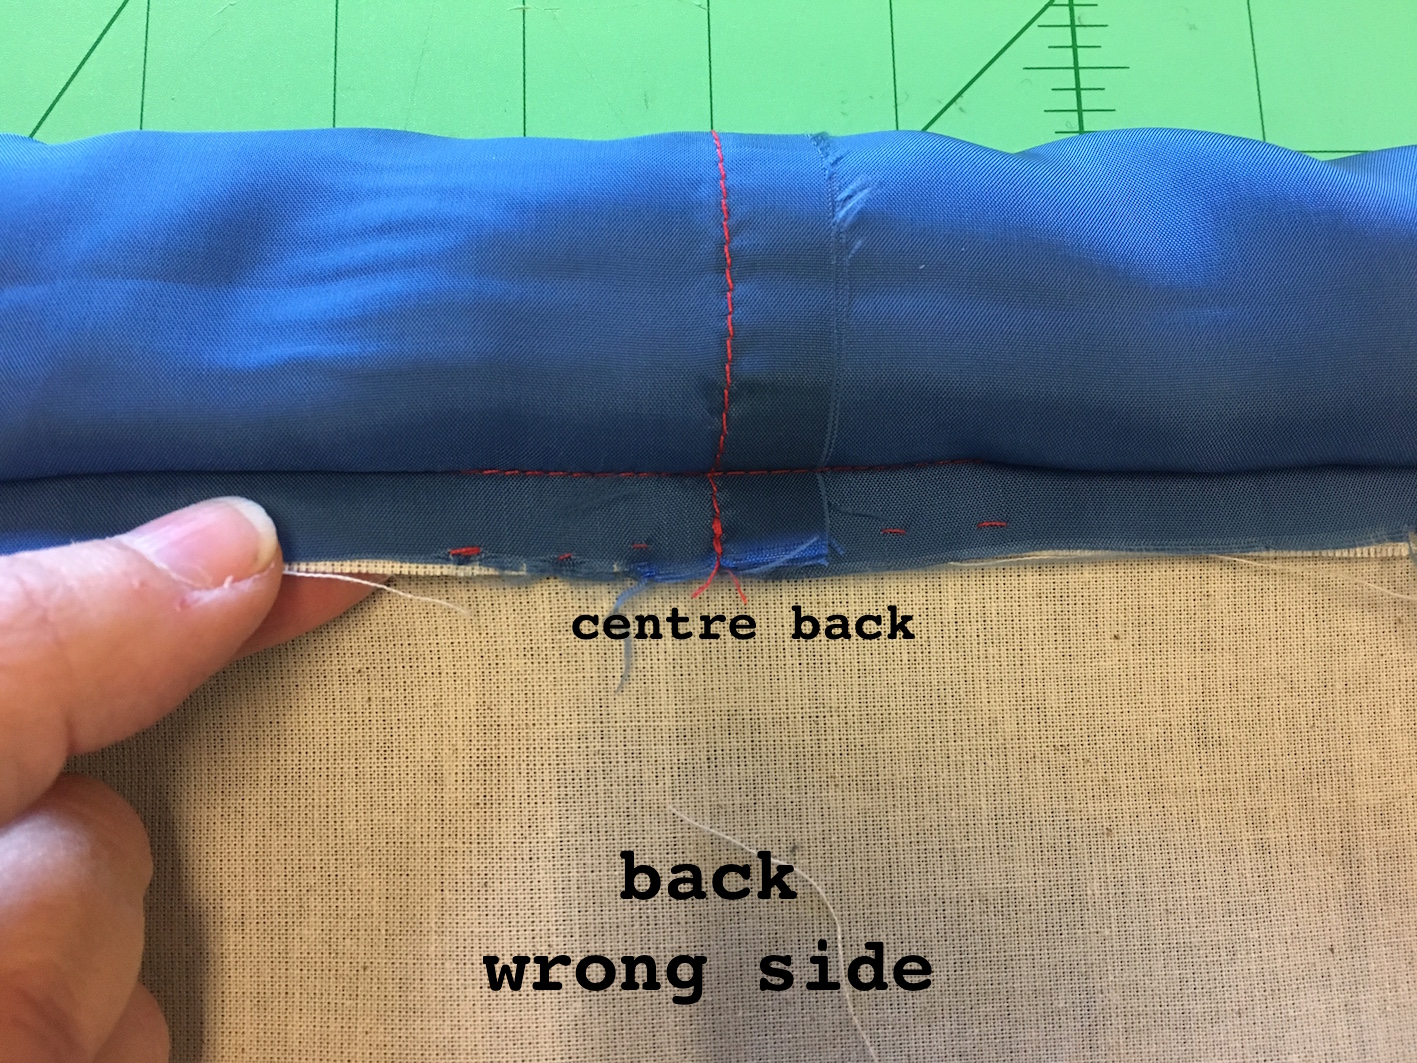
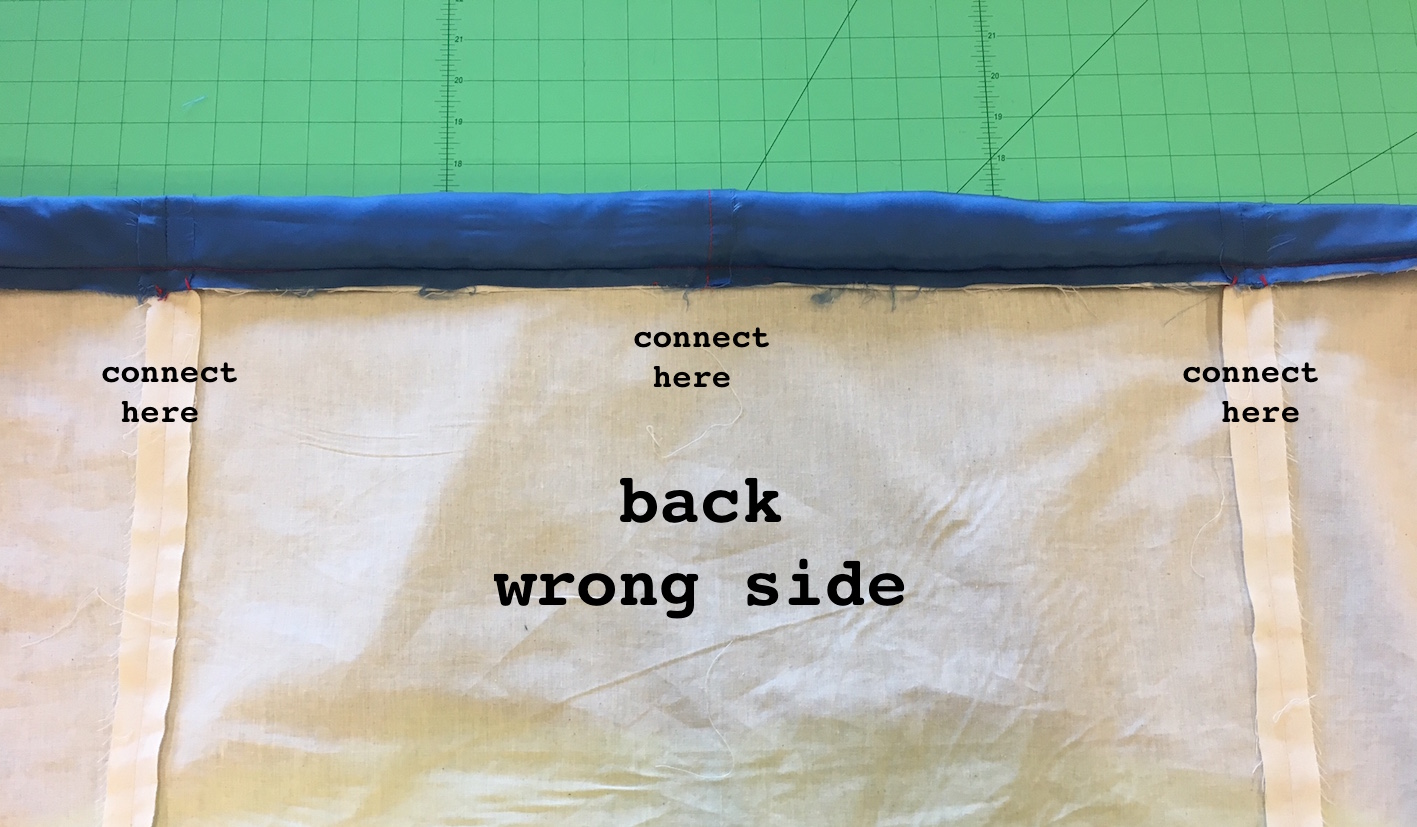 Repeat this process for sleeve hems.
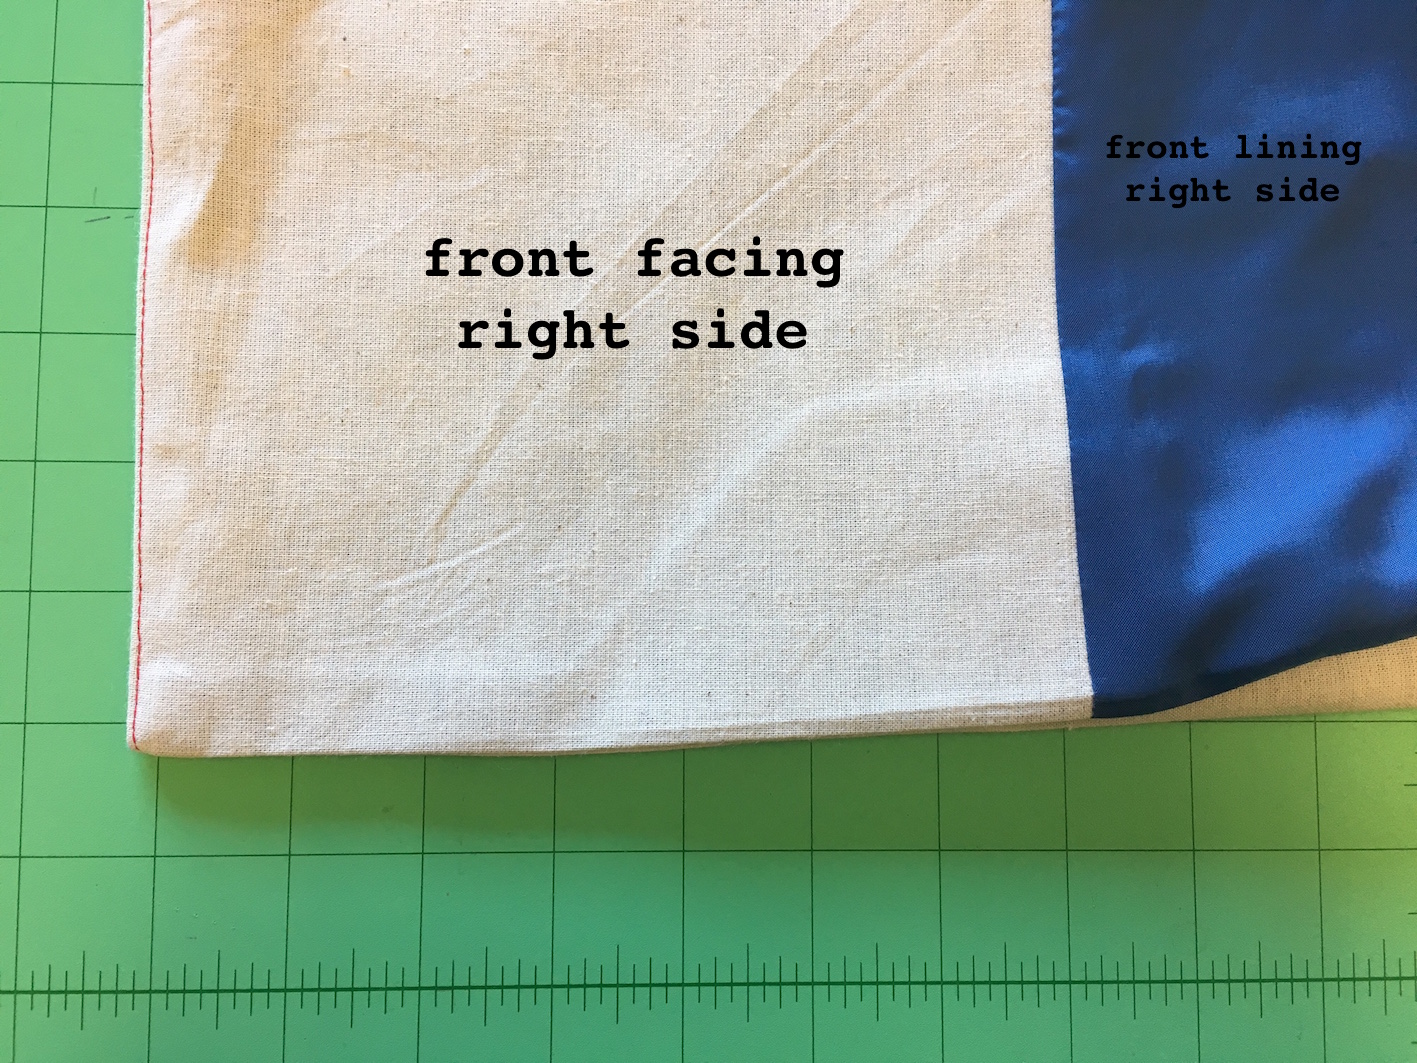
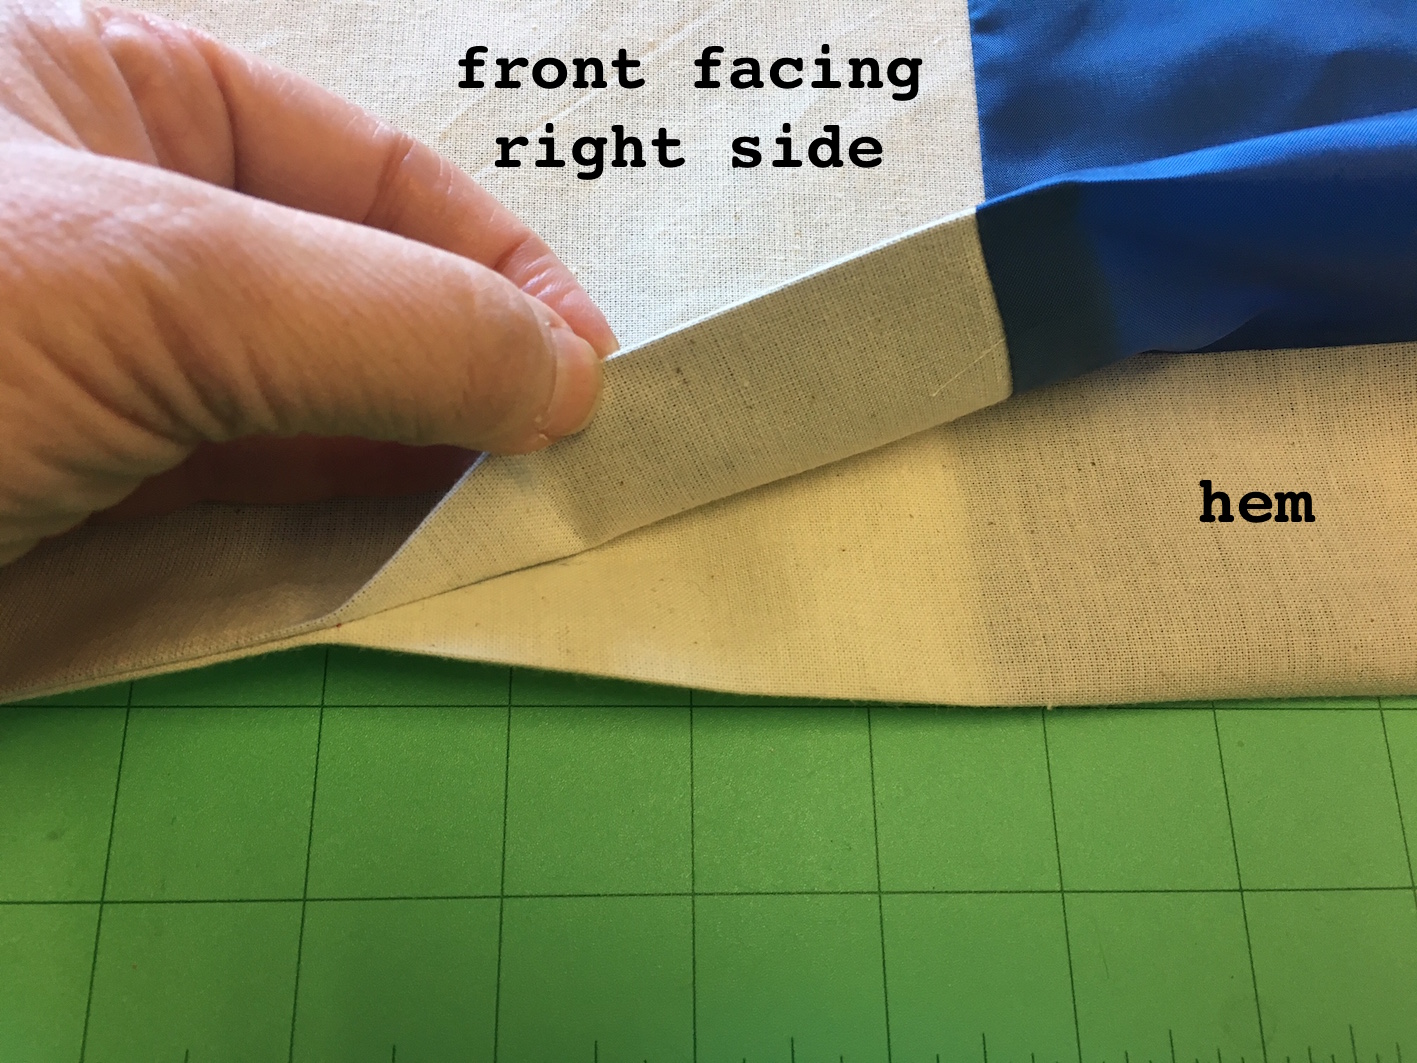 A note also about the pleat left at the lower front facing (in Step 24) where it connects to the front lining and hem. Do NOT stitch this together. For flexibilty of movement, it needs to be kept as an open pleat and this way there isn’t a strain on the front of coat.
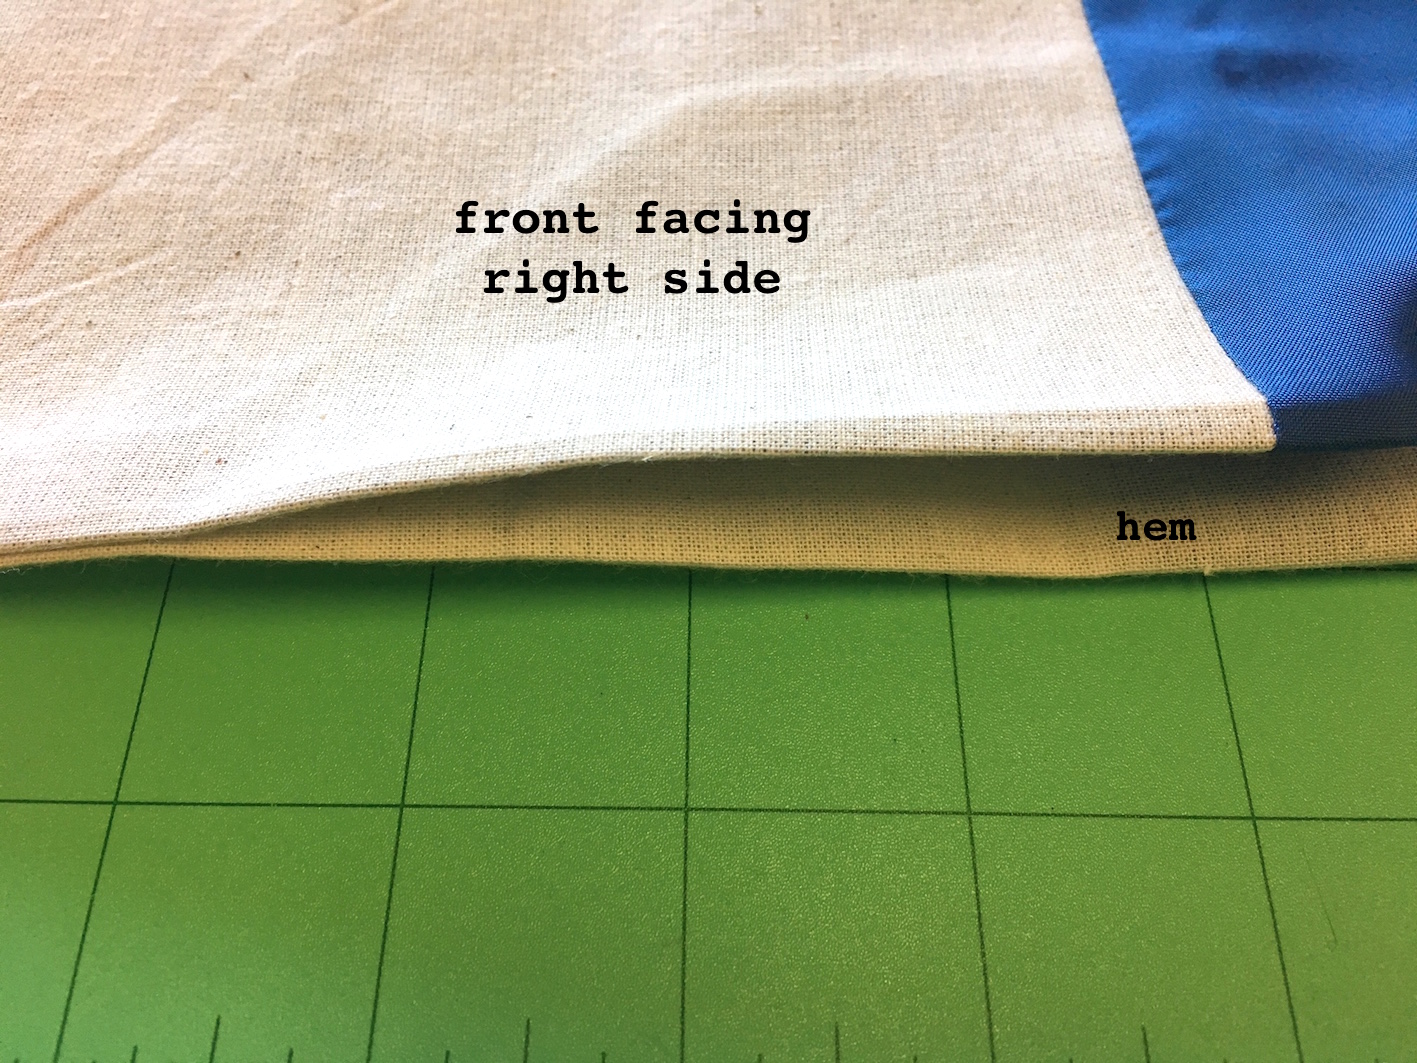
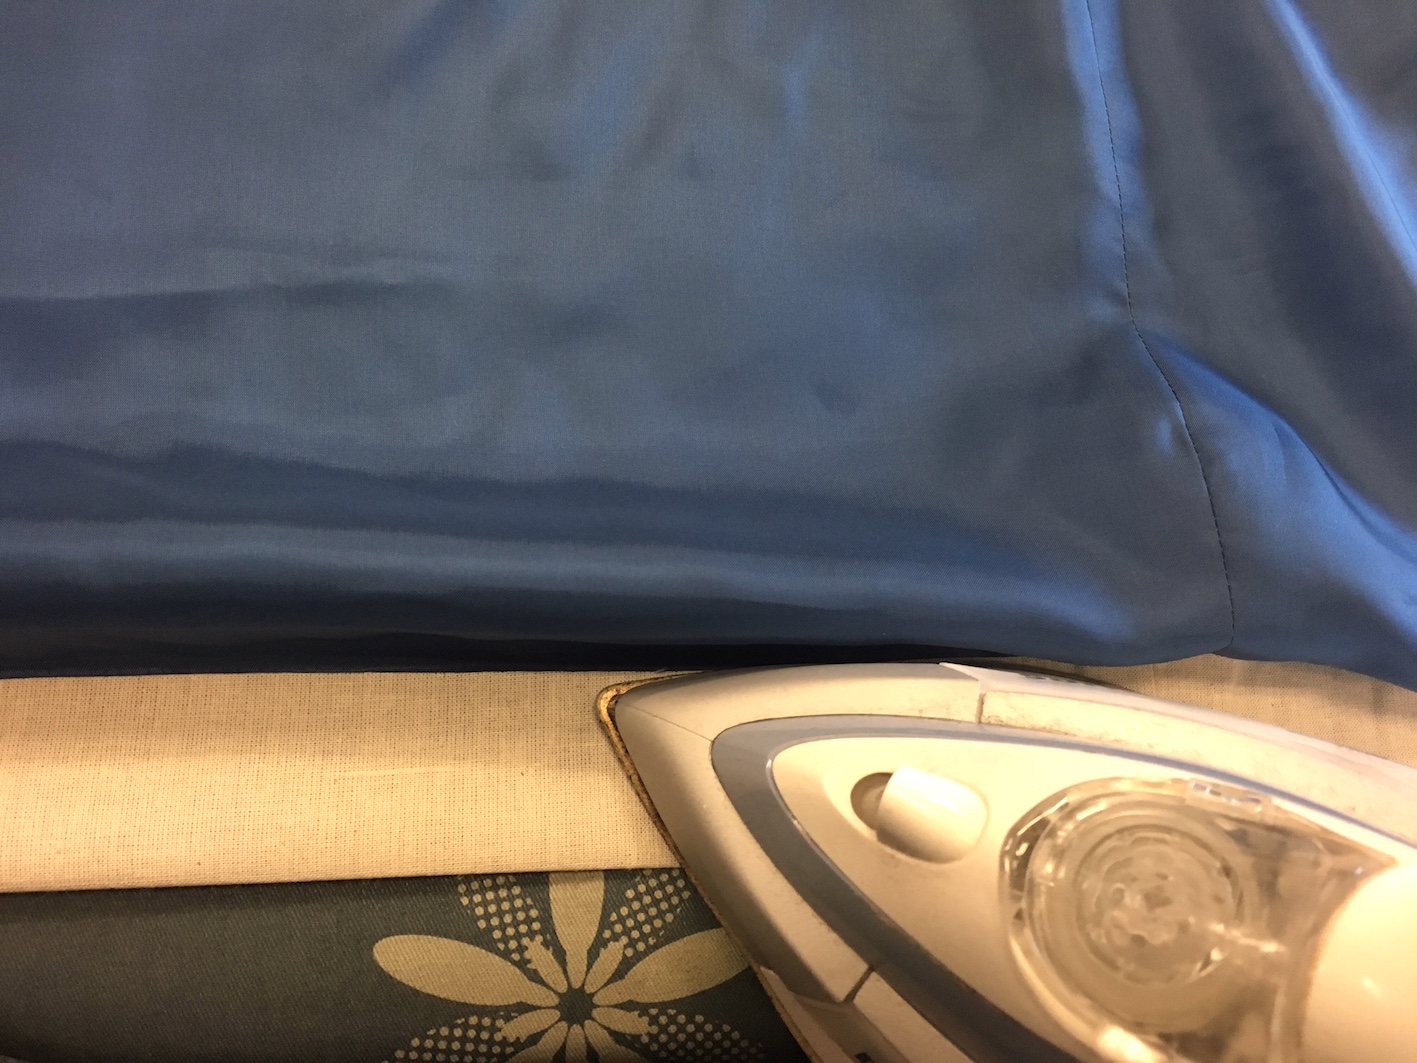 Press hems only.
You’re done! Hope that helps and if you have any further questions, feel free to email us fabrics@tessuti.com.
 Colette and Lisa collaborate to bring you this here Tessuti blog. Follow us to keep your finger on the pulse of new pattern releases, reviews, tips, techniques and a healthy dose of love and appreciation for all things fabric and sewing!


Your directions and the pattern are wonderful! I’m in the process of making this coat and I am having trouble with the sleeve instructions at Step 20 and Step 21. (I haven’t even gotten to the hem part, yet) Please let me know if you have any suggestions. I cannot figure out if I am supposed to turn the coat right side out and then pull out the sleeves. It doesn’t say to turn it yet but the picture just above Step 21 shows the coat right side out. I have just sewn my lining in all the way around, pushed the lining sleeve inside the main fabric sleeve, right sides facing each other coat is stlil inside out) I’ve pinned the two seams on each sleeve together. This is confusing for someone who has only ever made 1 other coat. 🙂 Many thanks in advance for any suggestions you can offer!
I’m having the same issue! I would love some help with this step(step 20). I’m stuck!
Did you ever work this out? I also had some trouble with the sleeve the first time I made this, and am about to make my second one.
Hi Alexia
Feel free to email us at fabrics@tessuti.com.au if you need any help.
Connecting the sleeves and sleeve lining is much like shown here for connecting the coat body and lining/facings together at the open seams.
I’ve downloaded, printed and cut this pattern. Are “front” and “front-facing” pieces supposed to match at the corners and the curve part? Beacause they don’t, they are slightly different and I wonder if that’s a pattenr flaw or if it’s supposed to be this way. Can sobebody help me?
Hi Zekia,
apologies for the late reply. Please send us an email with images to show us what you are referring to and where you think the patterns aren’t right to us directly at fabrics@tessuti.com.au. Please also check your cut fabric pieces against your pattern pieces, and check that all pieces have been cut as the pattern.
We await your email and images
regards
Colette