
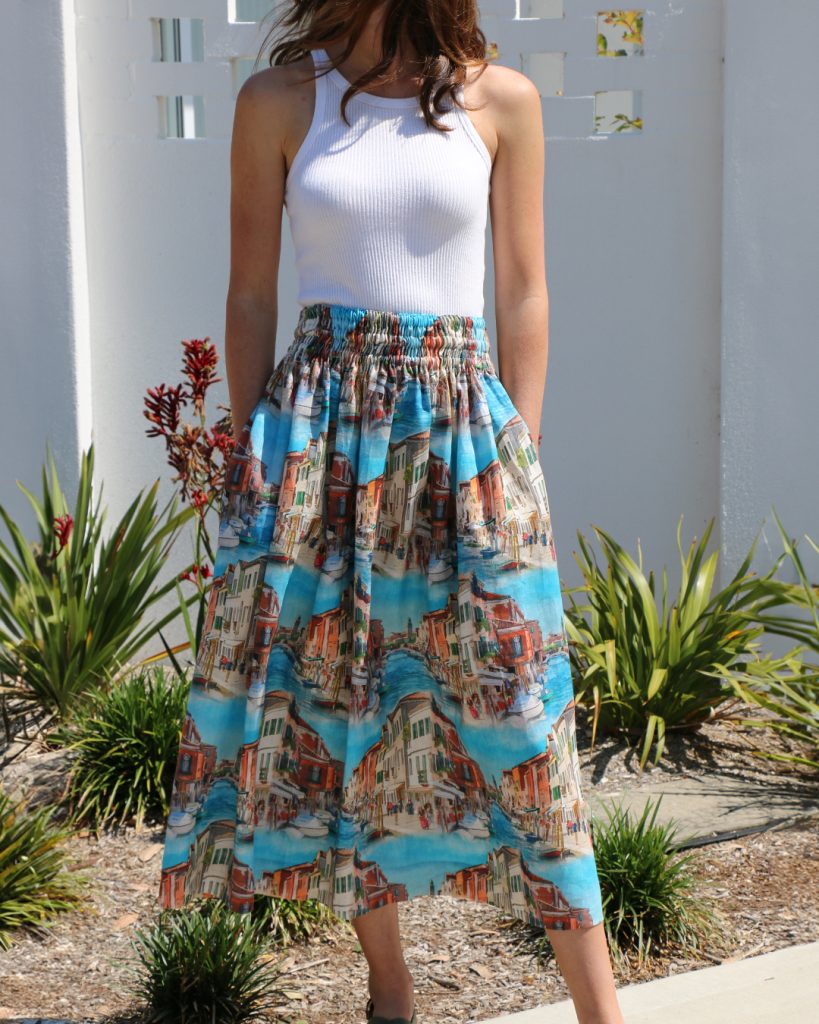
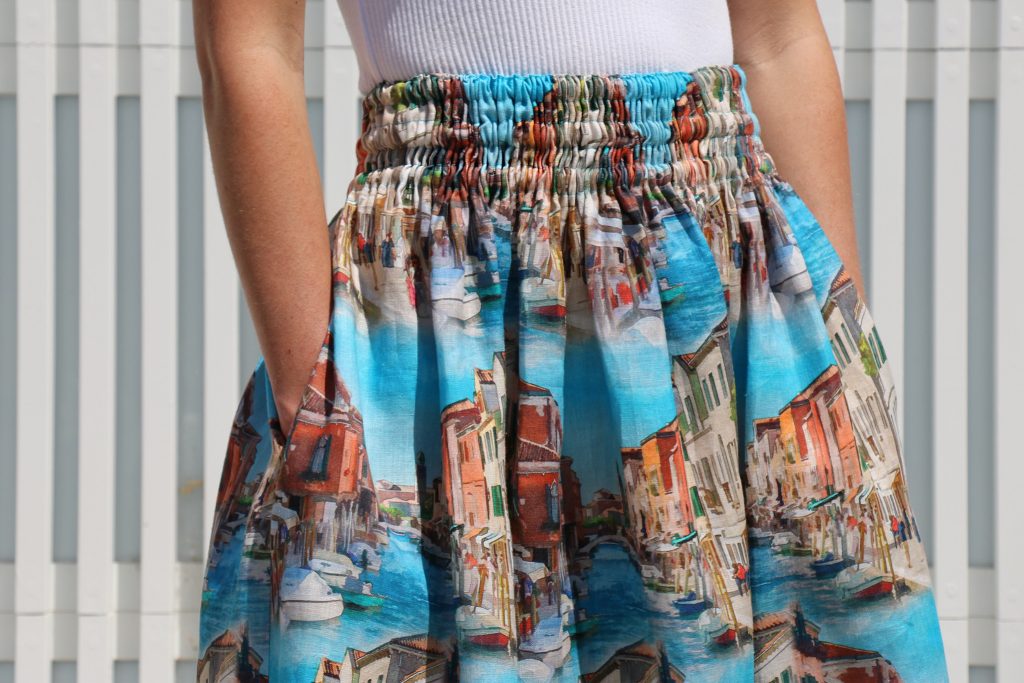
Here’s a simple skirt we’re calling the Multi Elastic Waist Skirt. Wordy, sure, but also accurate. The design features (optional) pockets and a waistband comprising three rows of elastic fed through three tunnel casings. It was completely inspired by the arrival of this 100% linen View Of Venice. We fell in love with the design and Silva decided to create a simple style to showcase the exceptional print. The resulting skirt was so striking we thought we’d share this easy tutorial with you all.

Where appropriate, finish the raw edges with overlocking. If you don’t have an overlocker/serger, you can finish raw edges with a wide zig-zag stitch to prevent fraying.
Let’s get into it! The materials you need are:
- 2.20m of 135-140cm (2.4 yards of 54-55″) wide fabric – Recommended fabrics are lightweight woven that drape and gather easily e.g. linen, wool crepe, silk, cotton, viscose. Cut pockets from waste scraps after cutting out the front and back skirt
- Thread
- 15-16mm (5/8”) wide elastic (approximately 3 x your waist/high hip measurement) – we used this 16mm scalloped elastic but most elastics will do (avoid high density, overly firm elastic)
- Pocket pattern piece and sewing instruction booklet (to print at home) – here
- Erasable marker pen
- Bodkin/safety pin
- Tape measure
Prepare fabric
Step A – Cut skirt front and back
Using the following formula, cut 2 rectangles* from pre-washed and ironed fabric:
- Length = finished length (from waist to hem) + 8.25cm/3¼” (for cut-on facing) + 4cm/1½”) (for hem)
- Width = ½ x finished circumference + 1” (for seam allowances)
* Suggested measurements for the following sizes below:
AUS sizing 6-8-10 – cut 2 rectangles of 104cm/41” (length) x 100cm/39” (width)
AUS sizing 12-14 – cut 2 rectangles of 104cm/41” (length) x 104cm/41” (width)
AUS sizing 16-18 – cut 2 rectangles of 104cm/41” (length) x 109cm/43” (width)
AUS sizing 20-22 – cut 2 rectangles of 104cm/41” (length) x 114cm/45” (width)
TIP: To make sure the cut edge of your fabric is at right angles to the selvedge, snip through the selvedge and into the fabric about ¼”. Grasp and carefully pull a weft (crosswise grain) thread to remove it from the weave. The line of the missing thread will be your cutting line. Do the same for the warp (lengthwise grain) thread.
Step B – Mark facing and pocket notches on side seams Download, print and cut out the Tessuti pocket pattern (
link).
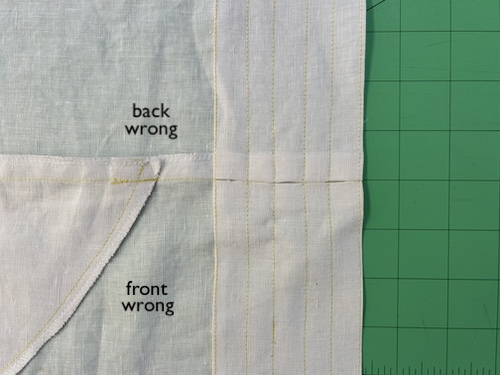
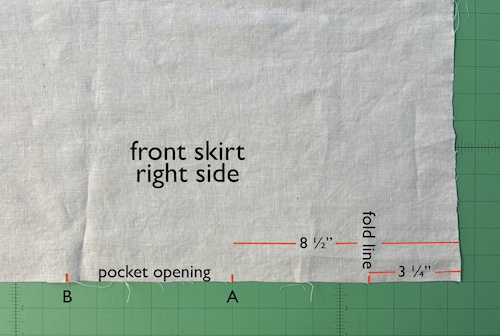
At the sides of both rectangles, mark a notch 8.25cm (3¼”) from the top. This will be the fold line for the facing.
At the sides of both rectangles, mark a second notch 21.5cm (8½”) from the top. This will be the top of the pocket opening.
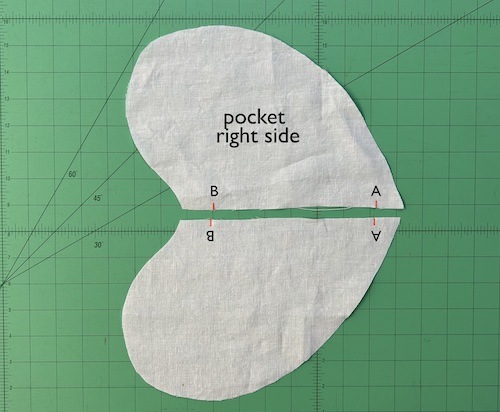
With straight edge of the Tessuti pocket pattern against the side of the rectangle, match top notch (notch A) on the pocket with the notch 21.5cm (8½”) from top of skirt. At lower notch (notch B), mark a third notch on skirt.
At the sides of both rectangles, mark a notch 4cm (1½”) from the bottom. This will be the fold line for the hem.
Step C – Cut pockets
Using the Tessuti pocket pattern, cut 2 pocket pairs in your chosen fabric.
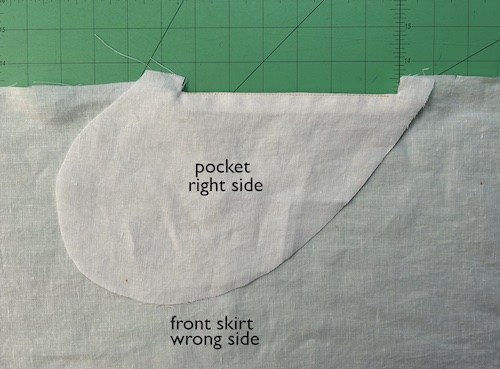
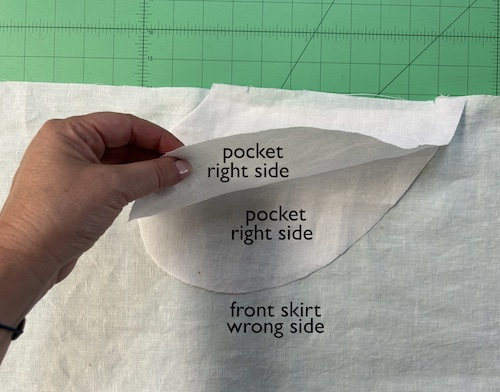
Step 1 – Join pockets to fronts:
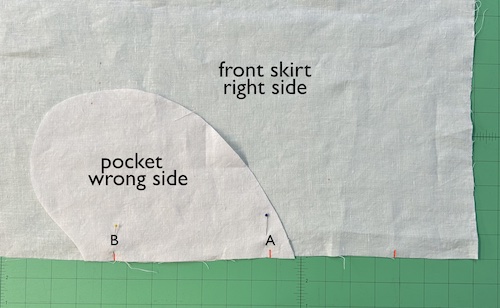
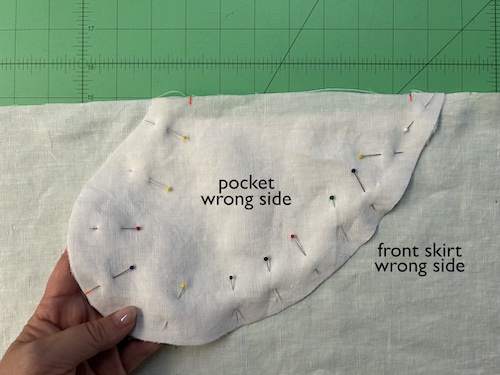
With right sides facing and lining up notches A and B, pin a pocket piece to left and right-hand sides of front.
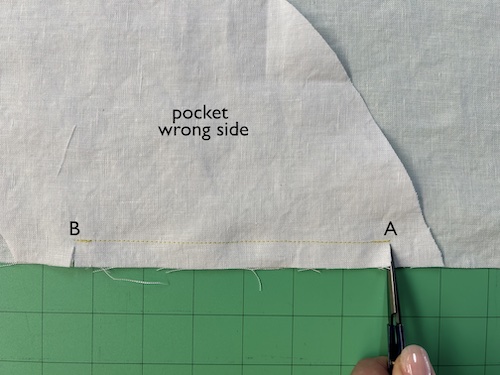
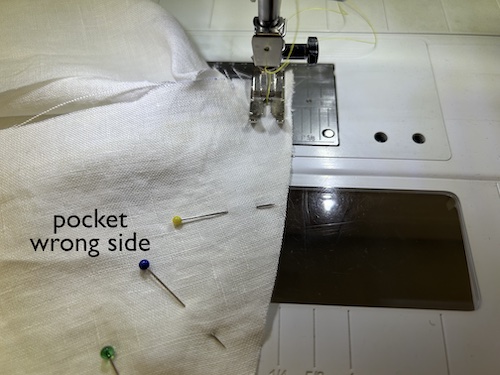
Sew ½” seam allowance, from notch A to notch B. Backstitch at beginning and end.
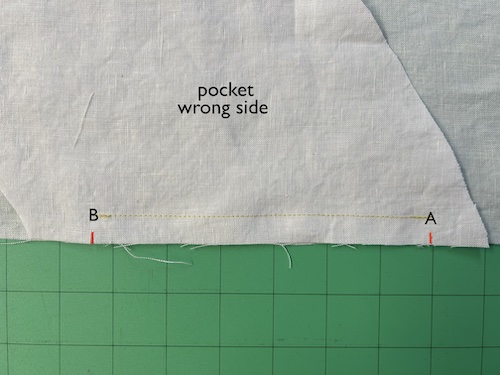
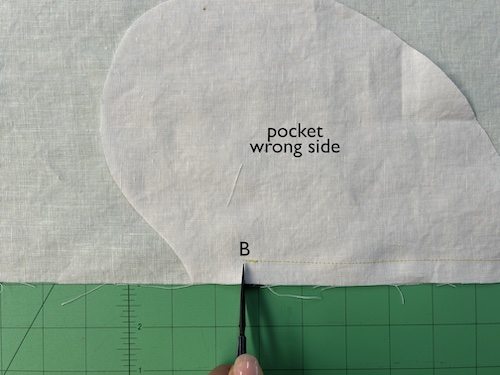
At notches A and B, clip very close to seam, taking care not to cut into stitching.
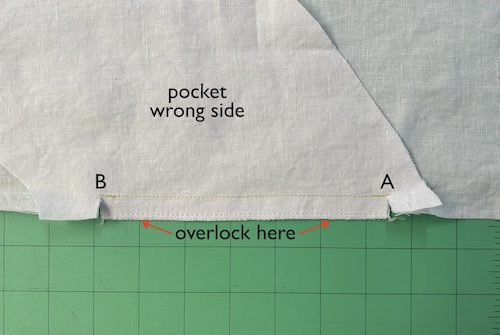
Between notches A and B, overlock seam allowances together.
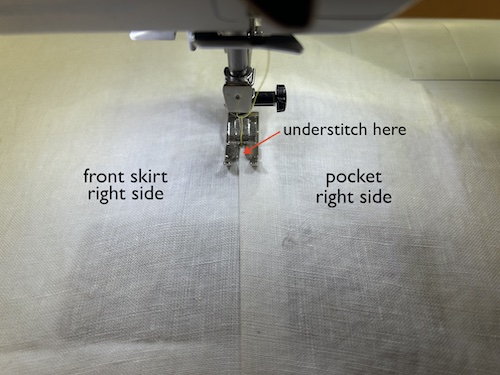
Turn pocket away from front, with seam allowance towards pocket. Starting/finishing ½” from notches, understitch on right side of pocket, close to seam, making sure to catch seam allowance at the back. Backstitch at beginning and end.
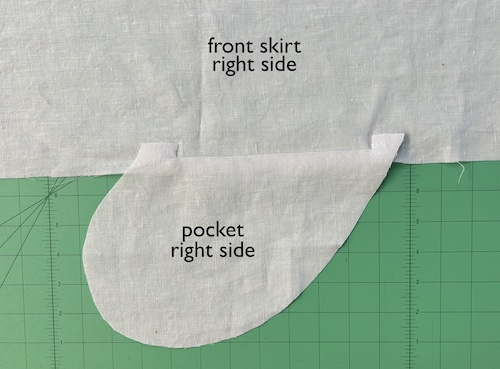
Turn pocket towards wrong side of front and turn seam allowances (above and below notch points) out to right side. Press.
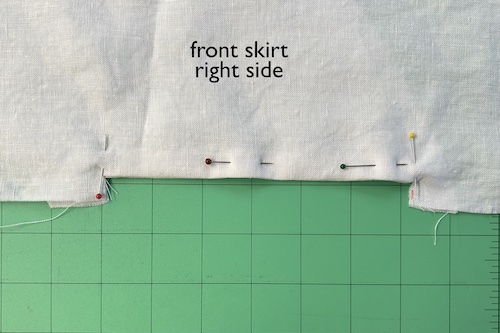
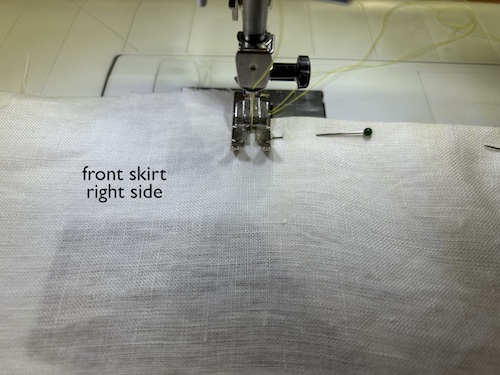
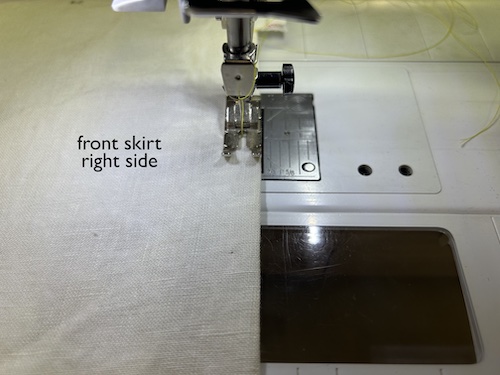
In preparation to topstitch around pocket opening, pin front and pocket together.
Starting at side seam edge at notch at one end of pocket opening, sew ¼” (approx. 3-4 stitches) across end of pocket opening.
Leaving needle in fabric, raise your presser foot and pivot to change direction. Lower presser foot and sew ¼” in from edge of pocket opening.
At end (at opposite notch), pivot again and sew to side seam edge. Backstitch at beginning and end.
With right sides together and taking care to match up notches, place the remaining pocket on top of attached pocket. Pin in place.
Sew 3/8″ seam allowance around curved edge of pocket. Backstitch at beginning and end. Overlock seam allowance of curved edge together.
Make sure that the pocket sits flat and that the seam allowance on pocket is exposed ½” past pocket opening on front.
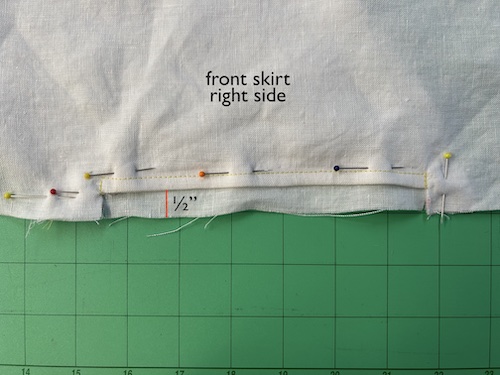
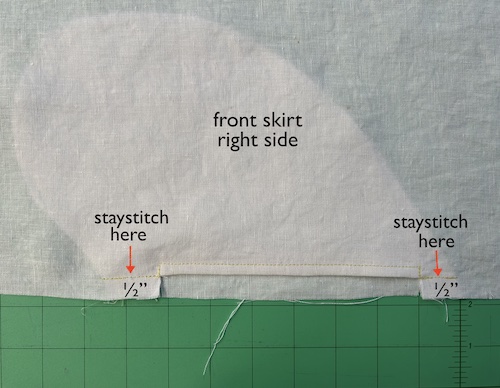
To secure pocket to front, staystitch seam allowances together at each end of pocket opening, taking ½” seam allowance.
Repeat for other side.
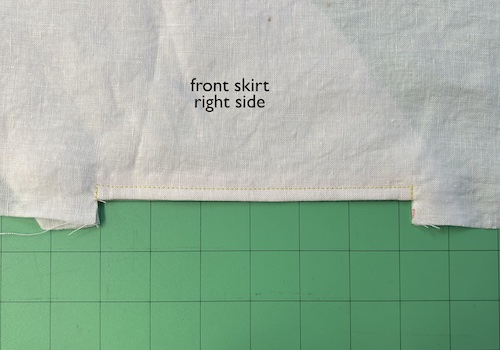
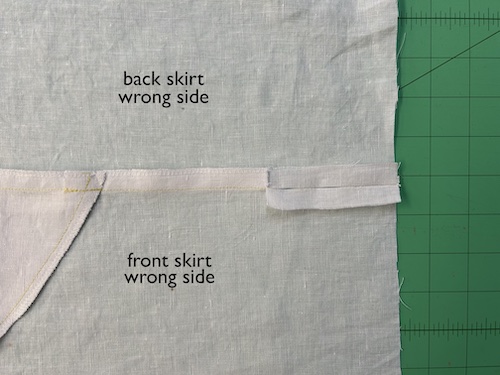
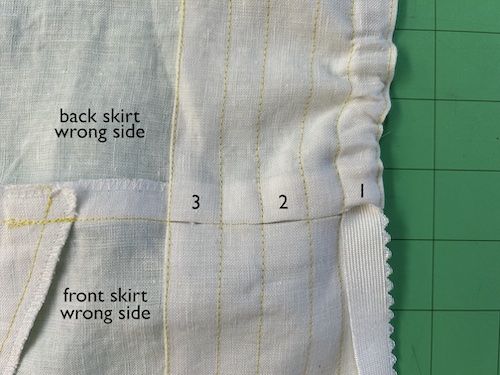
Step 2 – Join front and back at sides (NOTE: one side seam needs openings for 3-row elastic tunnel)
With right sides facing and matching notches, pin fronts and back together at sides.
On finished right-hand side only, sew ½” seam allowance. Backstitch at beginning and end.
Overlock seam allowances together. Press seam allowances towards the back.
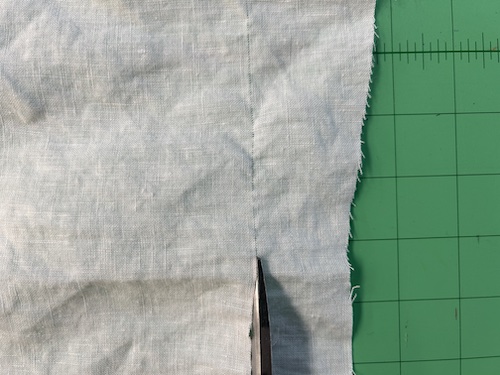
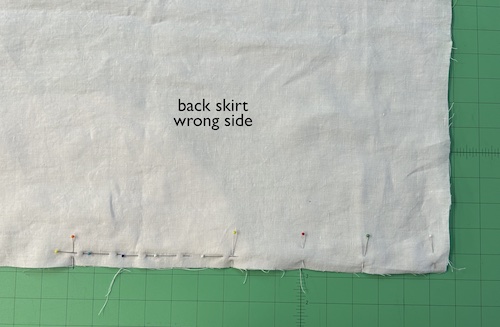
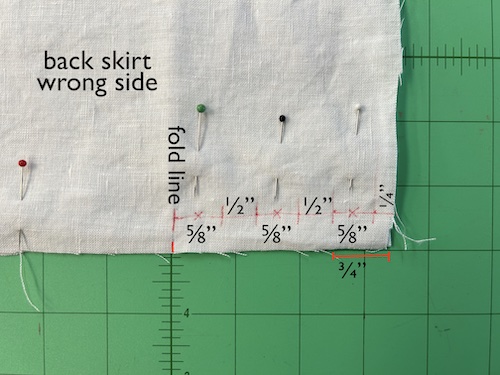
On left-hand side only, mark openings for elastic tunnels. Starting at top edge, mark down ¼“, then 3 x ⅝” openings, separated by ½”.
Leaving ⅝” openings (marked X) to feed elastic into tunnel at later stage, sew ½” seam allowance. Backstitch at beginning and end.

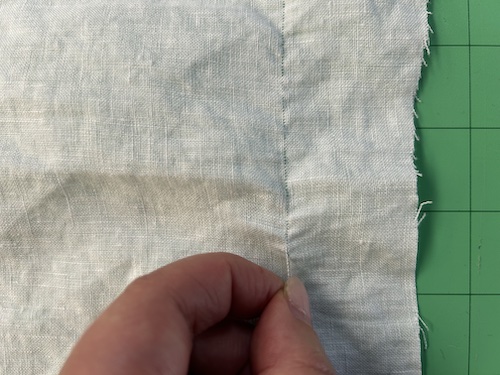
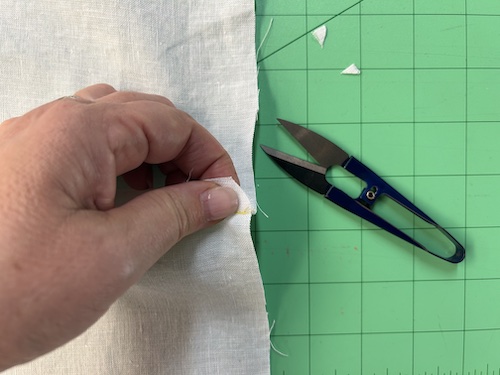
Clip further into facing fold line notch marking. Overlock seam allowances together from hem to notch.
Press seam allowances towards the back. Above notch press seam allowance open. Clip corners of seam allowance to reduce bulk.
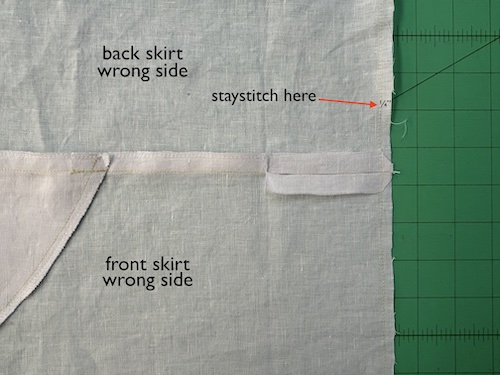
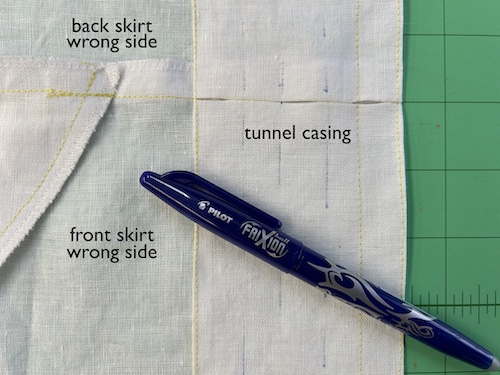
Step 3 – Prepare tunnel casing
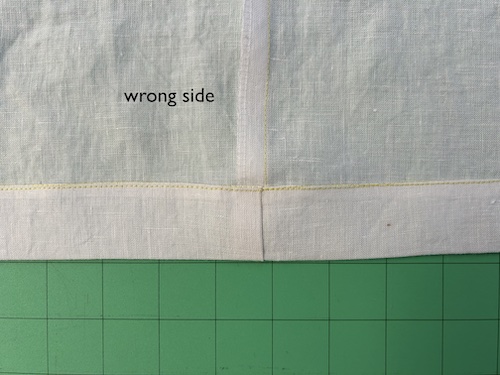
Staystitch ¼” from top edge of skirt.
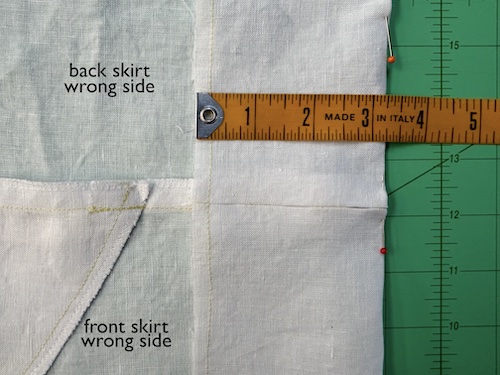
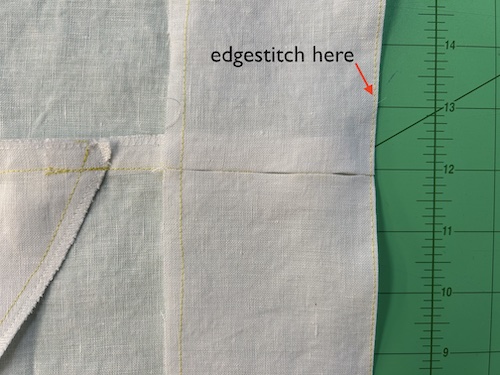
Turn back top edge of skirt 3 ¼” towards wrong side. Press.
Edgestitch top edge of waist. This gives a flat finish to edge of waist.
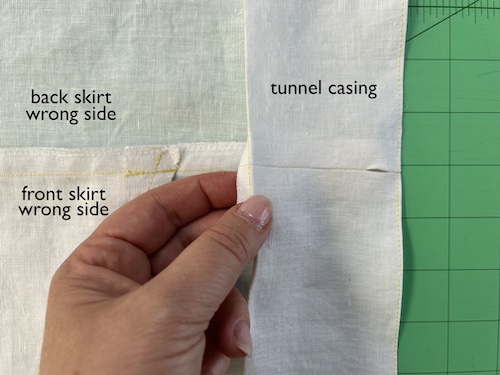
Neaten raw edge by finger pressing towards wrong side at staystitching.
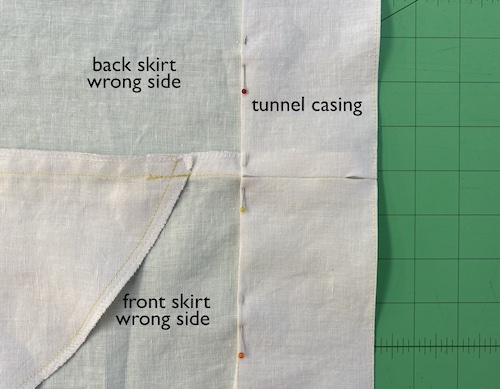
Pin tunnel casing in place along neatened edge, matching side seams, and making sure that tunnel casing sits flat.
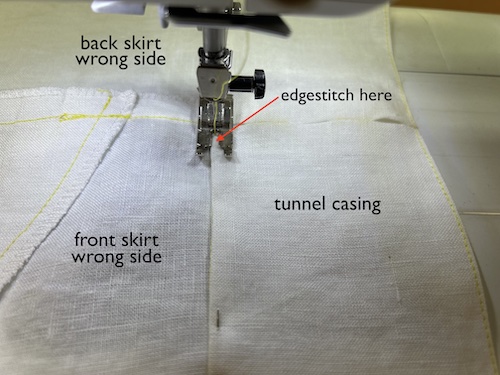
Edgestitch along neatened edge of tunnel casing. Backstitch at beginning and end.
Between the two rows of edgestitching, sew four rows of stitching to form tunnel casing – 3 x ⅝” wide tunnels separated by 2 x ½” . TIP: Sew first row ⅝” from top edge, then marking stitching lines with a removable marker as a guide.
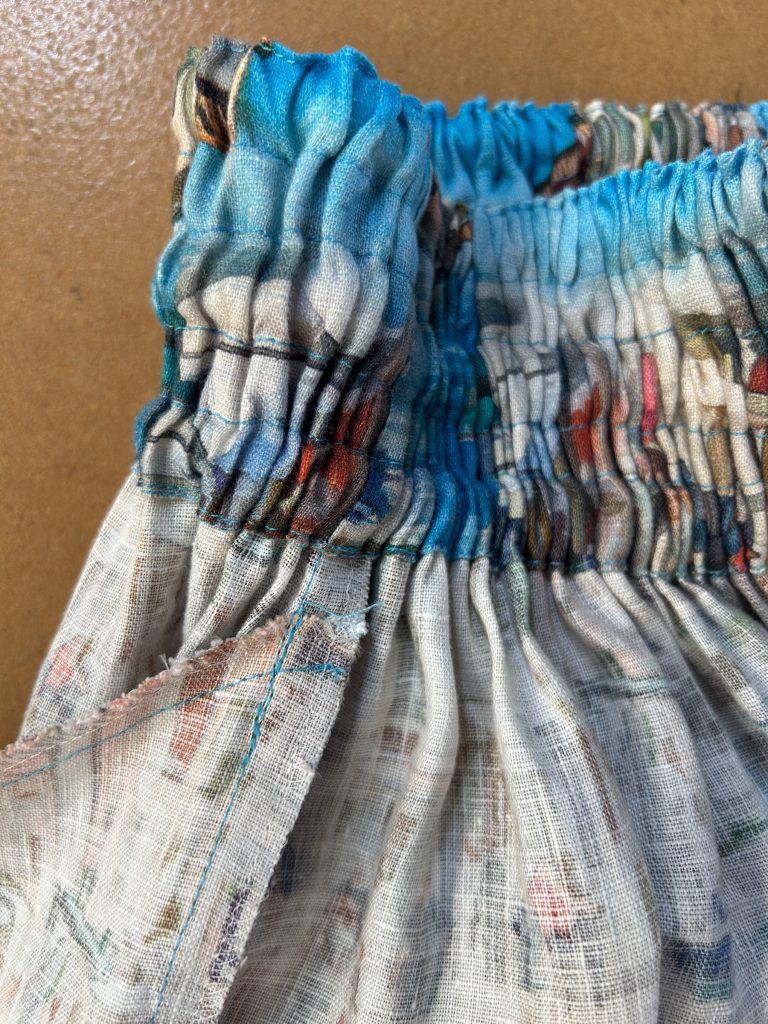
Step 4 – Feed elastic through openings in tunnel casing
Cut a length of good quality 15mm 15-16mm (⅝”) wide elastic to fit firmly around the waist. Cut a second and third length of elastic, 2.5cm (1”) longer and 5cm (2”) longer than the first.
*For our Australian size 10 sample, we cut 66cm (26″) for first row, 69cm (27″) for second row and 71cm (28″) for third row. As a guide, these lengths will vary by about 1” between sizes, but cut the elastic to suit your measurements and the type of elastic used.
Using a bodkin or safety pin and making sure that elastic doesn’t twist, feed elastic through opening in tunnel casing until you come out the other end through opening. Start with the shortest length in the top tunnel. Use the next longest length for the middle tunnel and the longest length for the bottom tunnel.
Overlap ends of elastic together by ½” and sew ends of elastic together by hand or machine. Backstitch securely.
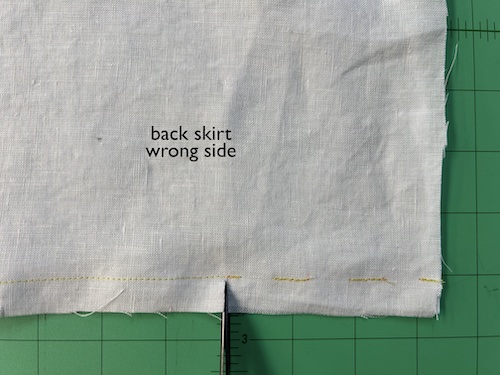
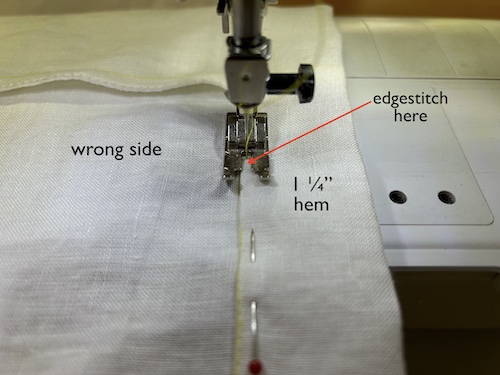
Step 5 – Hem skirt
Staystitch ¼” from skirt hem edge. Neaten raw edge by finger pressing towards wrong side at staystitching.
Measure up 3cm (1¼”) and pin in place along neatened edge.
On wrong side of skirt, edgestitch along neatened edge of skirt hem. Backstitch at beginning and end. Press.
We love this technique as a more stable and comfortable alternative to shirring. You can add more (or fewer) casing tunnels and it works just as well for
dresses, as seen in this
paper bag tie strap dress posted a few years ago. Happy sewing!


 Colette and Lisa collaborate to bring you this here Tessuti blog. Follow us to keep your finger on the pulse of new pattern releases, reviews, tips, techniques and a healthy dose of love and appreciation for all things fabric and sewing!


A fabulous skirt. Nice clear instructions. Well done, and thanks for posting.
Thanks Freya!
Can you put the measurements in yards and inches please?